
You are looking for information, articles, knowledge about the topic nail salons open on sunday near me chateau de stormveil elden ring on Google, you do not find the information you need! Here are the best content compiled and compiled by the toplist.tfvp.org team, along with other related topics such as: chateau de stormveil elden ring Elden Ring map, Stormveil castle walkthrough, Stormveil Castle, Elden Ring Godrick lore, Incantation elden ring, Elden Ring Stormveil Castle, Stormcaller elden ring, Locked door in Stormveil Castle
What level should you be for Stormveil Castle?
Stormveil Castle- The recommended level for this area is between 30-40.
How do I get through the Elden Ring in Stormveil Castle?
Climb up the stairs on the opposite side of the platform and stealth kill him, then go kill the other sleeping guards one by one. Notice the sandbags piled up next to the castle wall. Use them to climb up onto the wall, then go right along the ledge until you are close enough to jump onto the crumbling adjacent tower.
Where is Stormville castle in Elden Ring?
Stormveil Castle is a Legacy Dungeon in Elden Ring. A castle that lies on the cliffs of Stormhill, a stronghold of Godrick the Grafted. Be wary of this location since there are hordes of soldiers and hostile creatures that will stop anything and anyone who tries to infiltrate the area.
How do you break the statue in Stormville castle?
Move close enough to get the Troll’s attention. It will begin to chase after you, so turn and run back towards the glowing statue. As you sprint, ensure the Troll is still following you – once you pass the statue, the Troll should run over it and smash it open.
What should I not miss in Stormveil Castle?
Iron Whetblade can be easily missed while exploring Stormveil Castle, as it’s hidden behind the fog of an Imp Statue in the lower levels of the castle. It’s a key item that can add the Heavy, Keen, and Quality Affinities to any compatible weapons.
What level should I be to fight Margit?
The recommended level for Margit the Fell Omen is at least 20, ideally 25+. You should also use weapons of +3 or more.
Do you have to complete Stormveil Castle?
It is actually possible to skip Stormveil Castle, Margit the Fell Omen and Godrick the Grafted. Here’s how to reach Liurnia without entering the castle. Elden Ring is the magnum opus of FromSoftware Games.
What to do after killing godrick?
You have a couple of options. Head to the big waterwheel lift you used to get to the Schoolhouse classroom Site of Grace, but take it all the way down to the bottom. Allow the enemy down there to kill you with its grab attack and you’ll be teleported to a region beneath Volcano Manor.
What level is Stormveil Castle Elden Ring?
| Area | Level | Upgrade (Somber) |
|---|---|---|
| Stormveil Castle | 30-40 | +3-4 (+1-2) |
| Liurnia of the Lakes (South) | 40-50 | +3-4 (+1-2) |
| Academy of Raya Lucaria | 50-60 | +4-6 (+2-3) |
| Liurnia of the Lakes (East) | 50-60 | +4-6 (+2-3) |
How do I get into Stormveil Castle?
There’s no way to open it, so head through the doorway on the left to find an NPC. Talking to them reveals there’s a passageway along the side of the castle you can use to get inside, so let’s take that. Exit and jump up onto the ruined wall to your right, taking it over to the other side.
Do you have to break the statue in Stormveil Castle?
With the giant in toe, fans should run back in the direction of the Liftside Chamber Site of Grace, veering left toward the stone statute when it is possible to do so. Now all that is left to do is wait for the giant to step on the statue and break it, as this will give Elden Ring players access to the trapped items.
What’s with the glowing statue in Stormveil Castle?
The shining crack statue is located in the Liftside Chamber area. In order to get the items inside, you’ll need to break the stone statue, but you can not do it alone. Instead, what you need to do is to lure one of the giants which are roaming through the courtyard to break it for you.
What are the blue glowing statues in Elden Ring?
Elden Ring’s glowing statues have Smithing Stones inside, which are used to upgrade various weapons at anvils. If you’re looking to strengthen your armaments, you’ll need to have a decent collection of Smithing Stones.
[su_youtube_advanced url=”https://www.youtube.com/watch?v=p4uxeniQsg4″]
Stormveil Castle | Elden Ring Wiki
- Article author: eldenring.wiki.fextralife.com
- Reviews from users: 30410
 Ratings
 - Top rated: 4.0
- Lowest rated: 1
- Summary of article content: Articles about Stormveil Castle | Elden Ring Wiki Updating …
- Most searched keywords: Whether you are looking for Stormveil Castle | Elden Ring Wiki Updating Stormveil Castle Elden Ring Location Guide. Legendary Dungeon Full list of NPCs, Walkthrough, All Items, and Enemy & Creatures, Boss Encounters for Elden Ring.
- Table of Contents:
IGN Error 403 – Unavailable (IFW-U01)
- Article author: www.ign.com
- Reviews from users: 41967 Ratings
- Top rated: 3.3
- Lowest rated: 1
- Summary of article content: Articles about IGN Error 403 – Unavailable (IFW-U01) Stormveil Castle is the first Legacy Dungeon you can encounter in Elden Ring, and contains many challenges and dangers, as well as a demigod … …
- Most searched keywords: Whether you are looking for IGN Error 403 – Unavailable (IFW-U01) Stormveil Castle is the first Legacy Dungeon you can encounter in Elden Ring, and contains many challenges and dangers, as well as a demigod …
- Table of Contents:
Stormveil Castle | Game of Guides
- Article author: video-game-guide-walkthrough.supersoluce.com
- Reviews from users: 35717 Ratings
- Top rated: 3.7
- Lowest rated: 1
- Summary of article content: Articles about Stormveil Castle | Game of Guides Stormveil Castle. Home Collectibles Elden Ring – Gue & Walkthrough … Source: Supersoluce – Soluce Elden Ring – Château de Voilorage. Share it! …
- Most searched keywords: Whether you are looking for Stormveil Castle | Game of Guides Stormveil Castle. Home Collectibles Elden Ring – Gue & Walkthrough … Source: Supersoluce – Soluce Elden Ring – Château de Voilorage. Share it!
- Table of Contents:
Elden Ring – Guide & Walkthrough
Saints Row (Reboot) Guide &…
Xenoblade Chronicles 3 Guide &…
Stray Guide & Walkthrough
Live A Live Guide &…

Elden Ring Best Recommended Route & Boss Order According To Level
- Article author: www.dualshockers.com
- Reviews from users: 13915 Ratings
- Top rated: 4.1
- Lowest rated: 1
- Summary of article content: Articles about Elden Ring Best Recommended Route & Boss Order According To Level Updating …
- Most searched keywords: Whether you are looking for Elden Ring Best Recommended Route & Boss Order According To Level Updating Elden Ring fans are wondering what is the best recommended route and the boss order is to ensure that they don’t miss any important.
- Table of Contents:
Elden Ring Best Recommended Route & Boss Order According To Level
Genshin Impact 30 Offical Banner Schedule & Characters Revealed
Got a tip
Follow us on

IGN Error 403 – Unavailable (IFW-U01)
- Article author: www.ign.com
- Reviews from users: 22330 Ratings
- Top rated: 4.6
- Lowest rated: 1
- Summary of article content: Articles about IGN Error 403 – Unavailable (IFW-U01) Updating …
- Most searched keywords: Whether you are looking for IGN Error 403 – Unavailable (IFW-U01) Updating
- Table of Contents:
Stormveil Castle | Elden Ring Wiki
- Article author: eldenring.wiki.fextralife.com
- Reviews from users: 45379 Ratings
- Top rated: 3.4
- Lowest rated: 1
- Summary of article content: Articles about Stormveil Castle | Elden Ring Wiki Updating …
- Most searched keywords: Whether you are looking for Stormveil Castle | Elden Ring Wiki Updating Stormveil Castle Elden Ring Location Guide. Legendary Dungeon Full list of NPCs, Walkthrough, All Items, and Enemy & Creatures, Boss Encounters for Elden Ring.
- Table of Contents:
Elden Ring: comment contourner le château de Stormveil | Her Şeye Dair
- Article author: www.herseyedair.net
- Reviews from users: 21562 Ratings
- Top rated: 4.5
- Lowest rated: 1
- Summary of article content: Articles about
Elden Ring: comment contourner le château de Stormveil | Her Şeye Dair
Updating … - Most searched keywords: Whether you are looking for
Elden Ring: comment contourner le château de Stormveil | Her Şeye Dair
Updating Elden Ring: comment contourner le château de Stormveil - Table of Contents:
Her Şeye Dair
Comment contourner le château Stormveil et atteindre Liurnia des lacs
Genel Konular
fa-fire EN ÇOK DİKKAT ÇEKEN YAYINLAR$type=one
Etiketler
fa-clock-o HAFTANIN POPÜLER YAYINLARI$type=list
TEKNOLOJİ$type=blogging$m=0$cate=0$sn=0$rm=0$c=4$va=0
SON$type=list-tab$date=0$au=0$c=5
YORUMLAR$type=list-tab$com=0$c=4$src=recent-comments
RASTGELE$type=list-tab$date=0$au=0$c=5$src=random-posts

See more articles in the same category here: Top 165 tips update new.
Stormveil Castle | Elden Ring Wiki
The Castle’s Entrance
Use our Stormveil Castle Map and Walkthrough Videos to navigate the area and obtain 100% of all items. If you prefer to do a quick sweep, click here to go to the Speedrun Walkthrough.
You’ve beaten Margit the Fell Omen and have arrived at the main gate of the Stormveil Castle, just by the gate’s main gate, there is the Stormveil Main Gate Site of Grace that you can use. On the left side, you’ll notice a room nearby, this is the castle’s gatehouse, where you’ll meet Gatekeeper Gostoc, an old tall fellow that may seem a bit suspicious. Speak to him and he will advise you to avoid entering the castle using the main gate because he says it’s tightly guarded. But instead, he suggests you try the other way going through the opening, (on the left) claiming that guards don’t know about that entrance. You will be given the choice to accept or reject his suggestion. If you reject it, he will be fine with that and respect your decision. He will even open the gate for you. But as soon as you enter a few steps, multiple arrows will strike you from far away. However, you can make it past them. For this walkthrough, we will go through the opening that Gostoc suggests.
Go out through the opening on the left and you’ll see a summoning pool on the left corner which you can activate, and on the left side of the summoning pool is a body that you can pillage to find x1 Golden Rune (1). Turn around and hug the wall on the right, you’ll see there’s a concrete beam on the wall that you can jump on so that you can go through the opening. You’ll then immediately see another body you can loot to find x3 Ruin Fragment. From there keep going straight and jump over the wall to find yourself in the west backside of the castle.
Before you jump down towards the castle grounds, look to your right and you’ll notice that the destroyed wall is formed like steps that you can jump on to reach the high ground that’s on the upper left. When you reach it, there’s another body by a wall that you can loot to find x1 Smithing Stone (2). After grabbing the upgrade material, make your way to the bottom to continue towards the castle.
Just be careful since there is a Bladed Talon Eagle enemy here that will attack you once you are seen. Kill it and before continuing towards the overlooking area, you can roam around the cliffside (specifically on the left side) to find some materials such as x2 Herba, as well as an eyrie of Bladed Talon Eagle enemies. You’ll notice that there are about 5 Bladed Talon Eagles here, so we suggest that you use a ranged magic attack such as the Glintstone Pebble to gain the advantage of attacking first while it is unaware.
Once you’ve cleared out the area, check the spot where the eyrie was to find a corpse that you can loot to find x1 Smithing Stone (3). From the same spot where you picked up the smithing stone, first, go left and work your way around the cliffside, at the end of it, is another body that you can loot to find x10 Bolt. Now, continue towards the overlooking area where you’ll find the Stormveil Cliffside Site of Grace, use it to save it as your checkpoint and to rest if needed. There’s also another summoning pool on the left side of it.
Head up the slope on the right and jump on the wooden path and steps that go to the top. Just before reaching the top of the platform, you’ll find another corpse, midway through the steps, that you can pillage to find x1 Marred Leather Shield. Be cautious here and keep an eye out for three Castle Guards roaming outside since one of them can spot you as you try to grab the shield. You can try to backstab the first guard you see before it walks near the arch door so that you avoid catching the attention of the other guard that’s inside.
Once you’ve defeated the first three guards, go inside and look to the left, there’s another arch door where you’ll see a body that’s sitting by the edge of the platform, but before approaching it, look up, you’ll see another Castle Guard that is ready to shoot you as you approach the body. Take out the enemy first and then loot the corpse to find x1 Golden Rune (2) or you can just quickly grab the item and dodge to avoid getting hit. Now inside and head into the next room which is the castle’s wine cellar where you’ll encounter two commoner enemies resting by the barrels.
The Wine Cellar
Kill both enemies and then go left and straight under the stairs where you’ll see some stacked boxes and barrels, break through it, but be careful since there is another Castle Guard wielding an axe, roaming. You can hide first and wait as it makes another round, so you can backstab the enemy, instantly killing the guard. Check the left side corner at the end to find a body that can be looted, it has x1 Hookclaws. Now go back and tread carefully to the top of the stairs, as you head up, towards the first set of steps, you’ll see more wooden barrels blocking the way, dodge through them, and be ready to sprint as soon as you recover from dodging since you’ll encounter two more commoners ahead, one in front, and the other above one level that will throw bombs at you. Quickly kill the first commoner enemy, and then rush to the other that’s at the top.
Once you’ve killed the two enemies, go straight, on the right side from the arch entrance with a locked door to find a body by the edge of the platform to find x5 Throwing Dagger. Go back and if you look to the right where the second commoner standing above on the wooden platform bridge was, there’s a hole in the wall with roots, on the right side that you can jump on where you can find x5 Throwing Dagger. Go back and look to the right side, there’s a hole in the wall that is covered in vines. Jump on it to find a body that you can loot to find x10 St. Trina’s Arrow.
Go back down from the hole and continue forward towards the narrow path with the archway, be careful here, and be ready to doge back since there is another Commoner enemy ahead that will throw a bomb at you, as soon as you try to pick up the item by the arch doorway. Sprint and dodge forward to close the gap and then kill the enemy, or you can use a ranged spell to kill it while it’s unaware of your presence. You’ll also find a body here to pillage to find x3 Smoldering Butterfly.
Turn to the left and break the boxes and barrels to see another set of small steps that goes up. Next to the second set of steps, you’ll find another Commoner sitting, kill the enemy and then drop down below the platform from where the sitting Servant was, you’ll find another body to loot that has x1 Golden Rune (2). If you want to challenge yourself, turn to the left, jump across the wooden platform and then go back up to the spot where the Commoner was sitting where you’ll find a door to the right.
The Banished Knight
Before entering the room, be sure that you are prepared since the door will close behind you once you start to fight the Banished Knight inside the pitch-black room. Having a Torch will help you see here and will only be your source of light as you fight this enemy if you need to. The Banished Knight is a strong agile enemy that wields a sword and shield. If you can fight without a Torch, using a mix of melee and magical ranged attacks are best to use against the Banished Knight.
You may want to keep your distance as you fight the enemy since the knight’s swings from the sword have long reach, and aggressively using the shield causes a swirl of wind. One tip is to use Glintblade Phalanx against it since the magical swords will automatically attack, causing the knight to flinch. Successfully defeating the Banished Knight yields 400 runes.
Make sure to loot its body to grab a cosmetic item, Banished Knight Armor (Altered), loot the corpse that’s by a corner to find the Rusty Key. There is also a treasure chest here, just on the left side corner from where the corpse is, open the chest to find x1 Curved Sword Talisman. Since you’re done here, go back down to the second level near the hole on the wall that has vines and use the key to unlock the door. Inside the room, there is a ladder that you can climb to reach the top level of the wine cellar.
Wine Cellar – Top Level
Through the arch door, look to your right first and you’ll see a Commoner sitting on the floor with its back facing you. While it is unaware, you can use a ranged magic attack to kill it first, or jump to the platform to kill it. Walk up a bit and you’ll notice another Commoner ahead, with the same tactic, kill it with a ranged magic attack. Go straight and slowly walk onto the wooden beam to reach the other side, at the end, there is a body that you can loot to find x1 Fire Grease.
Go back a bit and jump across to the platform on your left, go through the archway in the outer wall (you may have noticed some loot in the hole to the right of the archway; ignore it for now). Turn left. A Castle Guard is on the ramparts, and another guard is down the stairs in the tower. There is a corpse on the ledge behind the second Guard that can be looted to find the Brick Hammer. You can jump down from here if you wish to return to the bottom of the ladder. Otherwise, retrace your steps back to where you came up the ladder. Be ready to sprint and dodge towards the set of stairs since there is a Commoner that is waiting to ambush you by the corner, on the left side.
Head up the stairs and on the upper platform where there are barrels, tools, and boxes, you’ll see another Commoner sitting on the ground, kill it and check the corpse in front of it that’s by a wall to find x1 Silver-Pickled Fowl Foot. Head outside and look to your left to find part of the castle’s steps. But before going up, walk around the narrow path of the castle’s structure until you reach a dead-end to find a body that you can pillage to find x3 Mushroom – from here go back and head up the steps.
At the top, you’ll find a room on the right, take caution since another Banished Knight is wielding an axe that’s roaming around. You can wait and sneak up behind the knight to perform a backstab and follow up with ranged attacks. You won’t instantly kill the knight but instead, inflict a chunk of damage to its health. Alternatively, you can also use the elevator shaft in the middle as space to maintain distance, and you can use long-ranged attacks. Another way is if you try to sneak up behind the knight, with proper timing and positioning, backstabbing the knight at the right moment can cause the knight to fall off.
After defeating the knight, you can make a detour for an Arteria leaf, which you may have seen earlier in the hole in the wall, or continue and head to the second floor (and touch the site of grace first):
Continue to site of grace: Go up the stairs to the second floor and you’ll find a large room on the left that hosts the Rampart Tower Site of Grace – take this opportunity to rest and manage your equipment if needed.
Arteria leaf: Go back outside where you fought the Banished Knight. Go the left side and jump down on the ledge below. Continue to the left along the edge until it ends. Jump down again on the wooden blanks to get the Arteria leaf. Go through the hole and make you way back up again.
You can also check the third floor where there is a Castle Guard that’s patrolling, while the other is on the other end of the platform that’s holding a crossbow. Tread carefully while you are crouched so the one patrolling doesn’t see you and slowly move back down to the second level as the guard goes down as well, when you have a clear shot, use a ranged magic attack to take it out. Go to the third level and take out the other guard with the crossbow next. This takes you to one of the castle’s rooftops, go through the doorway with a large arch, and go around the path to find the entrance leading outside.
There is another Castle Guard here resting by the pile of sacks on the left while another standing on a high platform. Kill it, and on the right side, just by the corner is another Castle Guard with a crossbow. Once you’ve cleared the area, on the wooden platform where one of the Castle Guard was standing, there’s a body that can be looted to find x1 Golden Rune (2). There are about three more Castle Guards as well on the other side, and you can find them looking tired and resting by the corners. You can take this advantage to collect Runes – you’ve cleared this area.
Castle Rooftops
While still on the rooftop, across from the entry area, if you look across, you’ll notice that you can jump onto the balcony ledge and you can jump across. But tread carefully so that you don’t fall! When you do jump across, wall hug, and go around the ledge to find an opening on the wall that you can go through. Jump down and you’ll see a corpse that you can loot to find x1 Stonesword Key. You’ll then notice that there is an exit to your left where you can jump down on a rooftop. Now prepare your weapon before jumping down since you will be ambushed by a Bladed Talon Eagle.
The Bladed Talon Eagle is quite agile and attacks in the air, so maintaining a safe distance while you attack it with ranged attacks, will surely do well against it. After killing it, you’ll see another corpse sitting against a wall on the roof that you can pillage to find a gesture x1 Dozing Cross-Legged. Now walk to your left and look below where you’ll notice a door that is blocked with white fog.
Before you try to jump down safely, you’ll notice ahead of you that you can jump onto a narrow platform that’s sticking around the wall. Jump on it, hug the wall, and go around to reach a corner where you’ll find a corpse that you can pillage to find x2 Smithing Stone (2). Go back to the rooftops via the narrow ledge, and near the fallen pillar, you can use the narrow platforms sticking from the wall to jump down. Make sure you jump down carefully since there is another Banished Knight here.
As you jump down, turn around and go straight until you walk to a ledge. If you look down, you’ll notice a statue and a corpse next to it that you can loot. You can jump down since your character can land safely from the height. Loot the body to find x1 Somber Smithing Stone (2). Now, if you look ahead, you’ll see the door that is blocked with white fog, and next to it, is a glowing imp statue. There’s also a doorway on the left side where you’ll hear some loud crashing noises. If you examine the imp statue, you will be asked to use the Stonesword Key to permanently dispel the white fog, allowing you to pass through. Remember that using the said key will be consumed and removed from your inventory.
Go through the door to find the armory, but walk up a bit, and peak to the right side, you’ll find x2 Castle Guard sitting. There’s no point if you try to sneak in since the moment you step in, they will see you and attack you. You could bait the nearest one outside so you have better space to dodge and move around, kill both enemies and then check the room to find some loot there. There are three things that you can find here from the corpses. x1 Hawk Crest Wooden Shield, x1 Misericorde, and x1 Iron Whetblade. Now, there’s is a door on the right side of the armory, don’t go rushing through it, walk up slowly and you’ll notice another Castle Guard holding a torch on the left side. You can sneak behind the guard to backstab it or attack it a few times, causing the enemy to fall. You’ve cleared out the armory, next is to go into the room where you previously heard the banging noises.
The Grafted Scion
Before you enter, make sure you have made preparations just in case you fail in trying to sneak in or if you decide to just fight this mini-boss. This is the Grafted Scion, a boss you previously encountered in the Tutorial section of the game. Now, you’ll notice that the guardian is walking back and forth. You can get to the room that’s adjacent to it if you crouch and sneak in when he walks back. But in the other room ahead, you’ll find a pile of dead bodies and x2 stray Zombie Dogs eating the bodies. Kill the dogs and loot the wrapped bodies to find three things here: x1 Lump of Flesh, x1 Chrysalids’ Memento on top of the pile of bodies, and x1 Golden Rune (1).
IMPORTANT NOTE: The Chrysalids’ Memento can be given to Roderika to advance her quest, you can fast travel to the Stormhill Shack site of grace and give her the item, by doing so, make sure to speak to her and she’ll mention that she will head to the Roundtable Hold where you can find her later on. If you return to the Hub, you can find her standing by the fireplace, if you speak to her, she will give you x1 Golden Seed as a reward. Once you have progressed her quest further, and she has turned into a Spirit tuner, you can find a Crimson Hood where the Chrysalids’ Memento was previously. – this room is now clear, head back to the room where the Grafted Scion is.
Now, you can sneak around the guardian if you observe and focus on when to sneak in. The guardian will not notice you if you crouch and start to move while it has its back facing you and if you remain moving at the sides if ever he turns to walk back. There are a few things you can grab here, x1 Stanching Boluses on the right and x1 Highland Axe that can be looted off a corpse that is sitting against a wall, under the large painting at the center of the room.
If you still want to avoid fighting the guardian at this point, you can continue to sneak through by going through the next room on the left from the corpse you’ve just looted. On the other hand, if you do decide to fight this guardian, you can bait it towards the arch doorway, either one since it won’t be able to go through it. Defeating the guardian yields 1176 Runes.
Now, on the east side of the room, you’ll see a set of stairs that goes up.A Castle Guard is roaming the area, and in the first room that looks like an assembly room, there is a Banished Knight. There is also a door that is locked on the right side. You can sneak behind the knight to backstab it and then follow up with attacks – there’s also a chance you can loot a Banished Knight’s Halberd after killing the enemy.
Inside the same room, look to your right and head up the podium to find a chest. Inside it is a Mimic’s Veil, a tool that allows you to use FP to mimic nearby objects. After grabbing the item, go through the arch doorway on the other end of the room straight into the adjacent arch doorway where another Castle Guard is sitting against a wall. Head through the narrow hallway on the west where you’ll find yourself inside a storeroom. Inside the storeroom, at the center, behind some crates, there is a Commoner corpse that you can loot to find x2 Golden Rune (2).
Head outside the next section where you’ll see another Castle Guard patrolling, alongside another Banished Knight wielding a sword and shield. After defeating the enemies, simply head straight and you’ll find the entrance of a chapel. Approach the altar and you’ll find the Sorcerer Rogier, make sure to speak to him and he’ll mention that he’s looking for something and questions why you are here, at the same time, he warns you about the dangers the castle holds. Tell him then that you’re purpose is to defeat Godrick and he asks if you are after the Great Rune. After speaking to him, you will be able to purchase a few Ashes of War from the sorcerer such as the Ash of War: Glintstone Pebble, Ash of War: Carian Greatsword, and Ash of War: Spinning Weapon.
Return to the room with the Grafted Scion, and enter the northwest exit. You’ll then reach a room that looks like a stable but has been used as another armory/stock room. Look to the top left, and you’ll see a Commoner guarding. Move to the left and there is another door that leads to the upper area. Kill the enemy and go to the opposite end of the wooden platform to find a corpse that you can loot to find x10 Arrow – now if you go straight, you’ll reach the castle’s courtyard that is heavily guarded by Castle Guard enemies. You won’t be able to sneak around here since the moment you step out, there are three Castle Guards on the left who will start to shoot you with their ranged weapons. You could, however, bait the ones patrolling into the stable and lessen their numbers.
Courtyard Stock Room
From the arch doorway exiting to the courtyard, make a hard left and you’ll see a set of stairs that goes underground. You’ll find a room that is guarded by three Rats, and ahead, is a doorway that is blocked by a white fog. To dispel this, you will need to use a Stonesword Key on the Imp Statue. On the other side of the door is a stock room where you’ll find two treasure chests, the one on the left contains the Godslayer’s Seal, while the other has the Godskin Prayerbook. And if you go straight towards the doorway, there’s a body that can be looted to find a Golden Rune (4).
From where the body is, turn right and you’ll see a ladder around the corner. Climb the ladder, continue forward, along the path, there’s another corpse that you can loot on the right side, behind a barrel, pillage the corpse to find some Arrows. Continue straight, turn left, straight again, and climb the second ladder where you’ll encounter two Banished Knight enemies at the top. Just a few steps from the ladder is another corpse that can be looted to find x1 Festering Bloody Finger. Kill the knights and go east where you’ll see a narrow bridge.
Upon crossing the bridge, there are two Castle Guard enemies on the left. Clear the area and you’ll find another ladder that you can climb. At the top, you’ll see two more Castle Guard enemies and a corpse that you can loot. The body is sitting by the edge of a podium. Looting it provides x1 Nomadic Warrior’s Cookbook [10] – from here, you can circle back to the courtyard to continue your exploration or you can cross the other narrow bridge in front of the podium where you just looted the cookbook, this takes you back to the Grafted Scion’s room and armory.
An Extra Stonesword Key
Before you head to the heavily guarded courtyard, we suggest you return to the large room where the Grafted Scion was. Head up the second floor, through the assembly room where the Banished Knight is roaming, and exit through the other doorway. Here, you’ll notice that you can jump over a fence that has some pile of sacks. On the other side, one Castle Guard patrolling, and on the right side, next to the crates and barrels, is a corpse that can be looted to find x1 Gold-Pickled Fowl Foot. Go to the left side, up the stairs, around the corner and you’ll find a ladder that you can climb at the end.
At the top, go straight and you’ll notice that there’s a wooden platform below. Drop down and kill the Castle Guard here. Follow the path and you’ll find yourself at the upper east section of the room where the Grafted Scion was. This platform has a lootable corpse and a treasure chest that is being guarded by one more Castle Guard, kill the guard and loot the body and chest to find x1 Stonesword Key and x1 Pickled Turtle Neck – from here, jump back down to the first floor, go west, and continue towards the courtyard.
Stormveil Castle – Courtyard
Killing them will have a chance to drop their equipment such as Exile Armor and Exile Greaves. Take out the ones wielding a crossbow with ranged attacks or you can rush in and melee attack them while they try to reload, and watch out for the one on the left who is operating a flamethrower. This area is swarming with Castle Guards so tread carefully. You can find various items here from the corpses that can be looted such as x1 Magic Grease, x1 Golden Rune (1), x2 Golden Rune (2), x1 Pike1, and x5 Smoldering Butterfly.
Make sure to kill all of the Castle Guard enemies here since there is an ogre-looking enemy, the Omen, at the north side of the area. Check the guardhouse on the right as well and go up to find a body that can be looted to find x1 Wooden Greatshield. You can sneak past the large enemy by moving to the side on the right and then jump onto the steps. At the midsection of the steps is a Commoner’s body that you can pillage to find x1 Furlcalling Finger Remedy.
At this point, you’ll want to rest at a Site of Grace, luckily if you look to your left from the corpse you just looted, there is a room that holds one, on the right side, however, you’ll see another Bladed Talon Eagle enemy. As you walk towards the room with the site of grace, look ahead and you’ll see a corpse sitting by the ledge. You can loot its body to find x2 Smithing Stone (1) – grab the item and head inside another armory room with the Liftside Chamber site of grace – in this room, there is also a lever that you can activate to call down the lift, riding it will take you to the upper section of the castle.
If you ride the lift, follow the path to go outside and you’ll notice an open area that has an opening on the ground. Make sure to crouch and quietly sneak in since there is a Teardrop Scarab below. Killing it will drop the Ash of War: Stormcaller. After killing the scarab, go back up and look to the left side, you’ll see another corpse in a sitting position that you can loot to find x8 Kukri – jump down and head towards the path ahead you’ll find the Secluded Cell Site of Grace inside a small armory adjacent to it – you’ve also found the entrance leading to the main boss of this dungeon, which is the door that is covered with a golden fog-aura.
Clearing the Castle
Now, there are still a few more things you need to discover here. Assuming you stopped to rest at the Secluded Cell site of grace, you’ll notice the entrance leading to the main boss, this is your first main demigod encounter, and you’re going to need some help from a certain NPC, as well as clearing the castle area first before facing Godrick the Grafted. You’ll notice a Troll that’s guarding the entrance, but since you went through the back, you have the advantage of attacking the enemy by surprise. You can just attack it and retreat since the Troll won’t fit through the arch. But be careful since it will also shout at you, causing your character to get knocked back, and its attacks can still reach you if you’re too close, kill the Troll and then another Castle Guard, and continue outside where you’ll find yourself at the main courtyard of the castle.
Just outside, down the steps, look to your left and you’ll see a small glowing tree without its leaves, approach it and you’ll find x1 Golden Seed that you can pick up. Tread carefully now since the area is again, heavily guarded and you’ll encounter enemies such as the Bladed Talon Eagle. If you’re looking at the eagle, check the left side and you’ll find a small room.
Head inside and you’ll find a fellow NPC warrior. Speak to her and she’ll introduce herself as Nepheli Loux who is also a tarnished and a warrior, like you. You’ll learn that you both have similar interests in taking out Godrick. Speak to her again and she will tell you that if you are to fight the grafted lord, to call upon her so that she may join and assist you in battle. After speaking to her a few times, check the corner of the room to find another corpse you can pillage to find x4 Smithing Stone (1) – go back outside to the courtyard as you maneuver your way through the barricades and enemies, you’ll notice that you’ll find yourself back at the courtyard that was heavily guarded.
At this point, you have already killed all of the Castle Guards, but there is still the ogre enemy known as the Omen along with the Zombie Dog enemy. You can use a site of grace nearby first before fighting the enemies so that you can use it as a checkpoint in case you die, just remember that the enemies will respawn upon resting. It’s best to lure out the hound first, and then fight the ogre. The Omen wields a large cleaver, so again, maintaining a safe distance while you try to hit it with ranged magical or consumable attacks will work to your advantage. Defeating this ogre enemy yields 451 Runes and you can loot its body to acquire the Omen Cleaver.
After defeating the enemy, on the west side, you’ll find a study room that has a painting surrounded by an aura in the middle. Examine it to acquire x1 Prophecy Painting, assuming you did rest at a site of grace, head back outside to the courtyard and defeat the Castle Guard enemies again.
Head towards the southeast gate and make your way to the main grounds of the castle, which will lead you down near the entrance of the castle gate. Tread carefully as you make your way to the main grounds since there are Castle Guards stationed on the high ground who will shoot with a ballista – be ready to dash and dodge your way until you reach the main castle grounds. If you are intending to clear this area, it is recommended to start from the Castle Gate grace location and run in the front, which (if you zig and you zag) will get you a clear path right up to the ballista shooters, which will clear up the rest of the encounter. Make sure to get the guy up top with a projectile.
Mini-Boss: Lion Guardian
For some of you, this area is quite familiar, especially to those who were able to try the Network Test. This is where you’ll encounter the Lion Guardian, a large, and fast beast that has a large blade attached to its paw. Do not engage the Lion initially, instead, run past, into the room with the kneeling knight statues, and beyond you will find a Site of Grace. This will allow you to engage the lion without having to fight or dash through hordes of enemies.
When you return to the courtyard, tread carefully, since the Lion Guardian will jump in and start to attack you. If you want to gain a bit of advantage to deal large damage before you even aggro the mini-boss, you can crouch and sneak around the runaway, move from the left side and go around to the right, you’ll see the Lion Guardian just waiting and hiding on the right side of the runway.
Make sure that you are crouching and if you can sneak behind it, you can use a strong attack while it is unaware of your presence. If you retreat to the arch doorway with the room with armored statues, the beast won’t be able to follow you inside, and you can exploit this tip by attacking it with long-ranged attacks. Defeating the guardian yields 1428 Runes, x1 Somber Smithing Stone (1), x1 Beast Blood, and x2 Old Fang.
In the middle, there is an arched doorway that you can enter where you’ll see some armored statues. Across it, will lead you to another section of the castle where you can find the Limgrave Tower Bridge Site of Grace by the steps. If you go up the stairs, you’ll notice a corpse at the top resting against a pillar on the left side. You can loot the corpse to find x1 Boltdrake Talisman. Now, go back to the castle grounds and clear out the remaining Castle Guard enemies stationed near the castle’s main gate. Tread carefully since there are guards who are operating a couple of ballistae, as well as the ones wielding a crossbow.
Near the main gate, you’ll find another arch doorway that has a room with a site of grace. Head to that room and next to the site of grace, you’ll see a corpse with half of its body hanging by the hole on the ground. Loot it to find x1 Golden Rune (5) then examine the site of grace to discover it. There’s another arch doorway ahead, and on the other side, there is a balcony where you can find another corpse that you can pillage to find x1 Commoner’s Simple Garb.
Go back inside the room and you’ll notice a lever that you can interact with, have your character push it to open the castle’s main gate. Head to the main gate and you’ll see some corpses that you can loot to find the following items: x5 Ballista Bolt, x1 Golden Rune (2), and x1 Golden Rune (1). From here, you can now head back to the Secluded Cell Site of Grace and make further preparations before facing Godrick the Grafted.
Where to find the Claw Talisman
In case you miss this, there is a Talisman here that you may want to find. Fast travel to the Rampart Tower Site of Grace and make your way to the top-level towards the balcony section where there are multiple Castle Guard enemies. At the balcony’s entrance, on the left, you’ll see one of the guards resting against a wall, near a stack of sandbags. Jump on it and walk carefully on the ledge, look to your left and jump down to the wooden platform. Jump down the other wooden platform below and as you hug the wall, you’ll have to drop down onto the narrow ledge that’s sticking out from the wall.
From there, drop down onto the rooftop where you’ll see a destroyed pillar. Jump on it and get on top of the narrow platform of the wall on the right side and go around it as you hug the wall until you reach an open section that has a ladder leading to the top of what seems to be a watchtower. Be careful here since it is guarded by more Castle Guard enemies. There’s about one resting on the right side, while three more on the left, two holding a crossbow and normal bow, while the other with a sword and shield.
Take out the ones with the bow weapons first and then shift your attention towards the one with the shield. After killing the enemies, climb the ladder to find x1 Claw Talisman that can be looted off a corpse.
Facing Godrick the Grafted
Now, before going through the gold fog door, make sure to use the summon sign to summon Nepheli, provided that you’ve spoken to her earlier and exhausted her dialogues at her initial location. You’ll need help from her since the battle is quite intense. Regardless of whether you are playing online or not, the summon sign will be available for you to use. Wait for her to be summoned and enter the boss arena.
In this arena, you’ll find yourself in an open courtyard that has a high elevated platform on both ends of the arena. The area does have walls but some parts are open which can cause you to fall off and die if you aren’t careful. The courtyard is covered with trees, pillars, and tombstones as well which can block your way, but these can be destroyed by Godrick’s attacks. To your advantage, you can also use it as cover from his attacks. At the center, is a corpse of a dragon, which you can use to block his movements, not his attacks.
If you are utilizing spells or ranged attacks, summoning the wolves by using the Lone Wolf Ashes will help in depleting Godrick’s health, as well as grabbing his attention. If you did summon Nepheli before stepping through the fog door, she can also help with small amounts of damage, but she’s actually more effective by grabbing Godrick’s attention as well, and surprisingly, she is a bit tanky, allowing her to at least survive until you reach the second phase of the battle. Utilize high ground and keep Godrick below you as you bombard him with magical ranged attacks. On the other hand, if you are using your melee weapons, make use of weapons that have a longer reach so you can land those attacks while maintaining a safe distance. Patience, timing, and playing defensively will work here since Godrick will be leaping into the air and executing tumbling attacks. During our playthrough, we were able to bring down his HP and enter the second phase just by bombarding him with magical attacks, of course, provided that we have our flasks upgraded and ready to use.
The second phase triggers when you’ve inflicted about 30-40% damage to his HP. A short cutscene will trigger where you’ll see him cut off his arm, fusing it with the head of the dragon’s corpse, reanimating it. During the second phase, Godrick gains additional attacks where he can now use his left dragon head arm as a flamethrower, as well as imbuing his attacks with flames. As soon as you continue the fight, move away from him or if you’re positioned close to him, get behind him to avoid getting hit by the flames. If he starts to use one of his dragon breath attacks in a forward sweeping arc position, you must roll clockwise before the flames come into contact with you to avoid getting hit, since standing far away from his attacks may still reach you.
Luckily, you can still use the environment around you to use as cover for the flames such as the elevated platforms and ledges, especially when he shoots flames in the air. At this point, close-quarter combat won’t work here, Nepheli will probably die, so again, you’ll need to focus on his attacks, keep away from him, and rely on any ranged-based attacks. You can even throw daggers or darts at him since he is somehow vulnerable yet resistant to Bleed. Depending on the situation you are in, your best shot to defeat Godrick is to use magical ranged attacks. Successfully defeating Godrick the Grafted yields x1 Godrick’s Great Rune and x1 Remembrance of the Grafted, as well as 15000 Runes.
By receiving a Great Rune, you can use it to restore the power at Divine Towers throughout the Lands Between. You will need to check the description of each Great Rune to discover which Divine Tower you should visit. At the center of the arena is a lost site of grace that you can examine and activate.
Godrick the Grafted’s Throne Room
Straight ahead, is Godrick’s throne room. At the center is a large seat and there are two rooms you can check on both east and west sides. The room on the east is empty, so check the west room where you’ll see a set of steps going down to the basement section. Climb down the ladder that’s on the left side and you’ll immediately see a spirit NPC that looks like it’s praying.
Approach it and you can find an item next to it, pick it up to obtain x1 Shabriri Grape. If you speak to the spirit, it will just ask where the maiden is and to take the grapes. If you turn back, you’ll see a passage that goes outside, formally arriving at Liurnia of the Lakes. If you return to the Roundtable Hold, you’ll find Nepheli Loux, the warrior who helped you in fighting Godrick, at the northeast side, by the library. Don’t forget to speak to her so that she can give you x1 Arsenal Charm.
Using Godrick’s Great Rune
Now, if you want to use Godrick’s Great Rune, you will need to fast travel to the Limgrave Tower Bridge site at Stormveil Castle. The path ahead is guarded by reanimated Colossal Statues, you can choose to fight them one at a time or just make a run for it until you reach the end where you’ll find a waygate. When you reach the other end, there are some Bladed Talon Eagle enemies here, as well as a flock of non-hostile Eagles. Keep going straight until you reach the large door of the tower, head inside, and step on the mechanism to activate the lift.
At the top, is another site of grace you can discover, the Divine Tower of Limgrave. Continue to the top until you reach the peak where you’ll find a glowing sigil at the center. Approach and interact with it to restore the power of the great rune. Godrick’s Great Rune blesses the player’s character by raising all attributes.
Exploring the Castle’s Underground Crypt
Now, you might have missed an area in Stormveil Castle, and that is an underground crypt. To find the entrance, first, fast travel to the Secluded Cell Site of Grace. Go straight through the tunnel, then turn around after walking up the sloped floor. From the wooden platform where the Kukri were, jump towards the northeast wall and land on the ledge there. Make your way to the right and jump once again to land on the windowsill.
Outside, you can find a Blade Talon Eagle and a sword-wielding Banished Knight, a Lump of Flesh is on a body to the right. Make your way back up and turn left, then after exiting the short corridor, you can jump up to find a Smithing Stone (2) to your right. Turn the other way to pick up another Smithing Stone (1) and a Golden Rune (2). In the next room, there are multiple Commoners and the Manor Towershield can be found next to the stairs. Head outside to find a Smithing Stone (3), then turn left and jump down multiple ledges. At the bottom, go around the tower to find a Golden Rune (5). You have to jump onto the ledge to pick it up, so jump while standing still and press forwards in mid-air in order to land on top of it. Go inside to find 5 Rainbow Stones, then turn left to open the shortcut to the Liftside Chamber site of grace. Turn around and jump across the tiled roofs on the opposite wall. There is an Arteria Leaf inside the tower, guarded by a Giant Bat. You can snipe two more hanging bats from here or simply go down the stairs and drop to the lower platform to take them out there. Walk across the broken beam and jump the gap to find a Smithing Stone (2). There is another way to get here, if you don’t want to fight the bats, but take some fall damage instead: Start from the Liftside Chamber site of grace and exit through the doorway leading to the courtyard. Make a hard right from the door and approach the corpse sitting by the ledge. You should have enough health so that you can take the damage from dropping on the platform below. Next, walk up a bit to the ledge and drop onto the beam where you found the Smithing Stone (2).
To proceed, drop to the wooden platform on the right, and continue going down via the platforms on the right as well, til you’re down on the ground.
Below, next to the wooden platform, there is another Commoner corpse that you can loot to find Golden Rune (2). Make sure to restore your HP or FP to be ready for the enemies ahead, a few Rats and one giant one. Kill the creatures and continue forward. Along the way, there is another corpse you can loot to find Poisonbloom. As you move to the right, you’ll see a Teardrop Scarab, quickly kill it to acquire x1 Rancorcall.
The path from here is pretty linear and you’ll find a pit that you’ll need to drop down to, just make further preparations since a strong enemy will appear here. Also, if you notice there are multiple bodies in the pit that you can loot, there is a Stonesword Key among these. Take care of that later and fight the enemy first. As soon as you drop down, the creature will appear from the ground. The Ulcerated Tree Spirit is a towering, centipede-like creature that heavily features bodies composed of tree-like structures.
It is quick and very aggressive when it attacks and moves similar to a centipede. The Tree Spirit also features two large arms and it mainly uses it to swing around or to slam the ground. It can also use its tail to hit you. One of the best ways to defeat this elite enemy is to counterattack after it uses those heavy moves where it needs to recover. At some point, its HP is at 50-60%, it will start to glow and emit a blast. Be ready to move back to avoid getting hit by it. This also means all of its attacks will be imbued with the glowing power it’s emitting, gaining more range and damage to your HP – take your time and be patient.
Once you’ve defeated this creature, you can loot the bodies and go forward where you’ll see a giant face structured from roots. On the right side, there is a corpse that you can loot to find the Prince of Death’s Pustule talisman. After grabbing the talisman, climb the ladder that’s on the left. At the top, just drop down from the ledge and you’ll find yourself back at the entrance of the Grafted Scion’s room.
Where to find the Crucible Knight
Head out from the Rampart Tower Site of Grace to the Bladed Talon Eagles and lots of fire barrels, there is a small area on the left where the second eagle comes from, walk up here and jump on top of the outer wall and look down. There should be a ledge you can drop to, drop down and follow the ledge along to pick up a shield that does bleed damage and follow the route until you get to a ledge that is extremely high up, if the ledge does not break on its own, swing your weapon or roll and the ground should break and you will fall into a large bush below, there is a teardrop scarab here and a Crucible Knight will come to attack you, after killing him just run past him through a door and take a left back in to the castle to activate a lift shortcut that takes you back up to the Rampart Tower Site of Grace.
STORMVEIL CASTLE TRIVIA
The item descriptions for the Marred Wooden Shield and the Marred Leather Shield make note of the fact that they, along with the castle as a whole, are marred by thorns and mottling. The descriptions speculate as to the nature of this phenomenon, mentioning two possible theories: that it is the result of a curse brought about by Godrick’s grafting, or that the source is more sinister and lies deep underneath the castle. When venturing into the underground passage near the Liftside Chamber Site of Grace, we find a mutated corpse implied to be that of a demigod (similar in appearance to Godwyn’s body, found near the roots of the Erdtree. The Prince of Death’s Pustule talisman’s description and later interactions with Fia heavily suggest that it is in fact part of Godwyn’s body, that spread under the land via the Erdtree roots). Rogier was injured after interacting with this corpse. Later, D, Hunter of the Dead, mentions how Rogier has been afflicted with thorns when discussing his current condition. This could mean that the thorns and mottling afflicting the castle do, indeed, come from the same demigod corpse.
Stormveil Castle Location and Walkthrough
Stormveil Castle is the first Legacy Dungeon you can encounter in Elden Ring, and contains many challenges and dangers, as well as a demigod boss. This page will contain walkthrough and guide information on how to reach Stormveil Castle, all the treasures and items that can be found inside, tips for navigating the dungeon, and how to defeat its fearsome bosses.
Sections in this Page
advertisement
How to Get to Stormveil Castle
The Legacy Dungeon Stormveil Castle is easy enough to find, as you can spot it high on the cliffs as soon as you leave the tutorial dungeon at the Stranded Graveyard and enter Limgrave. Getting to it is another matter.
Taking the roads to the east, you can enter the large Storm Gate, but be prepared for a host of Godrick Soldiers and Crossbowmen waiting behind barricades, as an imposing Stonedigger Troll jumps down from the ruins above the small canyon to ambush you. It’s a rough fight, and you may want to bypass it either by racing through on Torrent, or traveling a bit farther East to find a Spiritspring Jump point to get onto Storm Hill.
Past the narrow canyon entrance, you can find a Site of Grace at the Scavenger’s Shack, where you’ll meet the Character Roderika. She’ll give you a bit of information on the castle, as well as the Spirit Jellyfish Ashes to hold onto, and may eventually move on to the Roundtable Hold.
Further up the road are more patrols of soldiers leading to the main Stormveil Castle Gate, but the entrance is heavily fortified by rows of barricades lined by soldiers, with a ballista manned at the tunnel entrance. It has incredible range and power, so it may be best to gallop on Torrent into the dense woods on the left as you make your approach, then race forward along the castle walls to ambush and destroy the ballista, before taking out the rest of the soldiers in smaller groups.
Entering the tunnel, you can find one last Site of Grace before you must fight the boss that guards the entrance to Stormveil Castle proper – Margit the Fell Omen.
advertisement
Margit the Fell Omen Boss Fight Guide
Margit the Fell Omen is something of a skill check in Elden Ring, as he’s way more imposing and fearsome than any mini boss you’ve likely fought in the smaller dungeons of West Limgrave. If you’ve been avoiding these places or raced straight here, he may prove to be insurmountable, and it is highly recommend you gain experience and gear by clearing out the smaller dungeons of West Limgrave before attempting this fight.
Loading
Margit is a wary fighter, but don’t let his slow pacing or knobbled cane fool you, he can hit incredibly hard – not just with his cane, but with his ability to summon holy weapons at a moment’s notice to strike you with. You’ll also be fighting on a somewhat narrow bridge, with chasms on both sides that he can and will knock you off of if you don’t position yourself with your back to the middle as much as possible.
As stated previously, Margit can sometimes be very cautious unlike many main bosses, and may slowly strafe you at a distance, inviting attacks. This can be a good opportunity for ranged and magic attacks, but you’ll need to be ready to move at a moment’s notice – particularly when he summons holy daggers to toss your way.
As you draw close, be prepared for several types of attacks he can unleash:
Getting close often prompts him to use a rapid upward swing from his staff that’s difficult to anticipate, and can still deal damage if your shield isn’t fully absorbing hits. He’ll follow this up by slamming the weapon down again, but after a short delay – meaning you can quickly get behind him and counter with a few blows while his animation plays out – just watch for a quick tail lash follow up if you stay behind him for too long.
He can employ a series of swings from his preferred weapon in horizontal sweeps (which can be parried if you’re timing things right), and often combine them by summoning a holy dagger to slice at a faster rate, before jumping backwards and throwing it at you. He may also simply performing a retreating swing from his staff as he jumps back to increase distance from you. Other times, he may start to hold his staff high in one hand while walking forward before slamming it down vertically in front of him.
One of his more iconic attacks is to slowly raise his cane above his head and hold it high with two hands. He’ll wind it up with a long delay, and then finally send it crashing down fast in front of him – but you can dodge once the weapon is on its way down. If you retreat from this attack, he’ll leap forward after smashing down and use a follow up attack to get close to you, but you can dodge roll behind his leaping swing.
Sometimes at range, he’ll begin to jog forward, and jump high into the air to slam down with his cane like a speartip into the ground. It’s a powerful move, but also easier to dodge and get behind him, giving you lots of time to attack him as he slowly removes the weapon from the ground.
At around half health, he’ll admit you have some strength, but summon a might holy hammer, and swing it in an arc in front of him to gain momentum to launch into the air, and slam it down on top of you. Backpedal away from the initial swing, and wait until he’s about to crash down to dodge out of the way of the hammer and retaliate – but be ready for followup dagger swings.
He can also start to summon a longer golden sword blade, with more reach than his daggers, and can use it in conjunction with his cane to perform spinning combo slashes that are difficult to avoid, or end with a stab with his main staff weapon.
advertisement
Margit can be very hard to predict which magical weapons he’ll summon and how he’ll incorporate them into his combo attacks, so you’ll always want to have stamina in reserve to quickly block or dodge his next move. If you have an adequate absorbing shield, you can even perform Guard Counters, provided you make sure he’s finished his combo strike before you launch your counter, or you’ll likely take more damage once committed to the attack.
Take your time with this fight, as he moves slowly enough to give you time to watch his attack animations and get a feel for the right and wrong times to try your own attacks – and never get too greedy so you leave yourself open. Melee fighters should back off every now and then to regain full stamina and wait for him to make the first move so you can react accordingly.
You can purchase this item from Patches at his shop in the If you are having a bit of trouble with Margit there is one other tool available to you: the Margit’s Shackle . Using this item causes Margit to become stunned for a few seconds, allowing you to get in some free hits. The Shackles only seem to work two times, and only in the first phase of the fight, so use them wisely.You can purchase this item from Patches at his shop in the Murkwater Cave
Get your hits in where you can to slowly whittle Margit down, and he’ll fall with enough practice, clearing the way to Stormveil Castle proper.
Stormveil Castle Walkthrough
Loading
Starting from the Stormveil Main Gate, go right down the staircase and loot the body to get a Furlcalling Finger Remedy.
advertisement
As you go back up the stairs take a peek over the edge and you will see a wooden bridge along the wall. Drop down and follow this path to the end to find a Fire Grease x2. Drop down again into the grassy area, then exit the castle out of the hole in the castle wall on your left.
Return to the Site of Grace then go through the door on the left and speak to the NPC who calls out to you from the corner. They will explain you have two ways to approach the keep: Through the heavily fortified main gate, or through a hidden opening in the side. At this point it may be possible to run through the front gate gauntlet with a little determination, but it would be a waste of time and you would miss a lot of items. So this guide will be taking the side path for maximum loot acquisition.
Taking the NPC’s advice, exit out the opening on the left side of the room and grab the Golden Rune [1] on the cliff’s edge. Turn around and use the rocks to jump up onto the hole in the castle wall where you can find a Ruin Fragment x3. Use the path along the wall to reach the cliff on the other side. Here you will find a wall with a hole smashed in it. Climb up the debris on your right to reach a cliff above you where you can find a Smithing Stone [2]. Carefully drop down to the grassy area below where you will be attacked by a storm hawk. Once you kill it walk forward to the cliff’s edge but instead of dropping down, go right to find a small path that leads up to a crumbling watchtower. You will meet the NPC from before here, and he will give you a Grace Mimic.
Look down and you will see a Site of Grace below. Drop down and rest if you need, but before progressing we need to go back and grab a few more items. Go left from the Site of Grace following the cliff’s edge down to a clearing where you will see three Stormhawks. Approach them carefully or you may be overwhelmed. When you defeat them you can claim the Smithing Stone [3] they were guarding. Continue following the path down to encounter two more Stormhawks, then past them is a dead-end where you can find Bolts x 10. Return to the Site of Grace from before and prepare for the next zone.
Stormveil Cliffside
From here we can finally get into the castle proper. Walk up to the wooden staircase in front of the Site of Grace, keeping an eye on the guard who is patrolling the tower at the top. Wait for him to turn his back, then stealthily ascend the stairs, trying to reach and kill him before he can alert the other guards. There are two more soldiers, one in the tower and one around the corner. Beware their quick thrusting attacks and ranged air slash ability. Defeat them and walk around the tower to find a Golden Rune [2] on the other side.
advertisement
Enter the tower to get inside the castle wall. Inside you will encounter two sleeping guards who can be easily dispatched as they try and get up. There is a staircase on your left, but instead walk underneath it and sneak your way around the barrels to get a backstab on the guard patrolling this area. Once he is defeated you can freely loot the Hookclaws in the back corner of this room.
Return to the staircase and make your way up to the platform at the top. Enemies will throw firebombs at you to ignite the barrels at the top of the stairs, so roll backwards before the explosion sets off, then run up the stairs and kill both of the guards before they can pelt you with more bombs. On this platform you will find a locked door we won’t be able to access for now, but look to the right of the door to find Throwing Dagger x5.
Turn around and go up the next staircase where you will enter a hall with a Smoldering Butterfly x3 and more explosive barrels for you to dodge. Kill the enemy ahead, then smash the debris behind you to uncover another set of staircases. Kill the enemy at the top of the stairs, then drop down to grab the Golden Rune [2] on the platform below you.
Go back up the stairs and open the black door on the right wall of the top platform. Entering this room will trigger a cutscene where the door is closed behind you, locking you in with a black knight. The knight has a large shield, but his slow moves make him highly susceptible to backstabs. Be careful, though. There’s a good chance he’ll use his Ashes of War Storm Stop skill to call up a gust that can do severe damage if you’re not playing a highly armored character.
Once the knight is dead you can explore the room and grab the Rusty Key and Curved Sword Talisman.
advertisement
Return to the platform with the locked door, but don’t use the key just yet. Instead look for the huge hole in the wall to the left of the door. Jump up into the hole in the wall where you will find St. Trina’s Arrow x10. Target the enemy below and execute them with a falling attack. Beware another spear wielding enemy to your left who will pelt you with firebombs, and a third who will come down the ladder at the top of the staircase. Once all the enemies are dispatched climb the ladder and reenter the room through the hole in the wall at the top.
Return to the locked door from before and unlock it with the Rusty Key, then climb the ladder inside to reach the platform above. Upon exiting the door take a right walk toward the platform ahead of you, taking care to jump across the gap rather than fall down. Kill the resting enemy in the middle of the platform, then carefully cross the wooden plank to reach another enemy and a Fire Grease.
Note the slightly elevated wooden platform to the right of the plank. Run and jump to it to access a door to the exterior. Here you will encounter a shielded soldier. Stand your ground and try not to get knocked off the platform. Walk down the stairs ahead and enter the door on your left, where you will find another soldier and the Brick Hammer. Do not drop down from this point, instead turn around and walk all the way back to the ladder room.
This time take the left path, but beware the enemy waiting to ambush you just before the stairs ahead of you. Kill the enemy and ascend the stairs to find another enemy resting at the top, and a Silver-Pickled Fowl Foot behind some boxes. Head out the door to an exterior platform where you will see a large staircase. Don’t ascend it just yet, instead walk along the edge of the wall to find Mushroom x3 around the corner.
advertisement
Walk back to the stairs and climb up to find a large door leading to the inside of the castle, guarded by a halberd knight. Try and sneak up on him and execute a backstab to get the upper hand. Beware his large sweeping attacks and keep in mind that he can leap long distances to kill you as you attempt to heal. Once he is defeated you can enter the elevator room and take the staircase up. The elevator is not active yet, but you can jump over the elevator shaft to reach the Drawstring Fire Grease x2 on the other side. Jump back across the gap and enter the armory room ahead where you can rest at a new Site of Grace.
Rampart Tower
Loading
From this we can finally access the real core of Stormveil, but before that we have some hidden items to collect. Begin by ascending the second staircase outside the Site of Grace room. You will encounter a spear and shield enemy and another soldier shooting you with a crossbow from a platform across the room. You can run into the nearby hallway to avoid the crossbow enemy, then use guard counters to break down the shield enemy. Go back to the elevator and jump on the pulley system to cross over to the other side, kill the soldier, and loot the Throwing Dagger x5.
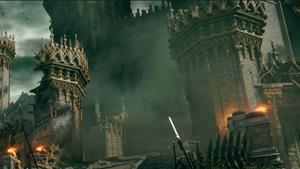
Go back into the hallway and walk all the way around to find a door that exits onto a exterior platform. Crouch and carefully walk around the pedestal to the left of the door to avoid alerting the guard on patrol. Climb up the stairs on the opposite side of the platform and stealth kill him, then go kill the other sleeping guards one by one.
Notice the sandbags piled up next to the castle wall. Use them to climb up onto the wall, then go right along the ledge until you are close enough to jump onto the crumbling adjacent tower. Jump inside and fall down to find a Stonesword Key.
advertisement
Jump out the window and land on the rooftop below where you will encounter an armored stormhawk. This hawk is just as relentless as the previous ones, and it can also spit fire out of its helmet. Trying to pick a spot to attack is hard because of its erratic movement, so your best bet is to shield block one of its heavy strike and counter strike in the small opening. Defeat the hawk and claim the Dazing Cross-Legged gesture on the other side of the roof.
Look at the wall where the stormhawk was perched and you will notice an adjacent tower with a ledge you can hop up onto. Jump on and walk all the way around the tower to find a small wooden walkway that gets you access to a platform containing a Smithing Stone [2].
Go back around the tower but instead of going back to the roof where you battled the stormhawk you will want to jump onto the adjacent rooftop with the crumbled pillar on it. You will want to use that pillar to reach the ledge above you, then walk around it where you will find yet another accessible rooftop.
This roof is teeming with soldiers, so be careful how you approach. I would recommend starting by killing the sleeping soldier on the right, then hiding behind the tower to protect yourself from the three crossbow soliders on the left. Let them come to you and dispatch them one by one. Once they are all dead climb to the top of the tower above you and loot the Claw Talisman.
advertisement
Take the ladder back down, then retrace your steps all the way back to the rooftop with the crumbling pillar on it. You will see a gap in between this roof and the one where you fought the stormhawk. Heal to full HP then drop down to the courtyard below where you will find a Stonesword Key door and a Somber Smithing Stone [2]. Use the Stonesword Key you recently got to unlock the door, but be careful of the two axe soldiers waiting inside. Draw them out into the courtyard one by one if you need a little room to dodge around. Their slam attacks are very slow, so you can easily get bnehind them and execute a back stab. Inside the room you will find the Hawk Crest Wooden Shield, Misericorde, and the Iron Whetblade.
Go back into the courtyard and go in the other door you haven’t explored yet. Inside is a dining hall guarded by a Grafted Scion, but we don’t want to battle it yet so immediately run to the other side of the room and enter the small room on the other side which contains two dogs and the Crimson Hood atop a pile of bodies.
Exit this room and enter the door immediately to your left where you will find the first elevator that takes you back up to the Spot of Grace.
If you are low on Flasks you can rest, but we still have a little more jumping to do. Go back up to the rooftop and jump across the towers and make your back back to the rooftop with the crumbling pillar. Climb up like you are going back to the rooftop where you got the Claw Talisman, but instead drop down to the platform below you, then drop down again onto a large open rooftop where you will see two soldiers in the distance. Sneak up behind the weaker one and backstab them so you can take on the halberd knight one on one. Just like before your strategy is going to be to strafe in an attempt to execute a backstab, and guard countering when you see an opening. Just keep in mind that most of his attack patterns have two parts, so don’t get caught attacking too early.
advertisement
Cross the wooden bridge to access another rooftop where you will meet two more soldiers, and find the Nomadic Warrior’s Cookbook 10 on a wooden platform. Go down the ladder on the other end of this rooftop where you will encounter two more soldiers,, then cross another wooden bridge where you will meet another halberd knight as well as a sword knight in hiding. Approach carefully or you will quickly get overwhelmed by the two of them (The halberd knight dropped a Banished Knight Helm (Altered) for me here, but I cannot confirm if that is a guaranteed drop at this time). Grab the Festering Bloody Finger from the nearby body, then descend the ladder nearby to another lower platform.
Follow this path forward and around the corner where you will find Arrow x10 and another ladder you can go down. On this final platform you will find a Golden Rune [4] and a blocked doorway, which we will get to later. For now, teleport back to the Spot of Grace and we can go take on the Scion.
Take the elevator back down to the dining hall and prepare to take on the Scion. This enemy is a pain because of his multi-hit attacks, erratic movements, and large shield, but it is just as susceptible to guard counters as anyone else. Keep in mind that most of its attacks feature two to four strikes, so wait until the final attack before countering (usually denoted by it being a little slower and stronger). Anytime it rears up on its back legs the Scion is about to unleash a flurry of attacks so back off or roll away quickly and wait it out. Rinse and repeat this process and you should be able to take it down fairly easily.
Once it is dead you can grab the Highland Axe from underneath the large painting, as well as the Stanching Boluses off the table in the side of the room. From here we can go a few different places, but we will begin by going into the kitchen to the left of the giant wall painting.
advertisement
Quickly take out the group of weak enemies resting in front of the fire, then take on the soldier who runs down from the platform overhead. Loot the Exalted Flesh under the platform, the ascend the stairs where you will run into another soldier with a shield.
Inside the room at the top of the stairs is yet another halberd knight. Crouch, wait for him to turn his back, then sneak up to start the fight with a backstab before executing the same careful strategy as always to defeat them. Loot the chest at the front of the room to get the Mimic’s Veil item.
Exit this room, but instead of going straight ahead into the next room climb the sandbags on your left to hop the wall and go onto the platform on the other side. Sneak up on the enemy overlooking the ledge, then loot the nearby Gold-Pickled Fowl Foot .
Follow the nearby wooden walkway to find a ladder at the end. Climb up onto the roof and walk forward to the edge of the roof where you can see a wooden balcony below with an enemy on it. Drop down and kill the enemy, then open the nearby door to open a shortcut back to the kitchen. Before going back, go through the door the soldier was guarding to find a Stonesword Key and a chest containing a Pickled Turtle Neck.
Take the shortcut back to the halberd knight room and proceed through the doorway we ignored earlier, following it all the way to the end and killing the resting Axe Soldier. Go through the nearby door to find yourself in a cozy room where you can find a Golden Rune [2].
advertisement
Exit out the door on the opposite side to find yourself on a rampart patrolled by a sword knight and a weaker soldier enemy with a torch. As always you want to crouch and wait for them to turn their backs, then sneak up and kill the weaker soldier before taking on the knight. Once they are defeated you can proceed down the rampart where you will see a ladder you can climb on the left and a doorway at the end.
We are going to start by heading for the door which will lead you to a chapel where you can meet a Sorcerer named Rogier who will ask you to kill Godrick and sell you spells. Once you are done speaking to him you can head back to the ladder and climb up onto yet another roof.
Begin by dropping off the side of the roof opposite the ladder to loot the Kukri x5 below. Drop into the chapel through the window then return to the ladder and pass through the bell tower to find the Golden Rune [2] on the connected roof before heading up the nearby stairs.
Here you will encounter some very dangerous stormhawks that throw explosive barrels at you, triggering other explosives in the area. You want to approach them slowly to bait out their barrel toss so you can fight them without worrying about getting blown up. As always, wait out their erratic swooping attacks before guard countering. Turn around and head toward the dead end behind the stairs to find a Smithing Stone [2] (beware yet another stormhawk ambush) then follow the path forward through one last stormhawk before reaching the Rampart Tower Spot of Grace yet again.
advertisement
We are nearly done exploring this area, but we still have to open up that second elevator before we can fully proceed. Go back to the rampart with the barrel chucking stormhawks and find the balcony that overlooks the ocean. Peer down over the edge and you will see a platform below you can drop to. From here you can drop again to a thin ledge along the castle wall, the onto a smashed tower where you will find a Marred Wooden Shield. Continue dropping until you land on a ledge made of crumbling rocks which will break and send you plummeting down to an area far below.
Immediately you will notice a scarab on the nearby cliff’s edge, so be sure to run and kill it before it can escape to claim the Ash of War: Storm Assault. Keep following this cliff, but go into stealth before you reach the open area ahead because there is a Crucible Knight patrolling the area. He is VERY tough to defeat at this point because of his high health pool and resistance to normal cheesy strategies like backstabbing. Your best bet if you want to beat him is to parry his sword swings. However, when he reaches half health he transforms and opens up a new set of powerful abilities like a diving attack and fire breath. If you manage to defeat him you will get the Aspects of the Crucuble: Horns.
If you are up to the challenge feel free to practice against him, otherwise just run and grab the Somber Smithing Stone [2] he is guarding and then sprint past him through the crumbling archway and into the tower beyond where you will find the second elevator back to the Spot of Grace.
Finally we are ready to proceed for real. Return to the room where you battled the Scion and exit out the door opposite the kitchen to enter a new room that leads to the courtyard. use the door on the left to get onto the wooden rafters above where you can find an Arrow x10.
advertisement
Loading
The next room is the courtyard, which is absolutely packed to the brim with soldiers, archers, and fire spitting turrets. The name of the game here is CAREFUL, but really how you want to approach this is up to you. If you feel confident enough to run in there and kill them all as a group feel free, otherwise you can try and draw them out slowly and dispatch them one by one. Whatever you do make sure you fully clear all of them out before taking on the larger enemy and the dog that is behind the line of soldiers.
Once the coast is clear enter crouch and sneak around the large enemy and position yourself on the staircase behind him so you can approach and backstab him. His attacks are strong but slow, so execute the normal cheese plan of backstabbing, or do some guard counters to break him down. Once he is dead we are free to explore the courtyard! Check the grounds as well as both of the wooden guard towers and you will find: Fire Arrow x12, a Wooden Greatshield, a Pike, Magic Grease, Golden Rune [1] [2] and [4], Furlcalling Finger Remedy, Mushroom x8, and Smoldering Butterfly x5. You will notice a path leading down to the main gate, but I would recommend just ignoring that until after you defeat the boss.
Check the corner near the doorway into the courtyard and you will see a cellar leading to a room with some rats, a Fireproof Dried Liver, and another Stonesword Key door. Use the other key we found earlier to open it up and loot the chests inside to get the Godslayer’s Seal and Godskin Prayerbook.
Near where the giant enemy was resting is a small room containing a special painting. Next head up the stairs behind the large enemy where you can find a Smithing Stone [1] and finally (finally!) the next Spot of Grace in a room at the top of the stairs.
advertisement
Liftside Chamber
From here we are within striking distance of the boss room, and in fact we can even take back way to get there. Pull the lever next to the elevator to call it down, then take it up to reach a high rampart that over looks the courtyard. Go through the door at the end of the path and you will find yourself in a long room populated by magic jar enemies, including one large jar warrior hiding in the back.
Try to draw out the large jar and deal with him first. As you may expect his attacks are strong and slow, so just stay out of range to bait out an attack, then run in for one or two attacks when he is vulnerable. The main attack you need to look out for is his spin which he winds up by turning his body slightly.
Kill off the smaller jars afterwards then look in the corner where the large jar was hiding to find two Cracked Pot. Look down the path and you will see it has been split in two with two higher paths and one leading down the middle. If you look down you will see another scarab, which you can kill to get the Ash of War: Stormcaller. Grab the Kukri x8 off the left high path, then drop back down and go through the door at the end of the room. Here you will find the boss door as well as another Spot of Grace. Activate the Spot of Grace and rest if you need, but it isn’t boss time just yet.
advertisement
Instead take the other path where you will see a giant and some soldiers waiting. Dealing with the giant is easy, but the soldiers can be pesky in this encounter. Try to draw them underneath him and it is possible that he will just kill them with his slam attack. Otherwise, try and bait the soldiers into the smaller hallway area the giant cannot get into. Once you have the giant in a one on one, stand in front of him until he starts up an attack, then run underneath him and strike the back of his legs. This will almost always cause him to miss his attack, allowing you some free hits. Just look out for his foot stomp which can deal big damage in an area of effect.
Once the enemies are defeated you can grab the Smithing Stone [2] from the end of the alleyway nearby, then loot the Golden Seed from under the tree up ahead. Look to the right and you will see an item sitting behind the line of stormhawks. Carefully walk up and grab it without alerting the hawks to get the Golden Rune [2]. Then you can kill them to access the staircase they are guarding and reach the Smithing Stone [2] that is atop them.
Finally go into the room near the tree and meet a warrior named Nepheli Loux who wants to help you defeat Godrick, as well as a Smithing Stone [1]. Turn around and head back to the jar warrior room.
Climb up onto the wooden awning where you found the Kukri earlier and use it to jump to the thin railing that runs along the wall. Follow this ledge to reach some open windows on the wall.
advertisement
Go through and windows and head forward where you will encounter a powerful knight and his stormhawk. Try and deal with the hawk first to simplify the encounter, then deal with the knight with the usual combo of sneaky strikes and guard counters. Grab the Lump of Flesh that they were guarding and head back towards the windows.
Go through the door near the windows and up the stairs inside to reach another wooden platform above the jar warrior room. Cross the gap to the right of the door to get a Smithing Stone [2], then jump back and take the path up where you can loot a Golden Rune [2] and a Smithing Stone [1]. Go through the nearby door and take the stairs down, but beware the group of enemies resting on the platform below. Thankfuilly they are all weak guards, so clear them out then grab the Manor Towershield from under the staircase, then exit out onto the balcony.
Here you will find a Smithing Stone [3] and a message on the ground hinting that you should look down. You will see a series of platforms you can drop onto, so follow them all the way to the bottom where you will find an accessible tower and a Golden Rune [5]. Pass through the tower to find yourself on a balcony overlooking a deep pit. grab the Rainbow Stone x5, then go forward and up the stairs to reach a door that leads back to the Spot of Grace.
With that shortcut unlocked it is time to venture into that pit. Go back to the corpse where you got the rainbow stone and you will see a small awning you can use to reach the platform on the far side of the room. Jump across and go into the tunnel where you can find an Arteria Leaf, and a bat waiting in ambush. Drop down again where two more bats await. You can deal with them in mostly the same way you deal with the stormhawks, guard counters are always effective! Use the nearby rafters as a bridge to reach the item on the other side, a Smithing Stone [2].
advertisement
Continue carefully dropping down until you reach the bottom of the room, where you will immediately find a Golden Rune [2]. Start walking down the path, careful not to get overwhelmed by the rats that are creeping around, including one powerful Large Rat who can drop a Rune Arc. Past the rats on the left is Poisonbloom x3, and on the other side of the wall is another scarab you can kill for the spell Rancorcall.
WARNING: If you drop down the ledge at the end of this path you will enter into a mini-boss battle against a powerful tree spirit. If you have a lot of Runes you don’t want to lose teleport back to the Spot of Grace now and come back once you have spent them.
As stated by the warning, if you drop down into the swampy area below you will trigger a mini-boss that may be too powerful for you at this point. It is a massive snake-like creature with large sweeping attacks and powerful magic. However with a 100 physical block shield and a little determination, it is very possible. The enemy telegraphs its attacks pretty obviously, so manage your stamina and be ready to block or dodge roll when you see it move to attack. You want to stand somewhere around its belly area to avoid its forward smashing attacks and get hits in safely. When it spins around and charges at you with its mouth open you NEED to dodge away or else get caught in its mouth and take on massive damage. When the monster glows gold it is entering its second phase with a magic explosion, so back off to avoid the area damage.
If you manage to defeat the spirit you will be rewarded with a Golden Seed and some loot including a Stonesword Key, Throwing Dagger x8, and Smoldering Butterfly x3. Continue up the path to find a massive skull and one more item, the Prince of Death’s Pustule. From here you can access a ladder that will take you back to the dining hall area. With that in the books it is offically boss time. Teleport to the Secluded Cell Site of Grace and get ready.
This is a good moment to take stock of your current supplies. You should have a number of Smithing Stones and a bunch of new gear, so consider taking a trip back to the blacksmith to upgrade before taking on this fight. A +3 weapon and 100% physical block shield are recommended
Godrick the Grafted Boss Fight
advertisement
Godrick the Grafted is the first of the Main Bosses you will face in Elden Ring. He is distinguished by his twisted body which is made up of his servants limbs that he has grafted onto his own broken body. Similar to the Grafted Scion, many of Godrick’s attacks are multi-part and multi-hit and he has some erratic movements that might catch you off guard. At half health he will graft a dragon head onto his arm that opens up some new attacks and modifies others with fire damage, so be careful if your shield does not have high fire resist.
Loading
Thankfully in both form’s Godrick’s attacks are highly telegraphed, highly punishable, and he is generally slow moving which leads to a fairly easy fight once you’ve clocked the patterns. Additionally, you can summon Nepheli just outside the boss door if you need a little extra help (or a distraction). Below is our general boss guide for besting Godrick:
In general you can stick relatively close to Godrick if you are a melee attacker. His axe sweeps seem to have the biggest hitbox at the ends, so if you simply dodge roll toward Godrick you will generally avoid them and end up in a good spot to punish. Just remember that most of these are combo attacks, so be sure you manage your stamina and wait for the final attack if you plan to guard counter. If you are really unsure you can stay further out of range and wait for one of his slow overhead slam attacks which are easy to punish.
Another easy to see move is his aerial slam, which he telegraphs by grabbing the head of his axe with his off hand and leaping into the air. Dodge as he comes down then get in a 2-4 hit combo while he is standing back up. Another easy to punish move is his rolling slam. He will whip up the air around himself and then roll on the ground before leaping up into the air and slamming into the ground. Simply walk toward him while he is in the air and he will sail right over you, letting you get in some back slashes while he is recovering.
With Nepheli’s help you can easily stagger Godrick and get a critical attack in. Let her become his focus, then get in a bunch of side and back strikes while he is trying to strike her. Just pay close attention to his movements because he can change focus back to you in an instant.
With his dragon hand on there are only a few more moves to pay attention to. The most dangerous is probably the dragon breath which has a large area of effect and can hit multiple times. He telegraphs this one by raising the dragon head into the air as its mouth starts to leak flames. Try to move to the side or back to avoid the brunt of the blast. The other is the fiery rock attack which he telegraphs by dragging the dragon head across the ground in a circle before blasting fiery rocks into the air. You can run toward him and let the rocks sail over your head, or simply run away and heal up while the rocks burn out on the ground.
If you are feeling extra confident you can equip a Gold-Pickled Fowl Foot and use it before killing Godrick to rake in some extra Runes. Defeating him will get you Godrick’s Great Rune and the Remembrance of the Grafted (See our guide on how to duplicate Remembrances).
advertisement
You can rest at the new Spot of Grace here to level up, then speak with the NPC from earlier who is now stomping on Godrick’s grave. Proceed up the path and enter the temple where you can find Godrick’s throne. Go through the door to the right of the throne to reach a separate chamber where you can speak to a ghost who laments his failed service to some maiden. Grab the Shabriri Grape next to him, then run to the temple exit which spits you out into the next area, Liurnia of the Lakes.
Stormveil Castle Cleanup – How to Activate Godrick’s Great Rune
Finally it is time to gather the last of the loot in this castle, and activate Godrick’s Great Rune. Teleport back to the Liftside Chamber Spot of Grace and head back to the heavily guarded main gate path that is accessible via the courtyard. This path is slightly easier to clear approached from the back, but it can still be a major pain. Use stealth whenever possible, and do not aggro too many enemies at once. Don’t be afraid to back off if you need some extra space or need a moment to heal.
When you reach the second set of stairs remember that this area is heavily guarded by two turrets and multiple firebomb throwing soldiers. If you have a ranged attack you can pick off the turret soldiers from afar, but otherwise just run as fast as you can to the bottom where you can escape their range. From here you can scale the rocks that are piled up against the wall, then jump over the gap to reach the posts where the turrets are located and kill their operators and find the Arbalest.
Continue into the next large open area where you will encounter another large group of soldiers. Similar to the courtyard you want to draw them out slowly and be sure NOT to aggro the large lion enemy waiting in the corner. if you look down the path you can see the front gate and the final Spot of Grace from here, but don’t run toward it because there are more turrets hiding around the corner ready to blow you away. Instead sneak along the right side wall where they can’t see you, then climb up onto their platform and kill off all the turret operators, plus loot the Smithing Stone [2] and Smithing Stone [1] on their platform.
advertisement
Once all the soldiers are dead you can finally loot all the items at the gate ( Ballista Bolt x3, Golden Rune [1], and Golden Rune [2] ). Next, go into the door on the hillside next to the front gate to find the Spot of Grace, a Golden Rune [5], and the mechanism that opens the gate as well. Go through the door behind the Spot of Grace to find a Commoner’s Simple Garb.
With the Spot of Grace activated we can now go back and face off against that fearsome lion. This enemy is both powerful and agile so it can be hard to find your spot to strike it or heal. Your best bet is to throw up your shield and wait out one of its slow arm-blade attacks, then get in one or two attacks during the recovery state. Do not try and punish the quicker bite or off-claw swipes as they are usually followed up with another attack. It is kind of cheesy, but if you fight the lion on the nearby staircase its attacks will occasionally go right over your head.
Defeat it to get a Somber Smithing Stone [1], Beast Blood, and Old Fang x2. Now you can progress through the large doorway it was guarding and reach the final Spot of Grace for this dungeon as well as the Boltdrake Talisman. Proceed down the path and onto the long bridge that leads to the Divine Tower in the distance. Unsurprisingly, this bridge is guarded by some more powerful enemies. There are three of these mechanical giants in total, and the good news is that they can hit each other, so try and position yourself between the melee giants and the ranged giant so that they may get struck by incoming arrows. Otherwise, deal with them how you would a normal giant: bait out an attack, then strike their ankles while they are preoccupied.
Once all three giants are dead you can grab the loot on the bridge. There is a Warming Stone sitting on a smashed in section near the middle of the bridge, and then a Soft Cotton and Ash-of-War Scarab waiting on end of the bridge behind the teleporter. However, I would take the teleporter first and go into the Divine Tower and come back before dropping down to collect that loot because scaling up the debris is annoying.
Use the teleporter to be taken across the bridge to the Divine Tower in the distance. The door will not be unlocked until you have defeated Godrick. With the Rune in hand, open the door and take the elevator up to the top where you can activate a Spot of Grace get the true Godrick’s Great Rune. This can be equipped at a Spot of Grace to access its power using a Rune Arc. Similar to the Ember in Dark Souls III, using a Rune Arc will give you the Great Rune buff until you die.
advertisement
What to Do After Defeating Godrick
Now that you’ve cleared all of Stormveil Castle, there are many directions you can take to continue your adventure:
We highly recommend exploring the rest of Limgrave if you haven’t already to find every mini dungeon, world boss, and secret in the entire region.
See Our Region Overview Guides for West Limgrave, East Limgrave, and the Weeping Peninsula
You may also want to explore the Siofra River Well located in East Limgrave’s Mistwood area, as the underground area is much larger than a dungeon, but presents a good and fairly linear challenge with a tough summonable boss.
Farther to the East lies the region of Caelid, but newer players may find the area incredibly difficult and unforgiving with lots of large aggressive beats and poisonous areas.
Therefore, we recommend journeying North instead to the region of Liurnia. It can be reached either through Godrick’s throne room, or by a secret path along the cliffs northeast of Stormveil Castle, below a broken bridge. Liurnia is the home of the second Legacy Dungeon – The Academy of Raya Lucaria, and boasts a very large region comprised of a large central flooded lake and two large ridgelines bordering the swamp. There are many more dungeons and points of interest here that should provide a bit more challenge than Limgrave, and is a natural progression point.
advertisement
See Our Region Overview Guides for East Liurnia and North Liurnia, as well as the guide for entering and beating The Academy of Raya Lucaria.
Was this guide helpful? Leave feedback
Elden Ring Best Recommended Route & Boss Order According To Level
Elden Ring fans are wondering what is the best recommended route for the game is, along with the boss order to ensure that they don’t miss out on any important things.
MORE: Why You Should Kill Gatekeeper Gostoc in Elden Ring
If you are wondering what way you should progress the game in Elden Ring, then here is the best route you should be taking in the game.
Elden Ring Best Recommended Route & Boss Order According To Level
West Limgrave – The recommended level for this area is between 1-10. The recommended weapon level is 0 to +1.
East Limgrave & Mistwood- The recommended level for this area is between 5-10. The recommended weapon level is 1 to +2.
Weeping Peninsula- The recommended level for this area is between 1-20. The recommended weapon level is 3+.
Roundtable Hold
Stormveil Castle- The recommended level for this area is between 30-40. The recommended weapon level is +3 to +4.
Liurnia of the Lakes South- The recommended level for this area is between 40-50. The recommended weapon level is +3 to +4.
Raya Lucaria Academy- The recommended level for this area is between 50-60. The recommended weapon level is +4 to +5.
Liurnia of the Lakes East- The recommended level for this area is between 50-60. The recommended weapon level is +4 to +5.
Ainsel River (Underground)- The recommended level for this area is between 50-60. The recommended weapon level is +4 to +6
Liurnia of the Lakes West- The recommended level for this area is between 60-70. The recommended weapon level is +8 to +12
Siofra River (Underground)- The recommended level for this area is 60+. The recommended weapon level is +8 to +12
Caelid South- The recommended level for this area is 60+. The recommended weapon level is +8 to +12
Nokron, Eternal City & Siofra Aqueducts- The recommended level for this area is 70+. The recommended weapon level is +15 to +20
Deeprot Depths- Eternal City & Siofra Aqueducts- The recommended level for this area is 70+. The recommended weapon level is +20 to +25
Lake of Rot, Nokstella & Liurnia West Special- The recommended level for this area isThe recommended level for this area is 80+. The recommended weapon level is +20 to +25
Mt Gelmir- The recommended level for this area is 80+. The recommended weapon level is +20 to +25
Leyndell, Royal Capital- The recommended level for this area is 80+. The recommended weapon level is +20 to +25
Forbidden Lands- The recommended level for this area is 90+. The recommended weapon level is +20 to +25
Mountaintops of the Giants- The recommended level for this area is 90+. The recommended weapon level is +20 to +25
Consecrated Snowfield- The recommended level for this area is 90+. The recommended weapon level is +20 to +25
Mohgwyn Castle- The recommended level for this area is between 100+. The recommended weapon level is +20 to +25
Miqeulla’s Halligtree-The recommended level for this area is 100+. The recommended weapon level is +20 to +25
Crumbling Farum Azula- The recommended level for this area is 100+. The recommended weapon level is +20 to +25
City of Ash- The recommended level for this area is 100+. The recommended weapon level is +20 to +25
Sewers- The recommended level for this area is 100+. The recommended weapon level is +20 to +25
DUALSHOCKERS VIDEO OF THE DAY
Finally, here is the boss order. Do note that these are the main bosses and you can defeat others too if you want.
So you have finished reading the chateau de stormveil elden ring topic article, if you find this article useful, please share it. Thank you very much. See more: Elden Ring map, Stormveil castle walkthrough, Stormveil Castle, Elden Ring Godrick lore, Incantation elden ring, Elden Ring Stormveil Castle, Stormcaller elden ring, Locked door in Stormveil Castle