
You are looking for information, articles, knowledge about the topic nail salons open on sunday near me monkey island 2 soluce on Google, you do not find the information you need! Here are the best content compiled and compiled by the https://toplist.tfvp.org team, along with other related topics such as: monkey island 2 soluce monkey island 2 mirror, monkey island 2 cottage trapdoor, monkey island 2 elevator, monkey island 2 steam achievements, monkey island 2 library, monkey island 2 tunnels, monkey island 2 telescope, monkey island 2 spitting contest
[su_youtube_advanced url=”https://www.youtube.com/watch?v=KTiGsYvr1vc”]
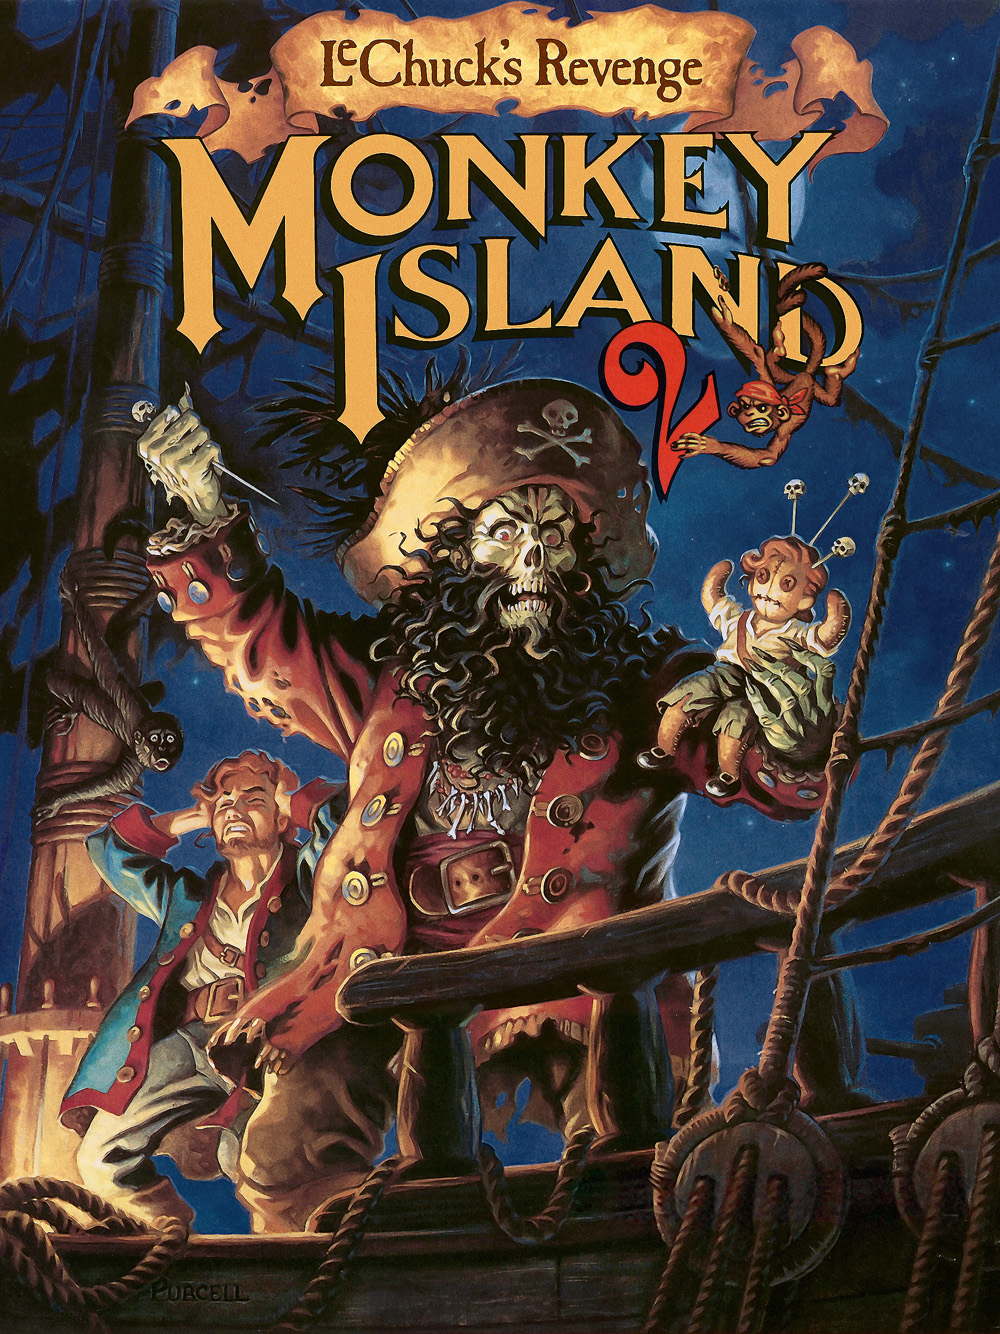
Steam Community :: Guide :: Monkey Island 2 LeChuck’s Revenge: Special Edition Walkthrough
- Article author: steamcommunity.com
- Reviews from users: 40573
 Ratings
 - Top rated: 3.2
- Lowest rated: 1
- Summary of article content: Articles about Steam Community :: Guide :: Monkey Island 2 LeChuck’s Revenge: Special Edition Walkthrough You start on the brge. Go left or right, either way, Largo will shake you down and steal your money. After he leaves, bail to the right … …
- Most searched keywords: Whether you are looking for Steam Community :: Guide :: Monkey Island 2 LeChuck’s Revenge: Special Edition Walkthrough You start on the brge. Go left or right, either way, Largo will shake you down and steal your money. After he leaves, bail to the right … Full walkthrough….
- Table of Contents:

Walkthrough for Monkey Island 2: LeChuck’s Revenge | Adventure Gamers
- Article author: adventuregamers.com
- Reviews from users: 28141 Ratings
- Top rated: 4.6
- Lowest rated: 1
- Summary of article content: Articles about Walkthrough for Monkey Island 2: LeChuck’s Revenge | Adventure Gamers Walk to the right ship. Open the box. Use the stick with the box. Use the cheese squigglies with the box. Use the string with the stick. Walk to the other end … …
- Most searched keywords: Whether you are looking for Walkthrough for Monkey Island 2: LeChuck’s Revenge | Adventure Gamers Walk to the right ship. Open the box. Use the stick with the box. Use the cheese squigglies with the box. Use the string with the stick. Walk to the other end … Stuck in Monkey Island 2: LeChuck’s Revenge, need a guide or a hint? This walkthrough for Monkey Island 2: LeChuck’s Revenge answers all!
- Table of Contents:
Contributed by
Game information
Players of this game also enjoyed these adventure games
Adventure games by LucasArts
Players of this game also enjoyed these adventure games
Soluce Monkey Island 2 : LeChuck’s Revenge – Soluce Monkey Island 2 : LeChuck’s Revenge : Special Edition | SuperSoluce
- Article author: www.supersoluce.com
- Reviews from users: 23306 Ratings
- Top rated: 4.2
- Lowest rated: 1
- Summary of article content: Articles about Soluce Monkey Island 2 : LeChuck’s Revenge – Soluce Monkey Island 2 : LeChuck’s Revenge : Special Edition | SuperSoluce Soluce Monkey Island 2 Special edition : Ohé moussaillon ! Prêt pour la plus grande aventure de tous les temps en compagnie du grand … …
- Most searched keywords: Whether you are looking for Soluce Monkey Island 2 : LeChuck’s Revenge – Soluce Monkey Island 2 : LeChuck’s Revenge : Special Edition | SuperSoluce Soluce Monkey Island 2 Special edition : Ohé moussaillon ! Prêt pour la plus grande aventure de tous les temps en compagnie du grand …
- Table of Contents:
Sommaire de la soluce
Partie 1 L’embargo de Largo
Partie 2 Quatre morceaux de carte
Partie 3 La forteresse de Lechuck
Partie 4 L’île Dinky
Les succès
Il parait que ça cartonne
Soluce Witcher 3 Wild Hunt
Soluce Metal Gear Solid V The Phantom Pain
Soluce Assassin’s Creed Unity
Soluce Batman Arkham Knight
Soluce Skyrim
Pour ne rien rater inscris-toi a notre NEWSLETTER

Monkey Island 2: LeChuck’s Revenge – Gamer Walkthroughs
- Article author: gamerwalkthroughs.com
- Reviews from users: 495 Ratings
- Top rated: 3.9
- Lowest rated: 1
- Summary of article content: Articles about Monkey Island 2: LeChuck’s Revenge – Gamer Walkthroughs Monkey Island 2 Walkthrough. Part 1: The Largo Embargo. You begin just outse the town of Woodtick. If you try to leave … …
- Most searched keywords: Whether you are looking for Monkey Island 2: LeChuck’s Revenge – Gamer Walkthroughs Monkey Island 2 Walkthrough. Part 1: The Largo Embargo. You begin just outse the town of Woodtick. If you try to leave …
- Table of Contents:
Soluce complète de Monkey Island 2 : LeChuck’s Revenge – Solution | MonkeyIsland.fr
- Article author: www.monkeyisland.fr
- Reviews from users: 40317 Ratings
- Top rated: 4.8
- Lowest rated: 1
- Summary of article content: Articles about Soluce complète de Monkey Island 2 : LeChuck’s Revenge – Solution | MonkeyIsland.fr Soluce complète de Monkey Island 2 : LeChuck’s Revenge – Solution complète, astuces. …
- Most searched keywords: Whether you are looking for Soluce complète de Monkey Island 2 : LeChuck’s Revenge – Solution | MonkeyIsland.fr Soluce complète de Monkey Island 2 : LeChuck’s Revenge – Solution complète, astuces. Soluce complète de Monkey Island 2 : LeChuck’s Revenge – Solution complète, astuces
- Table of Contents:
Soluce complète pour terminer le jeu (Soluce) – Gamekult
- Article author: www.gamekult.com
- Reviews from users: 27048 Ratings
- Top rated: 3.4
- Lowest rated: 1
- Summary of article content: Articles about Soluce complète pour terminer le jeu (Soluce) – Gamekult Gamekult vous propose le gue complet de Monkey Island 2 : LeChuck’s Revenge – Special Edition … Soluce complète pour terminer le jeu. …
- Most searched keywords: Whether you are looking for Soluce complète pour terminer le jeu (Soluce) – Gamekult Gamekult vous propose le gue complet de Monkey Island 2 : LeChuck’s Revenge – Special Edition … Soluce complète pour terminer le jeu. Du nerf moussaillon, Guybrush Threepwood, pirate redoutable, est de retour dans le second volet de la série Monkey Island et part à la recherche du fameux trésor de…
- Table of Contents:
Monkey Island 2 Special Edition : The Walkthrough King
- Article author: www.walkthroughking.com
- Reviews from users: 27229 Ratings
- Top rated: 4.1
- Lowest rated: 1
- Summary of article content: Articles about Monkey Island 2 Special Edition : The Walkthrough King Take the crypt key from behind the counter. Go over to the spit contest (to the right of Stan’s). Use the ship horn to get r of the spitmaster, then quickly … …
- Most searched keywords: Whether you are looking for Monkey Island 2 Special Edition : The Walkthrough King Take the crypt key from behind the counter. Go over to the spit contest (to the right of Stan’s). Use the ship horn to get r of the spitmaster, then quickly … An original walkthrough for the game Monkey Island 2 Special Edition, brought to you exclusively by The Walkthrough King
- Table of Contents:
Part 1 The Largo Embargo
Part 2 The Four Pieces
Part 3 LeChuck’s Fortress
Part 4 Dinky Island
Extra Achievements
Monkey Island 2 : LeChuck’s Revenge : Astuces et guides – jeuxvideo.com
- Article author: www.jeuxvideo.com
- Reviews from users: 38128 Ratings
- Top rated: 4.5
- Lowest rated: 1
- Summary of article content: Articles about Monkey Island 2 : LeChuck’s Revenge : Astuces et guides – jeuxvideo.com Soluce de Monkey Island 2 : LeChuck’s Revenge. Sorti en 1991, ce jeu est de type Aventure et Point’n Click. Il a été développé ou édité par LucasArts. …
- Most searched keywords: Whether you are looking for Monkey Island 2 : LeChuck’s Revenge : Astuces et guides – jeuxvideo.com Soluce de Monkey Island 2 : LeChuck’s Revenge. Sorti en 1991, ce jeu est de type Aventure et Point’n Click. Il a été développé ou édité par LucasArts. Vous débutez sur le jeu Monkey Island 2 : LeChuck’s Revenge ? Venez découvrir tout ce qu’il faut savoir sur ce jeu grâce à toutes les soluces que propose notre wiki.
- Table of Contents:
PC
PC – PlayStation 3 – Xbox 360 – Mac
PlayStation 3
Xbox 360
Amiga
Mac

See more articles in the same category here: 17+ tips for you.
Steam Community :: Guide :: Monkey Island 2 LeChuck’s Revenge: Special Edition Walkthrough
Part Two: Four Map Pieces (continue)
On your way to the mansion you meet a chick guard dressed as LeChuck. Have a conversation with her, put your costume on, then proceed to the mansion. When you get to the mansion, before you enter, notice there is a path running to the back of the mansion. There are actually two paths, one heading left, and one right. Take either path and you arrive in back. There is a back door which leads to the kitchen and there are some garbage cans. Select PUSH GARBAGE CANS. You make a loud noise with the cans and the cook get’s way pissed and comes out yelling at you. Run away from the cook and he will chase after you. Run to the path and follow it to the front of the mansion.Keep running past the front of the mansion to the opposite path and follow it around the other side of the mansion towards the rear again. You will have made a complete circle around the mansion, the cook has been chasing you all the way. Quickly enter the kitchen door before the cook catches you. Inside the kitchen you see a pot of fish. Take one of the fish and leave the kitchen. Let the cook yell some more and ignore him and he will go back in the kitchen. Now take one of the paths back to the front of the mansion and enter the mansion via the front door. All of the guests will ignore you so don’t waste time talking to them. Look to the far left side of the room, there is a painting there. You see a piece of the map you need stuck on the corner of the painting. PICK UP PIECE OF MAP. Now leave the mansion. You will get stopped by the gardener and the dog and taken back into the mansion and taken upstairs to see Gov. Marley. Marley will be pissed and the two of you will have a conversation. Select all of the polite, groveling dialogue selections and you will be ok. Don’t piss her off more. She will end up taking the map and tossing it out the window. Leave the room, head on downstairs and out the front door. Try to pick up the map piece and it will float away and then get carried by the wind and finally land on the side of the cliff. Go back inside the mansion. Go upstairs and into Gov. Marley’s room. She’s gone now. Notice the oar mounted above her bed. PICK UP OAR. Now leave, go downstairs and out the door. The dog will bark and you tell him to shut the hell up. When the dog shuts up, select PICK UP DOG, and you will take the dog Guybrush and stuff him in your pocket. Now leave to the right, heading down the path away from the mansion and you will arrive back at the overhead view of the map. Select Dread’s ship from here and when you get to the ship have him take you back to PHATT Island.Back on Phatt Island take the path over to the pier with the old fishing man. Select GIVE FISH TO MAN. You will have a conversation and he will admit you caught the biggest fish and you win. Your prize is his fishing pole so he gives you his pole and leaves. Go back to Dread’s Ship and have him take your ass back to BOOTY Island.Back on Booty Island go down the path to the left past the antique shop, behind the old man with the cannon and you’ll enter the overhead view map. Select the Cliff at the bottom of the map. When you arrive there, select WALK TO SIDE OF CLIFF. You will get a view of the map on the side of the cliff. Select USE FISHING POLE WITH PIECE OF MAP. You will cast your line, hook the map and start reeling it up. When you almost have the map, a bird flees by and takes the map from you and flees to the BIG TREE. Leave the cliff area and you’ll be back on the overhead view of the map of the island. From here, select the big tree and walk to it.When you arrive at the big tree, you will see a bunch of holes in the tree. The first hole has a plank stuck into it that will act like a step. Take the oar from your inventory and stick it into the second hole. ie. USE OAR WITH HOLE. Now step up on the big tree root from the left. Now walk to the plank, now walk to the oar. When you step on the oar it will break and you will fall and hit your head and become unconscious. You will have a dream then you will wake up again. PICK UP THE BROKEN OAR and leave this scene, back to the overhead map. From here select Dread’s ship. When you get to the ship, have him take you back to SCABB Island.Head on over to the left and enter the first door you see, which will be the Woodsmith’s workshop. Select GIVE BROKEN OAR TO WOODSMITH. The Woodsmith will fix your oar, reinforce it, and give it back to you. Leave the workshop. Walk left and head on over to Wally the Cartographer’s pad.At Wally’s all you need to do is replace his monocle with something he can see with. Give him the lighthouse lens you got from the model lighthouse at the library. Select GIVE LIGHTHOUSE LENS TO WALLY. Now leave Wally’s abode and head on across the way to the Bloody Lip Bar.When you get down the hatch to the Bloody Lip Bar, order some drinks. The barkeep dude will have a variety of specialty drinks that have colorful names. Order one of each drink. The Barkeeper will give you a free crazy straw. You will USE CRAZY STRAW WITH DRINKS later in the game in order to drink them. Now ask the barkeep for some near-grog. He’ll tell you that Kate bought all the near grog. You’ll need to know about this later. Now look over at Jojo the monkey. See his metronome? (That ticking thing on top of the piano). Place the banana on the metronome ie. USE BANANA ON METRONOME. Jojo becomes dazed while looking at the banana. Select PICK UP JOJO… you pick the monkey up and stuff him in your pocket. Now leave this scene, head back up the stairs to the surface.Now proceed left and up to where the laundry dude and the pirates are. The pirates are all kicking back and sleeping. You need to get a few things from the Woodsmith’s workshop, so the goal here is to somehow get the Woodsmith to leave his shop… Perhaps if you created an incident where an emergency Woodsmith housecall would be necessary you could accomplish your task. Any ideas? Take a look at ‘ole pegleg the pirate… see his peg leg? Select USE SAW ON PEGLEG. You saw his peg leg off! haha. Now leave this area. The pegleg dude wakes up, notices his peg leg is gone and starts screaming. From here go to the Woodsmith’s Workshop.When you get to the workshop, notice that the Woodsmith is gone. He went out to go fix the peg leg you sawed off. Now that he’s gone you can take a few things that you will need later. Take the Woodsmith’s hammer from the wall, then take some nails. That’s all you’ll need from here so leave this area and go back down the path to the right till you get to the overhead map. Now select Dread’s ship and have him take you back to BOOTY Island.Back on Booty Island head on over to Stan’s and go inside. Stan is a high pressure salesman and one of the most hilarious characters I’ve seen in an adventure game in a very long time. Some of the things he will say to sell you his things are incredibly funny. So ask Stan to see a coffin and enjoy some of the things he says during the conversation. At one point he hops inside the coffin to show you how roomy it is. At this point select CLOSE COFFIN, and you will close the coffin door on top of him. Stan should give you a complimentary Stan’s Used Coffin’s promotional hanky sometime at this point of the game. Now, quickly select USE NAILS ON COFFIN. If you do this quickly enough you will hammer the coffin lid down with the nails and seal it shut. If you aren’t quick enough Stan jumps out before you get the chance, but you can get him to go back in just by talking to him and asking him to show you the coffin again. After Stan is nailed shut into the coffin he really starts saying some damn funny things. For a really good laugh ring the bell on the counter while Stan is sealed in the coffin… OK now do what you came to do, take the CRYPT KEY. It’s on the back wall behind the counter. You can break the cash register open with the hammer if you want, but it’s empty so don’t bother. Leave Stan’s store (poor Stan).
Walkthrough for Monkey Island 2: LeChuck’s Revenge
Walkthrough for Monkey Island 2: LeChuck’s Revenge
=============================================================================== FAQ/Walkthrough for MONKEY ISLAND 2: LECHUCK’S REVENGE =============================================================================== GUIDE INFORMATION —————– Author: Tom Hayes E-mail: thayesguides(at)gmail(dot)com System: PC Updated: 19th June, 2008 Version: 1.1 CONTENTS ——– 1. Introduction 2. Walkthrough 2.1. Part I 2.2. Part II 2.3. Part III 2.4. Part IV 3. Item List 2.1. Part I 2.2. Part II 2.3. Part III 2.4. Part IV 4. Copyright information VERSION HISTORY ————— 1.1: 19th June, 2008 (Format update) 1.0: 21st September, 2002 (First version) =============================================================================== 1. Introduction =============================================================================== Monkey Island 2: LeChuck’s Revenge, takes place shortly after the first game. The game starts in a place called Woodtick on Scabb Island. Guybrush is visiting Scabb Island to find out information on the legendary hidden treasure known as Big Whoop. His travels eventually lead to him to a battle with the ghost pirate LeChuck, and he finds out that Big Whoop is not quite the treasure he thought it would be. The game plays much like the original, with the same controls and graphics. The major difference is the difficulty, which has taken a huge step up. In the first game, the game could be played straight through with only a few puzzles that could cause any difficulty. In Monkey Island 2, there are many more puzzles, and they are far more complex than the first game. Another point worth mentioning is the size of the game. It’s huge: I’d estimate at least twice the size of the original. Fortunately, the game retains it’s good quality all the way through. Old characters like Stan and Elaine are back, and new charactersare introduced in most areas of the game. The characters are once again well thought out and funny, and are a welcome diversion from some of the more difficult puzzles. Overall, Monkey Island 2 is a superb sequel. =============================================================================== 2. Walkthrough =============================================================================== ——————————————————————————- 2.1. Part I: The Largo Embargo ——————————————————————————- WOODTICK ——– At the start of the game, walk right to the path and Largo will appear. Select any of the speech options when he talks to you, and he’ll leave with the treasure. Get the sign to get a shovel. Walk left along the walkway and go to the right ship. Attempt to get the bucket, and the pirates will talk to you. Say “Sorry, is this your bucket?” to get the bucket. Walk to the street. Walk to the path at the right side of the walkway to exit Woodtick. BEACH —– Get the stick. Walk left to the path. SWAMP —– Walk to the coffin and row right to the shack at the other side of the swamp. Inside the shack, get the string from the table. Walk over to the right side of the shack to find the fortune teller from the shop in the first Monkey Island game. When she talks to you, select the top speech option five times to get a voodoo shopping list. Walk to the coffin to exit the shack, and row left to the shore at the other side of the swamp. On the shore, use the bucket with the swamp to fill it with mud. Walk left to the path. CEMETERY ——– Walk to the graves on the hill at the back of the cemetery. Use the shovel on the left grave to get a bone. Walk to the cemetery. Walk left to the path. WOODTICK ——– Walk left along the walkway and go through the second door to enter the cartographer’s shop. Get the pile of paper to get some blank paper. When the cartographer puts his monocle on the desk, quickly get it. Exit the shop. Go to the hatch leading to the Bloody Lip Bar, but don’t go down the hatch. Instead, walk to the left window at the left side of the hatch to enter the kitchen. Get the knife from the table. Walk to the left window to exit the kitchen. Walk to the hatch to enter the Bloody Lip Bar. Talk to the barkeeper and say “How’s business?” Largo enters the bar and spits on the wall. After Largo has gone, use the paper with the spit dripping down wall. Go to the upper deck to exit the Bloody Lip Bar. Walk left along the walkway and go to the left ship. Use the knife with the rope on the alligator and the innkeeper will leave. Get the bowl to get cheese squigglies. Walk up the steps at the left side of the ship and enter the cabin. Get the toupee. Use the bucket o’ mud with the door. Use the dressing screen. Exit the cabin. Walk to the stairway to exit the ship. Walk to the right ship. Open the box. Use the stick with the box. Use the cheese squigglies with the box. Use the string with the stick. Walk to the other end of the string. When the rat starts eating the cheese squigglies, pull the string. Open the box and get the rat. Walk to the street. Walk to the left ship. Walk up the steps at the left side of the ship and enter the cabin. Close the door. Get the laundry claim ticket. Open the door and exit the cabin. Walk to the stairway to exit the ship. Walk to the right ship. Give the laundry claim ticket to the laundry guy to get the pearly-white bra. Walk to the street. Walk near the hatch leading to the Bloody Lip Bar, and walk to the left window to enter the kitchen. Use the captured rat with the vichyssoise on top of the stove. Walk to the left window to exit the kitchen. Walk to the hatch to enter the Bloody Lip Bar. Talk to the barkeeper and say “Hey… Ah… How’s the stew tonight?” After the cook has been fired and the barkeeper asks if you’d like a job, say “Sure, I’ll give it a shot.” Walk to the left window to exit the kitchen. Walk to the path at the far right side of the walkway to exit Woodtick. SWAMP —– Walk to the coffin and row right to the shack at the other side of the swamp. Walk over to the right side of the shack and the fortune teller will talk to you. Say “About that voodoo doll…” Select the top speech options to give her the four ingredients. Walk to the coffin to exit the shack, and row left to the shore at the other side of the swamp. Walk left to the path. WOODTICK ——– Walk left along the walkway and go to the left ship. Walk up the steps at the left side of the ship and enter the cabin. When Largo talks to you, use the pins in the voodoo doll. After the cutscene, Guybrush will return to the fortune teller at the swamp. SWAMP —– Select any of the speech options when the fortune teller talks to you, and she’ll give you a book on the Big Whoop. Walk to the coffin to exit the shack, and row left to the shore at the other side of the swamp. On the shore, walk left to the path. PENINSULA ——— Walk to the houseboat. Give the monocle to Captain Dredd. Say “I need to charter a ship.” ——————————————————————————- 2.2. Part II: Four Map Pieces ——————————————————————————- SHIP —- Get the parrot chow. Walk to the door to enter the ship. When Captain Dredd asks you where you want to go, say “I don’t know, what are my choices?” On the map, select Phatt Island. WHARF —– After arriving on Phatt Island, a guard will talk to you. Continue talking to the guard until he takes you to the mansion. After the cutscene, Guybrush will be in a cell. Get the rock hard mattress. Get the stick. Use the stick with the bone on the left. Get the bone. Give the bone to Walt, and he will drop a key. Get the small key. Use the small key in the door. Get the gorilla envelope. Get the manilla envelope. Open the gorilla envelope to find a banana and an organ. Open the manilla envelope to receive the rest of the inventory. Walk to the door on the right. Outside, go right and walk to the first alley on the left. After the guy has won the money, walk to the wharf. Walk to the second alley on the left. Open the slot on the door. Say “What’s the next winning number going to be?” You will then have to guess the password. When the guy’s hand comes out of the slot, ignore what he’s saying and watch how many fingers he holds up. Repeat this process three times. Say “What! You don’t remember me?” When he tells you the winning number, walk to the wharf. Walk to the first alley on the left. Talk to the dealer and say “I’d like to place a bet.” When he asks what number you want, select the number that was given by the guy in the second alley. When he asks you what prize you want, say “I’d love to have the INVITATION!” Walk to the wharf. Open the door to the library. Enter the library. Open the model lighthouse. Get the model lighthouse lens. Look at the card catalog. Click the CD drawer and select the top-left tab to find the book filed as Disaster. Say “Hmm. “Great Shipwrecks of Our Century”. I’ll have to remember that.” Click outside of the drawer. Click the PQR drawer and select the middle- left tab to find the book filed as Recipes, Voodoo. Say “Hmm. “The Joy of Hex.” I’ll have to remember that.”. Click outside the drawer. Select any of the drawers and pick a random book. Click outside the drawer. Click outside the card catalog. Walk right and talk to the librarian. Select any of the speech options and the librarian will talk to you. Say “I’m looking for a book.” When she asks you if you have a library card, say “No, how do I get one?” She’ll then ask you five questions. Select any of the speech options for the five questions, and she’ll give you a temporary library card. When she asks you what books you want, say “I’d like ‘The Joy of Hex’.” Say “Could you find ‘Great Shipwrecks of Our Century’?” When she asks you if there’s anything else, select the title of the random book you picked from the card catalog. Exit the library. Outside, go right and walk to the path. MANSION ——- Open the gate and walk down the path to the mansion. Open the door and enter the mansion. Talk to the guard and select any of the speech options. Say “Look behind you, a three-headed monkey!” When the guard has gone, walk up the stairs. Use the random book that you got from the card catalog with the book of Famous Pirate Quotations on top of Governor Phatt. Walk to the door. Exit the mansion. Walk to the path. On the map, select Dread’s ship. When he asks you where you want to go, select Booty Island. VILLE DE LA BOOTY —————– Open the door on the left and enter the antique shop. For every item that you get in the shop, say “OK. I’ll take it.” when the antique dealer talks to you. Get the ship’s horn above the parrot. Get the well-polished old saw from the barrel at the right side of the shop. Get the sign near the parrot. Use the parrot chow with the hook that was revealed when you bought the sign. Get the mirror. Exit the antique shop. Outside, walk right and enter the costume shop. In the costume shop, give the invitation to the shopkeeper and he’ll reveal the party costume. Get the dress. Walk left and exit the shop. Outside, walk right and talk to the woman in the big hat and say “Could I have one of those leaflets?” Say “I just remembered I’m late for a party.” Walk to the path on the left. GOVERNOR’S MANSION —————— On the way to the mansion, Guybrush will be stopped by a guard wearing a LeChuck costume. Say “I’m here for the Governor’s party.” Select the top two speech options to show the guard the costume and the invitation. After passing the small structure, walk right over the log bridge to arrive outside the mansion. Open the door and enter the mansion. Inside the mansion, get the map from the frame at the left side of the room. Exit the mansion. Walk to the grounds, and the gardener will take you up to the Governor’s room. When she talks to you, select the nice speech options. After the cutscene in which Elaine throws the map out of the window, walk back up the stairs to Elaine’s room. Get the oar above the divan. Walk to the door. Exit the mansion. Outside the mansion, walk to the map piece and it will float away to the cliff at the south side of the island. Walk to the mansion and get the dog. Walk to the side of the house. Use the garbage can, and then walk around the right side of the house to arrive the front of mansion. The cook will follow you, so continue right and go around the right side of the house to return to the back of the mansion. Walk to the door to enter the kitchen. Get a fish. Exit the kitchen. Walk around the right side of the house to return to the front of the mansion. Walk left to the grounds. Walk right to the woods. BIG TREE ——– Use the plank that’s already in the first hole of the big tree. Use the oar with the second hole in the tree. Walk onto the oar, and it will break. After the cutscene, get the broken oar. Walk to the path at either side of the area. On the map, select Dread’s ship. When he asks you where you want to go, select Scabb Island. WOODTICK ——– Walk to the first door on the right to enter the woodsmith’s shop. Give the broken oar to the woodsmith, and he will reinforce it. Exit the ship. Walk left along the walkway and go to the right ship. Use the well-polished old saw on the peg leg of the right pirate. Walk to the street. Walk to the hatch to enter the Bloody Lip Bar. Use the banana with the metronome on the piano. Get Jojo. Talk to the barkeeper and say “Grog, please.” Say “Will you accept a temporary library card?” Say “Yeah, I could really use it.” When he asks you what you want, say “I’ll have Yellow Beard’s Baby.” Say “Bartender, get me a drink.” Say “Mix me up a blue whale.” Stop talking to the barkeeper and walk to the upper deck to exit the bar. Walk up to the door on the right to enter the woodsmith’s shop. Get the hammer. Get the nails. Exit the shop. Walk to the path at the far right side of the walkway to exit Woodtick. On the map, select Dread’s ship. When he asks you where you want to go, select Phatt Island. WHARF —– Walk to the fisherman on the pier. Talk to the fisherman and say “I’m Guybrush Threepwood, a mighty fisherman.” Continue talking to the fisherman until he asks if you’d like to take a bet. Say “Sure, I’ll take your bet.” Continue talking to the fisherman until he tells you that he can catch a bigger fish than you, and then say “All right, it’s a bet.” Give the fish to the fisherman, and he’ll give you a fishing pole. Walk left and use Kate’s leaflet with the poster. Walk left to the path, and the guard will appear. After the cutscene, return to the left side of the wharf and enter the first door on the right. Use the small key in the cell door. Get the vanilla envelope. Walk to the door on the right. Walk to Dread’s ship. When he asks you where you want to go, select Booty Island. VILLE DE LA BOOTY —————– Walk right and open the door to Stan’s shop. Enter the shop. Say “I’m looking for a good used coffin.” Close the coffin. Use the hammer with the coffin. Get the crypt key. Exit the shop. Walk to the path on the right to arrive at the spit contest. Use the yellow drink with the blue drink to create a green drink. Use the crazy straw with the green drink. Use the ship’s horn, and the Spitmaster will leave. While he’s gone, quickly get the flag. When he returns, talk to the Spitmaster and select any of the top three speech options to choose a name. Watch the woman at the right side of the crowd. As soon as the wind starts blowing her scarf right, select “Ptooie!” After getting first place, the Spitmaster will give you a spit plaque. Walk right to the path. CLIFF —– Walk to the cliff side to see the map piece far below. Use the fishing pole with the map piece and a bird will take it to the big tree. Walk to the path. BIG TREE ——– Use the plank that’s already in the first hole of the big tree. Use the reinfoced oar with the next hole in the tree. Walk to the reinforced oar, and get the plank from the previous hole. Use the plank with the next hole in the tree. Walk to the plank, and get the reinforced oar from the previous hole. Use the reinforced oar with the next hole in the tree, and Guybrush will climb up to the top of the tree. At the top of the tree, get the telescope from the top-left hut. Enter the bottom-left hut. Use the dog with the pile of maps to get the first map piece. Exit the hut. Walk to the ground. Walk to the path at either side of the area. On the map, select Dread’s ship. When he asks you where you want to go, select Phatt Island. WATERFALL ——— Walk to the path at the top of the waterfall. Use Jojo with the pump, and the waterfall will stop. Walk to the path on the left. Walk to the newly discovered gaping hole. Walk left through the three doors to arrive on a beach at the other side of the tunnel. Walk up the path to the cottage. COTTAGE ——- Open the door and enter the cottage. When the man speaks to you, say “I’m looking for a map.” Say “I’m Guybrush Threepwood. Prepare to die.” When the man returns with the mug o’ grog, quickly pick it up and use it with the tree. In the inventory, open the vanilla envelope to get a bottle o’ near-grog. Use the bottle o’ near-grog with the empty grog mug. After the cutscene, use the mirror with the mirror frame. Open the shutters at the right side of the cottage. Exit the cottage. Use the telescope with the grotesque statue, and the light will shine on a brick in the cottage. Enter the cottage. Walk left and push the brick to fall down through the trap door. Get the second map piece from the skeleton in the bathtub. Walk to the hole to arrive on the beach. Walk up the path to the cottage. Walk to the path. On the map, select Dread’s ship. When he asks you where you want to go, select Booty Island. VILLE DE LA BOOTY —————– Walk to the door on the left to enter the antique shop. Give the spit plaque to antique dealer. Say “What do you mean? It’s worth a mint!” Say “That’s not just any lump of pus.” Select either of the top two options, and the antique dealer will give you 6,000 pieces o’ eight. Exit the antique shop. In the inventory look at the book Great Shipwrecks of Our Century to find out the location of the Mad Monkey. Remember the coordinates. Give the 6,000 pieces o’ eight to the woman in the big hat. When she asks if you’re ready to leave, say “Yeah, let’s blow this popsicle stand.” Select the coordinates on the map that were given in the book. Say “I’ll dive in and look for the sunken galleon.” After finding the Mad Monkey, get the monkey head at the right side of the ship. Use the anchor to return to the surface. After returning to Booty Island, walk left and enter the antique shop. Give the monkey head to the antique dealer, and he’ll give you the third map piece. Exit the antique shop. Walk to Dread’s ship. When he asks you where you want to go, select Scabb Island. CEMETERY ——– Use the crypt key in the crypt. Enter the crypt. In the inventory, look at the Famous Pirate Quotations, and Guybrush will read the quotes. Look at the coffins until you find the one with Rapp Scallions’s quote. Open the coffin. Get the ashes. Walk to the cemetery. Walk left to the path. SWAMP —– Walk to the coffin and row right to the shack at the other side of the swamp. Look at the middle jar on the bottom row to discover that it’s called Ash-2- life. Attempt to get the Ash-2-life, and the fortune teller will talk to you. Say “I’ll take it.” Walk to the coffin to exit the shack, and row left to the shore at the other side of the swamp. Walk left to the path. CEMETERY ——– Enter the crypt. Use the Ash-2-life on the coffin, and Rapp Scallion will talk to you. Say “You WERE killed, Rapp.” Continue talking to him until he says that he left the gas on in his restaurant. Say “I’ll check on the gas for you, Rapp.” Rapp will give you the key to the shack on the beach. Walk to the cemetery. Walk left to the path. BEACH —– Walk right and use the key in the door of the shack. Enter the shack. Use any of the four knobs on the oven to turn the gas off. Exit the shack. Walk left to the path. CEMETERY ——– Enter the crypt. Use the Ash-2-life on the coffin, and Rapp Scallion will talk to you. Say “You were right. The gas was on.” Rapp will give you the fourth map piece. Walk to the cemetery. Walk left to the path. WOODTICK ——– Walk left along the walkway and go through the second door to enter the cartographer’s shop. Give the model lighthouse lens to the cartographer. Give the map piece to the cartographer. Walk to the path at the far right side of the walkway to exit Woodtick. SWAMP —– Walk to the coffin and row right to the shack at the other side of the swamp. Walk over to the right side of the shack and the fortune teller will talk to you. Say “Wally sent me to pick up some love potion.” Walk to the coffin to exit the shack, and row left to the shore at the other side of the swamp. On the shore, use the crate. ——————————————————————————- 2.3. Part III: LeChuck’s Fortress ——————————————————————————- Walk up the stairs on the right and enter the passage. Walk to the back tunnel. Push the ugly bone things that have the bones in this order: – Head, Rib, Hip – Arm, Head, Rib – Leg, Hip, Arm – Arm, Head, Rib After passing through the four doors, you will arrive at a huge door. Open the huge door. Go through the doggie door. On the other side of the door, get the voodoo key near LeChuck’s voodoo throne. When LeChuck talks to you, select any of the speech options. After the cutscene, continue talking to LeChuck until he leaves. In the inventory, use the crazy straw with the green drink. Spit at the bottom of the shield on the right to put out the candle. In the dark, open the juju bag and use the matches to exit the fortress. ——————————————————————————- 2.4. Part IV: Dinky Island ——————————————————————————- BEACH —– After landing on the beach, click to stand up. Walk right and get the bottle from the ocean. Use the bottle with the rock at the left side of the still to break it. Get the martini glass near the still. Use the martini glass with the ocean. Use the glass o’ water with the still. Get the crowbar near the still. Open the barrel under the parrot to get a cracker. Give the cracker to the parrot. Walk left along the beach and enter the jungle. JUNGLE —— At the junction in the path, walk west twice to arrive in an area with a bag hanging from a tree. Use the broken bottle with the bag. Get the box. Go east three times to arrive at a pond. Get the rope on the box. Use the crowbar with the box. Get the dynamite. Walk east twice to arrive at a dinosaur, which the parrot will land on. In the inventory, use the glass o’ distilled water with the box of cracker mix to get two crackers. Give one of the crackers to the parrot. Walk north twice to arrive at a pile of rocks. Give the final cracker to the parrot. Walk east to the big X. On the beach, walk to the shortcut to return to the big X. Use the shovel on the big X. Use the matches with the dynamite. Use the lit dynamite with the hole in the ground. After the cutscene, the treasure chest will be nearby. In the inventory, use the rope with the crowbar. Use the crowbar ‘n’ rope with the twisted metal rods above. DEFEATING LECHUCK —————– After landing in the dark room, use the light switch near the middle of the room. When LeChuck talks to you, continue selecting any of the speech options until he uses the voodoo doll. After Guybrush gets transported to the next room in the hallway, walk left twice and get the ticket from the smashed-up treasure chest. Walk east four times and walk to the door to enter the first aid room. Getthe remains of the right skeleton to get a skull. Open the medicinal drawer at the right side of the room and get the hypodermic syringe. Open the trash can at the right side of the room. Get the stuff in trash can to get a pair of surgical gloves. Exit the room. Walk left, and then walk to the door. Open the bottom box and get the doll. Open the middle box and get the root beer. Open the top-left box and get the balloon. Exit the room. Walk left, and then walk to the door to enter a room with a broken grog machine. Use the coin return on the grog machine, and a coin will fall out. When LeChuck bends down to get the coin, quickly use the clean, white hankie on LeChuck. LeChuck will transport Guybrush outside the room. Walk to the door to return to the room with the grog machine. Use the balloon with the helium tank. Use both surgical gloves on the helium tank. When LeChuck bends down to get the coin, quickly get his underwear. After he transports Guybrush outside the room, walk left to arrive in the section of the hallway with the elevator. Use the call button and enter the elevator. When LeChuck appears outside the elevator, quickly use the lever. Get the crispy beard bits. Use the crispy beard bits with the juju bag. Use the generic voodoo Kewpie doll with the juju bag. Use the used hankie with the juju bag. Use the skull with the juju bag. Use the underwear with the juju bag. Use the lever to return to the bottom floor. Exit the elevator. When LeChuck appears, quickly use the hypodermic syringe on the generic voodoo Kewpie doll. Walk right. Say “I wonder what would happen if I tore the leg off this thing.” When LeChuck asks you to take his mask off, say “Oh, all right, I’m coming over.” Guybrush removes the mask and finds out that it’s his creepy brother, Chuckie. Continue selecting any of the various speech options to complete the game. =============================================================================== 3. Item List =============================================================================== ——————————————————————————- 3.1. Part I Item List ——————————————————————————- BLANK PAPER Found in the cartographer’s shop in Woodtick. It is used to collect Largo’s spit from the bar. The paper with spit is one of four items given to the fortune teller in the Swamp. BONE Found in the graveyard. It is one of four items given to the fortune teller in the Swamp. BOOK OF BIG WHOOP The fortune teller will give Guybrush the book after Largo has been defeated. BRA The laundry guy in Woodtick will give Guybrush the bra for the laundry claim ticket. It is one of four items given to the fortune teller in the Swamp. BUCKET Found near the pirates in Woodtick. It is filled with mud from the Swamp. BUCKET O’ MUD Made by filling the bucket with mud from the Swamp. It is used on the door of Largo’s bedroom in Woodtick. CHEESE SQUIGGLIES Found in the bowl in the ship at the left side of Woodtick. They are one of three items used with the box near the pirates in Woodtick to set a trap for the rat. HAMMER Found in the woodsmith’s shop in Woodtick. It is used on the coffin in Stan’s shop in Ville de la Booty. JUJU BAG The fortune teller will give Guybrush the juju bag in the shack in the Swamp. It is used to hold the crispy beard bits, generic voodoo Kewpie doll, used hankie, skull and underwear. KNIFE Found on the table in the kitchen in Woodtick. It is used to cut the rope of the alligator in the ship at the left side of Woodtick. LARGO VOODOO DOLL The fortune teller will give Guybrush the voodoo doll of Largo when she is given the bone, bra, paper with spit and toupee. It is used with the pins near Largo in Woodtick. LAUNDRY CLAIM TICKET After Largo has discovered the bucket o’ mud, the laundry claim ticket is found in the cabin in the ship at the left side of Woodtick. It is given to the laundry guy at the right side of Woodtick to get the bra. MONOCLE Found in the cartographer’s shop in Woodtick. It is given to Captain Dredd at the Peninsula. PINS The fortune teller gives Guybrush the pins when she is given the bone, bra, paper with spit and toupee. It is used with the doll near Largo in Woodtick. RAT Found in the box near the pirates in Woodtick after the cheese squigglies, stick and string have been used. It is used with the vichyssoise in the kitchen in Woodtick. SHOVEL Found on the sign in Woodtick. It is used to get a bone from the cemetery. It is also used on the big X on Dinky Island. STICK Found on the Beach. It is one of three items used with the box near the pirates in Woodtick to set a trap for the rat. STRING Found on the table of the fortune teller’s shack in the Swamp. It is one of three items used with the box near the pirates in Woodtick to set a trap for the rat. TOUPEE Found in the cabin in the ship at the left side of Woodtick. It is one of four items given to the fortune teller in the Swamp. ——————————————————————————- 3.2. Part II Item List ——————————————————————————- ASH-2-LIFE Found in the fortune teller’s shack in the Swamp. It is used on Rapp Scallion’s ashes in the crypt in the cemetery on Scabb Island. BANANA Found in the gorilla envelope. It is used on the metronome in the bar in Woodtick. BLUE WHALE Bought from the bar in Woodtick. It is combined with the Yellow Beard’s Baby to create the green drink. BONE Found in the left cell at the Wharf. It is given to Walt. BOOK OF FAMOUS PIRATE QUOTATIONS Found on top of Governor Phatt in the Mansion on Phatt Island. It is used to read the quotes in the crypt in the cemetery on Scabb Island. BOOK OF GREAT SHIPWRECKS OF OUR CENTURY Found in the drawers in the library at the Wharf. It is used to find the location of the Mad Monkey ship. BOTTLE O’ NEAR-GROG Found in the vanilla envelope. It is used on the empty grog mug in the Cottage. BROKEN OAR Found when Guybrush walks on the oar in the second hole of the Big Tree. It is given to the woodsmith in Woodtick. CRYPT KEY Found in Stan’s shop in Ville de la Booty. It is used to open the crypt in the Cemetery on Scabb Island. DOG Found outside the Governor’s Mansion. He is used in the pile of maps in the hut at the top of the Big Tree. DRESS Found in the costume shop in Ville de la Booty. It is shown to the guard at the small structure before the Governor’s Mansion. EMPTY GROG MUD Found by using the mug o’ grog with the tree in the Cottage. It is used with the bottle o’ near-grog. FIRST MAP PIECE Found by using the dog in the pile of maps at the top of the Big Tree. It is given to the cartographer in Woodtick. FISH Found in the kitchen of the Governor’s Mansion. It is given to the fisherman at the Wharf. FISHING POLE The fisherman at the Wharf will give Guybrush the fishing pole for the fish. It is used to get the second map piece at the bottom of the Cliff. FOURTH MAP PIECE Rapp Scallion in the cemetery on Scabb Island will give Guybrush the fourth map piece after the gas has been turned off in the shack. It is given to the cartographer in Woodtick. GORILLA ENVELOPE Found after using the small key in the door of the jail. It is opened to find the banana and the organ. GREEN DRINK Made by combining the Blue Whale with the Yellow Beard’s Baby. It is used on the crazy straw to win the spit contest in Ville de la Booty. INVITATION Won from playing the game in the alley at the Wharf. It is given to the shopkeeper in the costume shop in Ville de la Booty. It is also shown to the guard at the small structure before the Governor’s Mansion. JOJO Found on top of the piano in the bar in Woodtick. He is used on the pump at the Waterfall. KATE’S LEAFLET Found by talking Kate outside the costume shop in Ville de la Booty. It is used on the poster at the Wharf. LIGHTHOUSE LENS Found in the model lighthouse in the library at the Wharf. It is given to the cartographer in Woodtick. MANILLA ENVELOPE Found after using the small key in the door of the jail. It is opened to find the inventory. MIRROR Bought from the antique shop in Ville de la Booty. It is used with the mirror frame in the Cottage. MONKEY HEAD Found on the Mad Monkey ship. It is given to the antique dealer in the antique shop in Ville de la Booty for the third map piece. MUG O’ GROG Found by challenging the man in the Cottage. It is used with the tree in the Cottage to get the empty grog mug. NAILS Found in the woodsmith’s shop in Woodtick. They are used on the coffin in Stan’s shop in Ville de la Booty. OAR Found above the divan in Elaine’s bedroom in the Governor’s Mansion. It is used with the second hole in the tree at the Big Tree. ORGAN Found in the gorilla envelope. It is not used. PARROT CHOW Found on Captain Dredd’s ship. It is used on the hook in the antique shop in Ville de la Booty. RANDOM BOOK Found in the drawers in the library at the Wharf. It is used with the book of Famous Pirate Quotations on top of Governor Phatt. REINFORCED OAR Made by giving the broken oar to the woodsmith in Woodtick. It is used in the second hole of the Big Tree. SECOND MAP PIECE Found on the skeleton after falling through the trap door in the Cottage. It is given to the cartographer in Woodtick. SHIP’S HORN Bought from the antique shop in Ville de la Booty. It is used to make the spitmaster leave the spit contest in Ville de la Booty. SIGN Bought from the antique shop in Ville de la Booty. When bought, it reveals the mirror. SMALL KEY Dropped by Walt when he is given the bone from the cell at the Wharf. It is used on the door of the jail. SPIT PLAQUE Found by winning the spit contest in Ville de la Booty. It is given to the antique dealer in the antique shop. STICK Found under the mattress in the cell at the Wharf. It is used to get the bone in the left cell. TELESCOPE Found in the top-left hut at the top of the Big Tree. It is used on the grotesque statue outside the Cottage. TEMPORARY LIBRARY CARD Found by talking to the librarian in the library at the Wharf. It is given to the barkeeper in the bar at Woodtick. THIRD MAP PIECE The antique dealer in the antique shop at Ville de la Booty will give Guybrush the third map piece for the monkey head. It is given to the cartographer in Woodtick. VANILLA ENVELOPE After Kate’s leaflet has been used on the poster at the Wharf, the vanilla envelope is found by using the small key in the door of the jail. It is opened to find the bottle o’ near-grog. WELL-POLISHED OLD SAW Bought from the antique shop in Ville de la Booty. It is used on the peg leg of the pirate in Woodtick. YELLOW BEARD’S BABY Bought from the bar in Woodtick. It is combined with the Blue Whale to make the green drink. ——————————————————————————- 3.3. Part III Item List ——————————————————————————- MATCHES Found in the juju bag. They are used on the dynamite. ——————————————————————————- 3.4. Part IV Item List ——————————————————————————- BALLOON Found in the LeChuck section on Dinky Island. It is used with the helium tank near the grog machine. BOTTLE Found in the ocean on Dinky Island. It is used on the rock at the left side of the still to create the broken bottle. BOX Found in the bag in the jungle on Dinky Island. It is used with the crowbar to find the dynamite. BROKEN BOTTLE Found by using the bottle on the rock on Dinky Island. It is used on the bag in the jungle. COIN Found in the coin return on the grog machine in the LeChuck section on Dinky Island. It is used to get the underwear from LeChuck. CRACKER Found in the barrel near the still on Dinky Island. It is given to the parrot. CRISPY BEARD BITS Found when Guybrush closes the elevator with LeChuck outside in the LeChuck section on Dinky Island. They are one of five items used in the juju bag. CROWBAR Found near the still on Dinky Island. It is used on the box from the bag in on Dinky Island. It is combined with the rope to make the crowbar ‘n’ rope. CROWBAR ‘N’ ROPE Made by combining the crowbar and the rope. It is used with the twisted metal rods in the hole on Dinky Island. DYNAMITE Found in the box from the bag in the jungle on Dinky Island. It is used with the matches to create the lit dynamite. GLASS O’ DISTILLED WATER Made by using the glass o’ water with the still on Dinky Island. It is used with the cracker mix. GLASS O’ WATER Made by using the martini glass in the ocean. It is used on the still to create the glass o’ distilled water. HANKIE Found on LeChuck when he bends down to get the coin in the room with the grog machine in the LeChuck section on Dinky Island. It is one of five items used in the juju bag. HYPODERMIC SYRINGE Found in the drawer in the first aid room in the LeChuck section on Dinky Island. It is used on the voodoo doll of LeChuck. KEWPIE DOLL Found in the LeChuck section on Dinky Island. It is one of five items used in the juju bag to create the LeChuck Voodoo Doll. LECHUCK VOODOO DOLL Made by using the crispy beard bits, generic voodoo Kewpie doll, used hankie, skull and underwear in the juju bag. It is used with the hypodermic syringe when LeChuck is near. LIT DYNAMITE Made by using the matches on the dynamite. It is used in the hole after the shovel has been used on the big X. MARTINI GLASS Found near the still on Dinky Island. It is used on the ocean to create the glass o’ water. ROPE Found on the box near the pond on Dinky Island. It is combined with the crowbar to create the crowbar ‘n’ rope. SKULL Found in the first aid room in the LeChuck section on Dinky Island. It is one of five items used in the juju bag. SURGICAL GLOVES Found in the trash can in the first aid room in the LeChuck section on Dinky Island. They are used with the helium tank near the grog machine. =============================================================================== 4. Copyright Information =============================================================================== This file is Copyright 2002-2008 Tom Hayes. As it can be difficult to keep track of websites that haven’t posted the latest version of this file, please do not distribute it without my permission. Send an e-mail to me if you would like to post this file on your website and you will likely receive a positive response. If you do post the file, please keep it in its original form with all of the sections intact and credit the author (Tom Hayes) as the writer of the file.
Monkey Island 2: LeChuck’s Revenge
Monkey Island 2: LeChuck’s Revenge is the sequel to The Secret of Monkey Island and follows the adventures of Guybrush Threepwood as he hunts for the treasure known as the Big Whoop. Guybrush soon bumps into Largo LeGrande who has revived LeChuck, and now he wants revenge.
Monkey Island 2 was first published by LucasArts in 1991. A remake was made in 2010 for the PC and released later in 2017 for the Xbox One. The remake features HD graphics and a more user-friendly interface.
Even though Monkey Island 2 sold poorly on release it was awarded the year’s best adventure game. It features challenging puzzles, an interesting storyline and atmospheric music. The full walkthrough for Monkey Island 2: LeChuck’s Revenge can be found below.
Monkey Island 2 Walkthrough
Part 1: The Largo Embargo
You begin just outside the town of Woodtick. If you try to leave the screen, either by going to the map to the right or across the bridge to the left, you’ll be stopped by LeGrande, the local bully, who’ll take all of your coins.
Take the Shovel from the sign and walk across the bridge to the left. Enter the second ship from the right at the top of the screen to meet the cartographer, Wally. After you’ve spoken to him about everything wait for him to rub his eyes. When he does he’ll put his Monocle down. Pick it up and then take a piece of Paper from the pile of paper at the bottom of the screen. Leave the store.
Go down the hatch across from Wally’s store that leads to the Bloody Lip tavern. Speak with him about everything until Largo show up and spits on the wall. Use the Paper with Largo’s Spit and then leave the tavern. Enter back through the open window on the side of the boat to the kitchen. Take the Knife and then crawl back out through the window.
Continue walking along the pier to the west until you see the laundry with the clothes hanging up. Speak with the three men of low moral fiber. Ask about the wooden leg until one of the men asks you to buy polish for him. He’ll give you some money. Try to pick up the Bucket. The men will try to stop you. Ask them if the bucket belongs to them. It doesn’t, so Guybrush will grab it.
Continue to the left and walk into the hotel. Use the Knife on the rope holding the little creature. It will escape and the innkeeper will chase after him. Take some Cheese Squigglies from the little creatures bowl and then open the only other door in the hotel to Largo’s room. Take the Toupee from the dresser and quickly leave the room.
Walk all the way back to the east until you see the map. Head to the swamp and use the Bucket with the swamp water to get a Bucket o’ Mud. Use the coffin and row it all the way to the east, into the mouth. You’ll be lifted up to the Voodoo hut. Take the Small String from the table and walk to the east to speak with the Voodoo Lady. Ask her about making a Voodoo Doll of Largo. She’ll tell you what kind of ingredients you need. Give her the Toupee and Largo’s Spit. You still need to find two more ingredients so row back to the island.
Go back to the map and head to the beach. All you need here is the Stick so pick it up and go back to the map. Go to the Cemetery and walk up to the graves on the hill. Look at the gravestones to find out which one belongs to Marco Largo LeGrande and use the Shovel on it to pick up one of Largo’s ancestor’s Bones.
Make your way back to Woodtick and enter the hotel. Go into Largo’s room and close the door. Place the Bucket o’ Mud on top of the door. Hide behind the dressing screen and wait for Largo to come back. Largo will get mud all over him and run off to the laundry to get his clothes washed.
Head over to the laundry to see Largo arguing with the laundry attendant, Mad Marty. Go back to Largo’s room, close the door, and take the Laundry Claim Ticket from the back of the door. Go back to the laundry and show Mad Marty the Laundry Claim Ticket to get Largo’s clothes, a Pearly-White Bra.
Go back to the Voodoo Lady and give her the items she needs to make a voodoo doll, Largo’s Spit, the Toupee, Bone and the Bra. Go back to Largo’s room. Before he throws you out use the Pins on the Voodoo Doll. After Largo runs off you’ll be back with the Voodoo Lady.
Take the coffin back to the island and walk to the peninsula in the bottom left corner. Enter the houseboat and speak to Captain Dread. Give him the Monocle and he’ll agree to captain the ship for you.
Part 2: The Four Pieces
After the cut-scene with LeChuck you’ll be on the boat with Captain Dread. Take the Parrot Chow and enter the cabin. Speak with Captain Dread and ask him to take you to Phatt Island.
When you arrive on the island you’ll be spotted by the guard and taken to the mayor who will throw you in prison. Pull the mattress to find a Stick. Use the Stick on the skeleton to get one a Bone and then use the Bone on Walt the dog. The dog will come closer to grab the bone and drop the Key. Pick up the Key and use it to unlock the cell door.
Pick up the Gorilla Envelope and the Manilla Envelope from the shelf. Open both envelopes to find your items and a Banana and Organ. Leave the prison, walk to the right. Go into the first alley on the left just before the library and watch the man spinning the wheel. When the contestant wins follow him out of the alley and into the next alley beyond the library.
Knock on the slit in the door and ask for the roulette number. You’ll need to pass the test before he gives you the number. He’ll hold up a number of fingers. The first time he holds up a number of fingers is the answer to the question. Repeat this three times and he’ll give you the winning roulette number. Go back to the first alley and after the contestant wins play the game. Use the winning number and select the Invitation as your prize.
Go back to the boat and sail to Booty Island.
Enter the small shop to the left and buy the Old Saw, Ship’s Horn and Beware of Parrot Sign. Place the Parrot Chow on the hook that held the sign and the parrot will turn around to have a feed. Now you can buy the Mirror. Ask to buy the Map Piece but he won’t sell it to you. He’ll only offer it for a trade.
Leave the store and go into the Costume Shop. Give the Invitation to the salesman and he’ll give you your Dress. Leave the store and speak to the Woman in the Big Hat. She’s offering tours on her ship for a price. Walk to the left to the path and go to the Governor’s Mansion.
On the way you’ll be stopped at the guard house. Show the guard your Invitation and then get changed into your Dress. Follow the path to the mansions and then walk around the right side of the house to the back. Read the sign next to the door and then push the garbage can. When the chef comes out to chase you run around to the front of the house and loop back around to the back. Enter the kitchen and pick up a Fish. Leave and go around to the front of the house.
Open the door and go inside. Look at the Map Piece and then take it. Leave the mansion. The dog will sniff out that you’ve taken something from the house and the gardener will take you to see Elaine. After talking to her she’ll throw the Map Piece out the window. Leave and enter the room again. Elaine will be gone. Take the Oar hanging on the wall and leave the mansion.
Try to pick up the Map Piece and it will eventually get blown onto the edge of a cliff. Pick up the Dog, go to the woods and then head back to your ship. Sail to Phatt Island.
Enter the library, open the model lighthouse and take the Model Lighthouse Lens. Open the card catalog and look at the ‘C – D’ drawer and search for Disaster “Great Shipwrecks of Our Century”. Click on the dialogue option “I’ll have to remember that.” Go to the ‘PQR’ drawer and find “Recipes, Voodoo “The Joy of Hex”. Remember this one also. Choose one other title, it doesn’t matter which one, and remember it as well.
Speak with the librarian and get a Library Card. It doesn’t matter what personal information you give her. Ask for the three books that you found and she’ll go and get them for you. Leave the library and read the first two books.
Speak with the fisherman and boast about what a great fisherman you are. When he challenges you to a competition show him the Fish you took from the mansion. He’ll give you his Fishing Pole.
Walk up the steps and use the Leaflet on the wanted poster. Walk to the left and go up the path. The Woman whose face is on the leaflet will arrive and be taken to prison. Return to the wharf and enter the jail. Use the Small Key to open the cell door and release the woman. Take the Vanilla Envelope from the shelf and then open it to find a Bottle o’ Near-Grog.
Leave the jail, walk back to the path and go to the mansion. Open the gate and go through the front door. Speak to the guard blocking the stairs and tell him there’s a fire in the kitchen. Head upstairs and use the third book you lent from the library on the book on Governor Phatt’s bed. Guybrush will switch your book with the Famous Pirate Quotations book. Leave and go back to your ship. Sail to Booty Island.
Walk to the path and go to the Big Tree in the north of the island. Use the plank in the tree and then use the Oar on the next hole in the tree. Guybrush will try to climb up but fall down and bump his head. During the vision you’ll hear a song. Guybrush will be so excited about it that he’ll write down the Lyrics. You’ll need these later.
Pick up the Broken Oar, head back to your ship and sail to Scabb Island. Walk along the jetty and enter the first shop which is the Woodsmiths. Give him the Broken Oar and he’ll reinforce it for you.
Leave and go down the hatch. You’ll see a monkey playing the piano. Use the Banana with the metronome and he’ll stop. Pick up the Monkey. Speak with the bartender and ask for a drink. Show him your Library Card and order a Yellow Beard’s Baby. You’ll also get a Crazy Straw. Order another drink. This time order a Blue Whale.
Open your inventory and use the Yellow Drink with the Blue Drink to make a Green Drink. Go back to the upper deck and walk along the jetty to the men of lower moral fiber. Use the Old Saw on the Peg Leg of one of the men. Go to the Woodsmiths and pick up the Hammer and Nails. Go back to your ship and sail to Booty Island.
Walk to the right and enter Stan’s shop. Tell him you’re looking for a coffin. End the conversation and he’ll give you a Hankie. Enter the shop again and ask about the coffin once more. This time when he gets in the coffin use the Nails with the coffin to nail him inside. Take the Crypt Key and leave the store. Walk to the path to the right.
Walk to the right to the spit contest and speak with the Spitmaster. Enter the competition and you’ll fail. Blow the Horn to distract everyone and use the flags to move them a little closer. Talk to the Spitmaster to have another go. This time use the Crazy Straw with the Green Drink. This time you’ll do better but not good enough. Speak to the Spitmaster once more. Use the Crazy Straw with the Green Drink but this time wait until the wind is blowing the ladie’s scarf before spitting. You’ll win first place and receive a Plaque.
Go back to the Antique Dealer and give him the Plaque. He’ll agree to give you 6,000 Pieces of Eight for it. Return to Kate, the woman with the leaflets, and read the book about Shipwrecks to find the location of where the Mad Monkey capsized. Charter a ship and move the cursor to the right coordinates on the map and dive into the sea. When you reach the wreck pick up the Monkey Head. Use the rope to be lifted back up to the surface.
Back on dry land return to the Antique Dealer and give him the Monkey Head. In exchange he’ll give you a Map Piece. Leave, walk to the path and go to the cliff. Use the Fishing Pole on the map piece and Guybrush will pull up the second map piece but it will get taken away by a seagull.
Leave and go to the Big Tree. Use the plank to stand on it and then use the Reinforced Oar on the next hole. Take the Plank and use it on the hole further up. Continue until Guybrush gets the hang of it and makes his way up the tree by himself.
Once you’re up the top walk to the lookout and take the Telescope. Enter the hut and use the Dog on the pile of paper and he’ll find the second Map Piece. Leave and go back to Dread’s ship. Sail to Phatt Island.
Walk left to the path and go to the waterfall. Walk up to the top of the waterfall and use the Monkey on the pump to stop the flow of water. Walk back to the bottom of the waterfall and enter the Newly Discovered Gaping Hole.
Walk to the left until you come out of the tunnel and then head up to the small cottage. Enter the cottage and speak to the old man, Rum Rogers. Tell him you’re looking for the map and then challenge him “I’m Guybrush Threepwood. Prepare to die.” He challenges you to a drinking contest. He’ll leave to get a Mug o’ Grog for you. When he leaves to get his mug pick up your Mug o’ Grog and pour it onto the tree. Fill up your mug with the Near-Grog you stole from Kate when she went to jail. Now when the challenge begins you’ll be fine but Rum Roger will pass out.
Use the Mirror that you picked up from the Antique Dealer with the mirror frame on the wall. Go outside and open the window just to the left of the door. Place the Telescope in the monkey statue’s hand. The sun will shine a spot on the far wall of the cottage. Enter the cottage and push the brick with the spot on it. Guybrush will fall down a trapdoor. Pick up the third Map Piece and leave through the hole. Go back through the cave and go to your boat and sail to Scabb Island.
Go to the path and head to the cemetery. Use the Crypt Key to open the middle crypt. Read the book you picked up from the library, “Famous Pirate Quotations“. The quote you need to remember is the one by Rapp Scallion. Look at all the coffins, find the one with the quote by Rapp Scallion and open it. Take some Ash and go back to the Voodoo Hut.
Pick up the Ash-2-Life book from the shelf and then talk to the Voodoo Lady. She’ll give you a potion of Ash-2-Life. Go back to the crypt and use the Ash-2-Life potion on the ashes. They’ll turn back to life. Once you convince him that he’s dead he’ll ask you to return to his restaurant and turn off the gas. He’ll give you the Restaurant Key.
Walk back to the path and go to the beach. Use the Restaurant Key to open the door to the small restaurant. Turn off the gas stove and return to the crypt. Use the potion on the ashes again and Rapp will give you the fourth Map Piece.
Leave and go to Woodtick. Enter the second shop and speak with Wally, the map maker. Give him the Model Lighthouse Lens so that he can see. Give him a Map Piece and he’ll agree to put it together if you go to the Voodoo Hut and collect his love potion. Head over to the Voodoo Lady and ask for the Love Potion. She senses that Wally’s in trouble. Go back to the map maker. He’s gone but he’s left a message carved into his table.
Go back to the swamp and open the crate. Use the crate to climb inside. The delivery crew will take you over to LeChuck’s Fortress.
Part 3: LeChuck’s Fortress
After the cut-scene walk to the right, go up the stairs and through the door. You’ll emerge inside the fortress. There’s a path to the right which leads to where Wally is being held in a jail cell and a back tunnel which circles around and comes back to where you started.
Look at the Spit Encrusted Paper where Guybrush wrote down the lyrics of the song. This gives you the clues to which doors to open. The verses are generated randomly so yours might be different. Here’s an example.
“The arm bone is connected to the head bone
The head bone is connected to the rib bone
The rib bone is connected to the leg bone”
Find the door that has an arm, head and rib from top to bottom and open that door. Repeat for the next three verses. Once you’re through the door puzzle push open the huge door and take the Voodoo Key. When you try to take it LeChuck will catch you and hang you alongside Wally over an acid pit.
After LeChuck stops talking use the Crazy Straw with the Green Drink. Spit on the pan in the foreground once and then on the shield hanging up to the right twice. You and Wally will escape and end up in a dark room. Open your inventory and open the Juju Bag to find some Matches and a Love Bomb. Use the Matches. After the explosion you’ll end up on Dinky Island.
Part 4: Dinky Island
Pick up the Bottle, the Crowbar and the Martini Glass and then use the Martini Glass on the ocean water. Use the Martini Glass with ocean water on the still machine. Open the barrel and Guybrush will find a Cracker. Herman is here also and you can talk to him if you want but it’s not necessary.
Walk to the left to enter the jungle. Take the next left and follow the path to a bag hanging from a tree. Smash the Bottle on the tree and then use the Broken Bottle to slash a hole in the bag. Pick up the Box that fell from the bag and use the Distilled Water on the Box to get another 2 Crackers.
Walk back to the intersection and this time go right to a chest by a pond. Take the Rope and then use the Crowbar on the chest. Take the Dynamite from the chest.
Go back to the beach and give the parrot a Cracker. It will give you directions. Follow the directions and you’ll find the parrot again. Give it another Cracker and proceed to the next location. Do this once more and you’ll find a Big X on the ground.
Use the Shovel on the Big X to dig a big hole. Light the Dynamite with the Matches and then throw the Dynamite in the big hole. The explosion will get Elaine’s attention and Guybrush will end up on a ledge in the hole.
Tie the Rope to the Crowbar and use it with the twisted metal rods above you. Guybrush will jump across to reach the chest as the ledges crumble. Elaine shows up and this is where the story began at the beginning of the game. The rope will break and Guybrush falls down into a dark room. Move the cursor around until you find a light switch and then push it. LeChuck is standing in the room! Talk to LeChuck and he’ll tell you that he and Guybrush are brothers.
LeChuck uses a voodoo doll of Guybrush that’s meant to send him to a different dimension but only sends him to a different room. From here you’ll have to hunt around to find the items needed for a voodoo doll while trying to avoid LeChuck.
Once you’re free from LeChuck walk north to the medical room. Pick up the Skull from Dad’s remains. Open the trash can and pick up the Surgical Gloves. Open the medical drawer and take the Hypodermic Syringe. LeChuck may teleport you around so it’s hard to give exact directions for the next items.
Find the room with the broken grog machine and use both the Surgical Gloves with the helium tank. In the room with the hole in the roof and the crumbled chest on the floor take the Ticket. In the room filled with boxes open the ones on the floor to find a Doll and a Balloon. Go back to the room with the helium tank and fill up the Balloon with helium.
Use the grog machine and a coin will roll out. Wait for LeChuck to show up and pick up the coin. When he does he’ll bend over revealing his underwear. Quickly take his Underwear. The next time LeChuck shows up give him the Hankie and he’ll sneeze on it.
Find the elevator and use the call button to go inside. When LeChuck shows up pull the Lever. Part of his beard will get chopped off by the doors. Take the Crispy Beard Bits. go through the door which leads back out to the alley on Melee Island.
Put the Crispy Beard Bits, Voodoo Doll, Skull, Underwear and the Used Hankie in the Juju Bag. This makes a Voodoo Doll of LeChuck. Go back down the elevator and wait for LeChuck to show up. When he does use the Syringe on the Voodoo Doll. He runs off but follow him and use the doll again. During the chat choose the dialogue option to “tear the leg off the voodoo doll”. Enjoy the final cut-scene.
Congratulations on completing Monkey Island 2: LeChuck’s Revenge!
So you have finished reading the monkey island 2 soluce topic article, if you find this article useful, please share it. Thank you very much. See more: monkey island 2 mirror, monkey island 2 cottage trapdoor, monkey island 2 elevator, monkey island 2 steam achievements, monkey island 2 library, monkey island 2 tunnels, monkey island 2 telescope, monkey island 2 spitting contest