
You are looking for information, articles, knowledge about the topic nail salons open on sunday near me the last stand aftermath soluce on Google, you do not find the information you need! Here are the best content compiled and compiled by the https://toplist.tfvp.org team, along with other related topics such as: the last stand aftermath soluce The Last Stand: Aftermath wiki, the last stand: aftermath guide, The Last Stand: Aftermath mod, The Last Stand: Aftermath ending, The Last Stand: Aftermath co-op, the last stand: aftermath tools, The Last Stand: Aftermath LinkNeverDie, The Last Stand: Aftermath Download
[su_youtube_advanced url=”https://www.youtube.com/watch?v=63gEGQX4enY”]
Walkthrough The Last Stand: Aftermath – game guide
- Article author: www.okaygotcha.com
- Reviews from users: 45569
 Ratings
 - Top rated: 3.6
- Lowest rated: 1
- Summary of article content: Articles about Walkthrough The Last Stand: Aftermath – game guide The Last Stand: Aftermath consists of several chapters, each of which contains at least one story mission. The locations you visit are … …
- Most searched keywords: Whether you are looking for Walkthrough The Last Stand: Aftermath – game guide The Last Stand: Aftermath consists of several chapters, each of which contains at least one story mission. The locations you visit are …
- Table of Contents:
TFT Set 75 PBE release date
Elex 2 Find all vaults and codes
Passage of Duskwood (1-10 episodes) all the answers and forks in the dialogues

The Last Stand: Aftermath Guide for Beginners | TechRaptor
- Article author: techraptor.net
- Reviews from users: 9589 Ratings
- Top rated: 4.9
- Lowest rated: 1
- Summary of article content: Articles about The Last Stand: Aftermath Guide for Beginners | TechRaptor Our The Last Stand: Aftermath Gue for Beginners will tell you everything you need to know to make the most of your runs in the zombie … …
- Most searched keywords: Whether you are looking for The Last Stand: Aftermath Guide for Beginners | TechRaptor Our The Last Stand: Aftermath Gue for Beginners will tell you everything you need to know to make the most of your runs in the zombie … Our The Last Stand: Aftermath Guide for Beginners will tell you everything you need to know to make the most of your runs in the zombie apocalypse.
- Table of Contents:
Header Menu
Breadcrumb
What is The Last Stand Aftermath
The Last Stand Aftermath Guide for Beginners – Understanding Game Mechanics
The Last Stand Aftermath Beginner’s Guide – Starting Your Adventure
Surviving Uptown and Beyond
Returning to ‘The End’
Supply and the Armory
Continuing Your Adventure
In This Article
More Gaming Articles
Footer menu
The Last Stand: Aftermath Guide, Tips, Cheat and Walkthrough – SteamAH
- Article author: steamah.com
- Reviews from users: 4212 Ratings
- Top rated: 3.9
- Lowest rated: 1
- Summary of article content: Articles about The Last Stand: Aftermath Guide, Tips, Cheat and Walkthrough – SteamAH For The Last Stand: Aftermath players, this gue is going to prove you the complete list of all recipes in game, and how to unlock them are listed below, … …
- Most searched keywords: Whether you are looking for The Last Stand: Aftermath Guide, Tips, Cheat and Walkthrough – SteamAH For The Last Stand: Aftermath players, this gue is going to prove you the complete list of all recipes in game, and how to unlock them are listed below, …
- Table of Contents:
The Last Stand Aftermath All Recipes List Guide
The Last Stand Aftermath Weapons Guide
The Last Stand Aftermath Complete Crafting Guide
The Last Stand Aftermath How to Farm Knowledge Easy And Fast
The Last Stand Aftermath Essential Tips For Cannon Fodder
Biendebuter.net » Guide The Last Stand Aftermath – Biendebuter.net
- Article author: www.biendebuter.net
- Reviews from users: 30793 Ratings
- Top rated: 4.4
- Lowest rated: 1
- Summary of article content: Articles about Biendebuter.net » Guide The Last Stand Aftermath – Biendebuter.net Partez à la découverte de ce rogue-lite post-apo où vous devrez survivre hors de la Colonie, grâce à notre gue Last Stand Aftermath. …
- Most searched keywords: Whether you are looking for Biendebuter.net » Guide The Last Stand Aftermath – Biendebuter.net Partez à la découverte de ce rogue-lite post-apo où vous devrez survivre hors de la Colonie, grâce à notre gue Last Stand Aftermath. Partez à la découverte de ce rogue-lite post-apo où vous devrez survivre hors de la Colonie, grâce à notre guide Last Stand AftermathSautez la case départ ! Ce site communautaire est dédié aux guides de jeux pour bien débuter votre partie, comprendre le jeu et vous mettre sur les bons rails.
- Table of Contents:
Bilan médical c’est compliqué
La Colonie
L’infection
À fond la forme
L’inventaire
Le craft
Les infectés
Non non aaaaah !
Un pas de plus vers la Fin
Guides et soluces de The Last Stand: Aftermath | NationHive
- Article author: www.nationhive.com
- Reviews from users: 3605 Ratings
- Top rated: 3.4
- Lowest rated: 1
- Summary of article content: Articles about Guides et soluces de The Last Stand: Aftermath | NationHive Dans ce gue complet de The Last Stand: Aftermath vous trouverez toutes l’information sur le jeu, nous vous donnerons toutes les astuces et conseils pour … …
- Most searched keywords: Whether you are looking for Guides et soluces de The Last Stand: Aftermath | NationHive Dans ce gue complet de The Last Stand: Aftermath vous trouverez toutes l’information sur le jeu, nous vous donnerons toutes les astuces et conseils pour … Dans ce guide complet de The Last Stand: Aftermath vous trouverez toutes l’information sur le jeu, nous vous donnerons toutes les astuces et conseils pour obtenir 100% des trophées et succès du jeu.
- Table of Contents:
Menu du compte de l’utilisateur
Menu principal
Navigation
Jeux populaires
Dernières solutions
NationHive
The Last Stand: Aftermath | Solutions de jeux
- Article author: jeusolution.com
- Reviews from users: 21372 Ratings
- Top rated: 3.7
- Lowest rated: 1
- Summary of article content: Articles about The Last Stand: Aftermath | Solutions de jeux Sorry! The Last Stand: Aftermath First Released Nov 16, 2021 released PC PlayStation 4 + 3 more PlayStation 5 Xbox One Xbox Series X Developed by: Published by: … …
- Most searched keywords: Whether you are looking for The Last Stand: Aftermath | Solutions de jeux Sorry! The Last Stand: Aftermath First Released Nov 16, 2021 released PC PlayStation 4 + 3 more PlayStation 5 Xbox One Xbox Series X Developed by: Published by: …
We have no news or videos for The Last Stand: Aftermath. Sorry!
The Last Stand: Aftermath
First Released Nov 16, 2021
releasedPC
Play - Table of Contents:
The Last Spell
The Last of Us Merle Dandridge reprend son rôle de Marlene dans la série de HBO
Planet Surf The Last Wave
The Last Stand
The Last Spell date son accès anticipé
The Last of Us Part 2 vient d’être patché en 60 images par seconde sur PS5
The Last of Us Part 3 Neil Druckmann a écrit les bases d’un scénario mais ne confirme rien
La série TV The Last of Us tient ses réalisateurs
Gabriel Luna sera Tommy dans la série TV The Last of Us
OBSCURY THE LAST
CATEGORIES
#Top 5
hier
#Top
de la Semaine
He had wings made of wax crossword clue
Thymesia
Astuces Saints Row (reboot)
It was the largest & westernmost of the 11 confederate states
USA Today Quick Cross August 18 2022 Answers
#Recherches récentes

Walkthrough The Last Stand: Aftermath – Game Guide
- Article author: walkthrough-guide.com
- Reviews from users: 46781 Ratings
- Top rated: 3.7
- Lowest rated: 1
- Summary of article content: Articles about Walkthrough The Last Stand: Aftermath – Game Guide Walkthrough The Last Stand: Aftermath – Game Gue … Once stopped, go left and fight the enemies. Use RMB and LMB, R to reload. Search bodies. …
- Most searched keywords: Whether you are looking for Walkthrough The Last Stand: Aftermath – Game Guide Walkthrough The Last Stand: Aftermath – Game Gue … Once stopped, go left and fight the enemies. Use RMB and LMB, R to reload. Search bodies.
- Table of Contents:
Beginning of the End
Time to leave home
Free communication line
Residential area Washington Avenue
Residential area Everett Street
Rothampton Road store
Quest “Strange Things”
SKROS barrier
Quest “Exploration”
The Last Stand : Aftermath sur PC – jeuxvideo.com
- Article author: www.jeuxvideo.com
- Reviews from users: 45861 Ratings
- Top rated: 3.4
- Lowest rated: 1
- Summary of article content: Articles about The Last Stand : Aftermath sur PC – jeuxvideo.com Issu de la série des The Last Stand, Aftermath vous emmènera au cœur d’une apocalypse zombie dans laquelle il vous faudra trouver des ressources, survivre, … …
- Most searched keywords: Whether you are looking for The Last Stand : Aftermath sur PC – jeuxvideo.com Issu de la série des The Last Stand, Aftermath vous emmènera au cœur d’une apocalypse zombie dans laquelle il vous faudra trouver des ressources, survivre, … The Last Stand : Aftermath sur PC : retrouvez toutes les informations, les tests, les vidéos et actualités du jeu sur tous ses supports. Issu de la série des The Last Stand, Aftermath vous emmènera au cœur d’une apocalypse zombie dans laquelle il vous faudra trouver des ressources, survivre, et…
- Table of Contents:
Les avis des joueurs
Jeux similaires

The Last Stand: Aftermath – Conseils essentiels pour les débutants – GuíasTeam
- Article author: guiasteam.com
- Reviews from users: 4845 Ratings
- Top rated: 3.1
- Lowest rated: 1
- Summary of article content: Articles about The Last Stand: Aftermath – Conseils essentiels pour les débutants – GuíasTeam Si vous jouez The Last Stand: Aftermath Indispensable, ce gue est un manuel pour les bénévoles dévoués qui s’aventurent au-delà de la … …
- Most searched keywords: Whether you are looking for The Last Stand: Aftermath – Conseils essentiels pour les débutants – GuíasTeam Si vous jouez The Last Stand: Aftermath Indispensable, ce gue est un manuel pour les bénévoles dévoués qui s’aventurent au-delà de la … Si vous jouez The Last Stand: Aftermath Indispensable, ce guide est un manuel pour les bénévoles dévoués qui s’aventurent au-delà de la sécurité relative
- Table of Contents:

See more articles in the same category here: 17+ tips for you.
Walkthrough The Last Stand: Aftermath – game guide
Detailed walkthrough of all plot tasks of The Last Stand: Aftermath, true ending
The Last Stand: Aftermath consists of several chapters, each of which contains at least one story mission. The locations you visit are randomly generated. And the tasks themselves begin at the moment when you, moving between two locations, find yourself in the third, the place for the quest. This also happens randomly, but all tasks listed below are required.
Hard West 2 | Gameplay Walkthrough … Please enable JavaScript Hard West 2 | Gameplay Walkthrough Part 2
Strange things
This task is activated during the exploration of the first game location. One of the residents of the Rubezh will contact you by radio and ask you to check the source of the strange noise emanating from the neighboring house. The building is located to the north of you, but you should not immediately run there. There are many zombies in the vicinity that need to be confronted, not to mention the many traps set up by the owner of the house. In particular, if you’re not careful, you will almost certainly be killed by a shotgun trap. Try using a pistol or explosives to lure the zombies moving around the house to you. They activate the trap, and they themselves will fall into it. Having dealt with all the monsters and avoiding traps, go inside the house.
Inside it, you will find a strange device. The man will contact you again and ask you to clean the equipment of organic material. Attack him with hand-to-hand combat or firearms. You can even punch with your bare fists. It won’t take long. You will spend a little more on fists, but you will save on the quality and durability of the weapon, and do not waste ammunition. As soon as you clear the device, you will be prompted to tell the Frontier about everything. Provide each detail, after which the mission will be completed. Do not forget to collect as much loot as possible before leaving the location.
Open the gate
To begin with, you will be automatically contacted by the radio operator, who will ask if you got to the wall (this will happen at the last location of the chapter). Then he will explain how to open that very gate. First of all, you should make sure that you have a full supply of health and good equipment. Here you will have to study first one part of the map, and then the other, the opposite. And there, and there is one large generator.
Before going to any of them, use the non-destructible parts of the fence to deal with several zombies from a safe distance. While you are standing here, they will not even try to find another way out. After complete or partial destruction of the horde, move down and follow through the gate on the left side. After that, go along the left edge in the direction of the wall. Pick up your loot, get ready for battle, and activate the generator to energize the gate. Be sure to also lower the nearby lever. Mutants will run to the noise of a working generator, which you will have to eliminate. Do not forget that you can simply run away from the mutants and find some kind of bottleneck so that they do not fall on you from all sides.
Having done this, move to the other side and repeat the steps. On the right side, everything will be much more complicated, since the fence looks more like a maze. Use this fact to your advantage to keep zombies out. Otherwise, progress is achieved by the same actions. Having opened the gate, you can get in the car and hit the road. Of course, if the engine is intact and there is gasoline.
Intelligence service
As soon as you leave the first huge map (complete the chapter) and find yourself behind the wall, on the way to one of the randomly generated locations you will be stopped by a new task. The hero will discover an abandoned military base. The current task is to get to the military headquarters and get as much information as possible about what is happening outside the Dead Zone. The first thing to do is to collect more ammunition, otherwise you won’t be able to survive. Or you have to rely on stealth skills and patience. There are usually a lot of zombies in this place, which are stronger than ordinary ones, and there are mutants who wear body armor. But at this point, you can also look from the other side: since you are at a military base, you can find here a lot of modifications for weapons, ammunition and advanced equipment that are not found anywhere else.
The best way to go further is to bypass the base. There is a collapsed part of the wall to the side of the military base, and you can get inside the base without colliding with the horde at the gate. Once inside, you need two things: a generator and a key card. At the back of the military base is a generator that can be activated with a few hits (as before). Fortunately, even enemies will not run to its noise! Then search the base itself and find a container with a key card inside. After starting the generator and finding the key card, look for the grill with the electronic panel. Apply the key card. This code panel should be highlighted in red (blinking light). After going behind the bars with the panel, you will need to fight your way through another one to gain access to the command center. Inside it, there are three documents with information. You need to pick each one. Besides,
As soon as you collect all the information, automatically contact Rubezh to report everything. After you have discussed everything, it will remain to leave this place. It’s probably best to follow the same path you took here.
Warehouse
When you move through the mountains, then again stop in a random place. This time, the hero will find the warehouse mentioned in the orders inside the command center of the military base. Again, you will be taken to spacious territory, which can be tedious to traverse if you don’t have enough ammo and gear. As with the military base, to get inside, you can find a hole in the fence. After making your way through the outer fence, you will find that the warehouse is a rather dangerous place. Everything is on fire here, and before you get inside, you will have to put out the fire.
There are many zombies near the main entrance. Not much to cause trouble, but still better to save on ammo. Head towards the building and look for a small area with fewer monsters. Destroy them or run past, and you can find a service entrance leading under the warehouse. There will be several mutants that will have to be eliminated, but some of them will be on the other side of the barbed wire.
Deal with the monsters, using all available means, and then start exploring the area. If you’re lucky, you may be able to find some good supplies. For example, during my passage in the first cell there was a new gun, thanks to which it was much easier to deal with the remaining monsters. Once you’re done collecting ammo, start the generator. If you haven’t finished everyone in the basement yet, then they will attack you. Having dealt with the threat, find the fire extinguishing system in the basement. This is a small box hanging on the wall, after activation of which the fire in the warehouse will stop.
When you leave the basement, you will have to deal with the monsters standing near the entrance to the warehouse. Be careful! There is a high probability of the appearance of special zombies, which significantly change the chances of survival. They need to be destroyed before they notice you. In any case, almost all special mutants must first be dodged and then attacked. Zombies are especially dangerous, capable of disguising themselves and hiding in the most unexpected places. If you die in this place, you will have to go all the way from the very beginning.
The best plan is to kill the zombies before getting rid of the fire. This will save you time turning off the fire extinguishing system. That is, if you die, then immediately, and not after spending a lot of time extinguishing the fire (in case of death, it will have to be extinguished again). As soon as you go inside, contact the base. You will be told that the warehouse must be blown up. Search this area until you find four explosives. Place them around the organic matter in the center.
Radio tower
Earlier we have already heard about the radio tower, but we can only get to it at the end of the second chapter (map). This location has a huge number of mutants, including special zombies. It is difficult to survive, since many enemies are on the heights, and your characters cannot shoot upwards. Climb the hill and make sure to eliminate all enemies on the way, otherwise you will regret it in the future. When you get to the gate, you will need to activate the generator, which will attract the attention of the zombies. They will trample on you from both sides. Almost all of them are runners and jumpers. You may have to retreat down the hill. Defeat the mutants, go up the hill and find the key reader. After heading up the stairs to the north, you will find a corpse that contains the required key card, as well as many monsters standing near the door. Go back down the stairs and use the keycard on the reader. By opening the door, you will attract many zombies, so prepare in advance for the second round of the battle.
After placing the explosives, the best option is to scatter and jump off a small cliff to quickly return to your car. There will be plenty of time to recharge. If you’re lucky and you survive, there will be time to heal and recharge before heading back to the hill and destroying everything that moves there. Fortunately, the generator, activated earlier, attracts the attention of zombies, which, instead of chasing you, rush towards it. Before activating the last generator, be sure to research this location and collect everything you need. All available equipment will be useful to you, because further there will be a fierce battle.
In the boxes scattered around the location, you can find components for crafting Molotov cocktails. Use them when opponents are clustered and are near you. Refuel the car in advance. After completing all these steps, you will have a good chance of surviving the final battle. Activate the generator and tower, and then drive away before the zombies kill the hero. Be sure to activate the tower as soon as possible. Even if you die, you will not have to complete this task again to go to the third game map!
Gloomy greeting
Now that you have left the mountains, events will take a new turn. You will get close to a fortification that resembles the object from Mad Max 3: Under the Dome of Thunder. After contacting the base, you will hear a strange voice. It will be necessary to find a way out of this wall. Walk to the left of the car, you will probably encounter a group of monsters here, but you will also find an impromptu bridge leading across the river to a hole in the fence. Having made your way through this hole, you need to open the gate in order to drive through them by car. But not everything is so simple – there is no handle on the control panel. Moving north, pay attention to the bubbles in the water – these are drowned zombies. Ahead there will be a chain-linked fence and a locked gate. Behind them is the handle.
Before opening the gate, destroy a few nearby enemies, preferably with a silenced weapon. There is some fuel hidden in the nearby houses. You can take it and refuel your car in advance, otherwise you will have to do it under the pressure of enemies. Once you’re ready, start turning the handle. Get ready for the horde to appear. Fortunately, you can open the gate in stages, progress will not be reset and the handle will not return to its original position. The best strategy is to rotate the handle as long as possible, then run back to the hole in the fence. Zombies will not be able to knock you down, you will get a little respite while enemies are running around trying to get close to you. When you open the gate, get in the car and hit the road.
Other
This is actually a fairly simple task. With little or no warning, you will find yourself surrounded by zombies. If there are any sonic bombs or other devices to attract the attention of the zombies, then throw them to avoid death. There are seconds of delay and the situation becomes critical. In addition, you need to rely on your skills to effectively manage the horde. Keep moving, shoot at enemies and make sure that none of the exploding mutants approaches you, otherwise it can lead to inevitable death. Once you finally kill all the enemies, head to the guy at the gate and chat with him as you try to get into new territory.
Explore a new location, collect as many supplies and equipment as possible. For some reason, all these guys don’t react to the fact that you are taking their stuff. There are excellent resources here, some even better than those you find in regular locations. Examine the building and find the lord. Chat with him. After some controversy, he will allow the hero to his domain.
Bridge to the distance
Finally, we are close to the end of the third area, where the real test of your skills will begin. Before you get to the right place, you have to solve one of the most difficult tasks – to cross the bridge. First, look for fuel nearby and make sure your car is fully fueled. Then you need to go down to the bridge, having met several mutants on your way. It is impossible to hide from them. You need to find the engine room, which is unfortunately located on the other side of the bridge. Go down the nearest ladder into the water and watch for bubbles on its surface. They indicate the location of the drowned. Move along the bridge until you see another staircase leading up to the engine room. Destroy all enemies near the stairs and go inside the building.
Search this place and collect as many resources as possible.
Get ready for the test. Turn on the generator, but do not rush to leave here. You will have to activate three more switches. As soon as you find yourself on the street again, a small horde of monsters will approach you. Roll down the stairs and head to land. Shoot the fast runners and then stun the thug using melee weapons. Beware of mines. Continue along the bridge until you reach a new staircase. A rather impressive group of monsters will appear here, among which there will be those who spit acid. Fun, yeah. When you deal with everyone, move on top (over the bridge) and find yourself in the control room. even more fierce resistance awaits you after activating the bridge steering mechanism, so prepare in advance for battle. Use explosives.
Fortunately, the new horde will consist of mostly weak monsters (runners) and one or two thugs. Use the nearest fence to control the crowd. The best method in this place is controlled bursts of fully automatic weapons. You don’t technically need to kill all the zombies. If you hold out long enough for the bridge to sink, you can go further and escape from enemies. Of course, if you have enough stamina.
Road sign
As you move along the new map, you will find yourself on another location, where you will get randomly. This time, you found a signal near the road. Chat with the Rubezh radio operator, and then get ready for action. You will have to kill several dangerous skeletal zombies, but after that you will definitely get to the fallen tree. Get closer to it, but be careful as there is an automatic turret on the other side. You can blow it up with one grenade or with a firearm, but in the second case, spend a lot of ammunition. After destroying the turret, do not rush to jump to the other side, as there is a mine on the ground. Go around it to survive. Keep driving until you hear the sounds of gunshots. Kill zombies standing in your way and make your way past a dangerous trap that can inflict huge damage in the form of infection. Follow the path to the left, where there will be another similar trap. Keep moving, destroy zombies and watch out for another mine ahead.
As you move forward, the sounds of shooting will be heard more and more clearly. Move carefully until you find a turret trying unsuccessfully to destroy the skeletal zombies by the fence. You can destroy the turret by ducking and shooting at it with any firearm, but be careful, as doing so will attract the attention of zombies in the area. It is best to use a silenced weapon. And don’t get too close, as there is another infection trap at the corner that is incredibly difficult to spot. If you die, you have to start over.
One of the working strategies in this place is to destroy the zombies, duck and move through the location, paying attention to the mines along the way. Continue to go around the fence, and get ready for another series of mines and booby traps. Then you will reach the mine and another dangerous battle awaits you. Try to destroy as many enemies as possible before the flaming monsters approach. Remember there is an infection trap nearby. Even with the maximum resistance level, such things do huge damage.
As soon as you clear the location, take a close look. The broadcast is coming from here, so you need to start the generator. You have probably already guessed what will happen in this case. Prepare yourself as best you can as you face the horde. At first, nothing portends trouble. Inside you will meet several zombies that you need to deal with. However, there are much fewer of them than usual. Kill them, go down the corridor and open the door with the brute on the left.
Beware of the scanner in the middle. Destroy the burglar one by one. Use your usual tactics of dodging, stunning and shooting. There is a bunch of strange canisters in the room behind the thug. Return to the main room and examine the book on the right table for another piece of information. Go to the opposite corridor and examine the tubes to get the last piece of data. Return to the main area and head to the home base. You will complete the task. You need to safely return to the car and use it. If you’re lucky, you can stealthily get to the car, but avoid traps and mines along the way.
Suspicious signal
After passing one or two locations after the previous location, you will receive a radio call. You are asked to repeat your search because another source of the mysterious signal has been discovered. Activate concentration mode and you will see one or two arrows on the map. Head towards these arrows, destroying zombies and turrets along the way. There is nothing more painful than walking through a minefield at night. Infection traps can also be set there. Turn on the lights to avoid stepping on one of these devices. If you hear shots, slow down – there is a turret in front.
At the end of the day, you will face the most obvious pitfall in the world. Since you have no other choice, activate this trap and cross your fingers. Hope you have enough gear to deal with the threat. Activate the beacon in the center, and then fight the monsters that will jump out of the four opened containers. If there is an automatic weapon, then there will be no problems. Try not to get close to the fire.
Also beware of the brute. Best used in a fight against a big guy, Molotov cocktails, which instantly explode. Conventional bombs go off after a while, so you have to pick up the moment. As soon as everything is over, you will have to fight the enemies clustered around the gate. Interact with the keyboard and deal with enemies, including skeletal zombies. Be careful on your way back to the car as the forest you are moving through is filled with enemies and turrets. When you return to the car, interact with it to travel to the Last Frontier.
The Last Frontier
Here it is, the last stop of this seemingly endless journey. First, deal with the zombies that surrounded you as soon as possible. Go right and follow the path to the helipad, where there are monsters. Kill everyone and keep going up. Respond to any noise. There are two turrets at the top of the stairs. Bend down and shoot at them with any firearm. After destroying the turrets, run inside, but watch out for the mines. Once inside, don’t go through the obvious scanner. Break the glass and go through it to bypass the scanner and not trigger an alarm. Approach the elevator, go downstairs, bend down and slowly move on. There are many traps, not to mention the zombie horde. There is a large door in front, which can be opened with a special key card. To get this key card, head south and use the control panel to enter the loot room. Take away everything you need, including antivirus and batteries. Then search the table to obtain the desired key card. You can explore the room on the opposite side to find some first aid kits.
Once you are ready, go through the great door into the very abyss of this world. You can break the glass, but, most likely, one of the nearest enemies will hear it and raise an alarm. Deal with the mutants, and do not forget that you can walk back out the door if you need a break. Zombies can’t use the keyboard! Clear the room and head north. There will be a mine that you need to activate (and dodge). Basically, you need to move from room to room, killing enemies. Luckily, you can still use the doors to avoid battling dozens of mutants at once. At the very end of the path there will be a fork where the repair zone is located. Repair the door at one end, then follow the southern path and do the same. Return to the center area. The door should work. Walk through it to face the crowd of monsters, which activate the alarm. This signal attracts other enemies who fire it again, and so on.
Use the door to separate the brute from the main horde and kill him. Then open the door and finish off the remaining opponents. Now you can study this object in more detail. Continue forward until you find yourself in the last room. Here you will find that the main villain of the whole game is the same doctor from the Border. I would never have guessed. Shoot him until he stops moving. He has a standard set of dodges. Search the corpse, examine its table and get important pieces of serum. Go to your car at the back of the room to travel further. Contact Rubezh and tell us about what happened. After a short conversation, head to the car and interact with it to complete the game.
The Last Stand: Aftermath Guide for Beginners
In my The Last Stand: Aftermath Guide for Beginners, I’ll tell you what you need to know to survive the zombie apocalypse in this new roguelike title from Con Artist Games and Armor Games Studios.
What is The Last Stand: Aftermath?
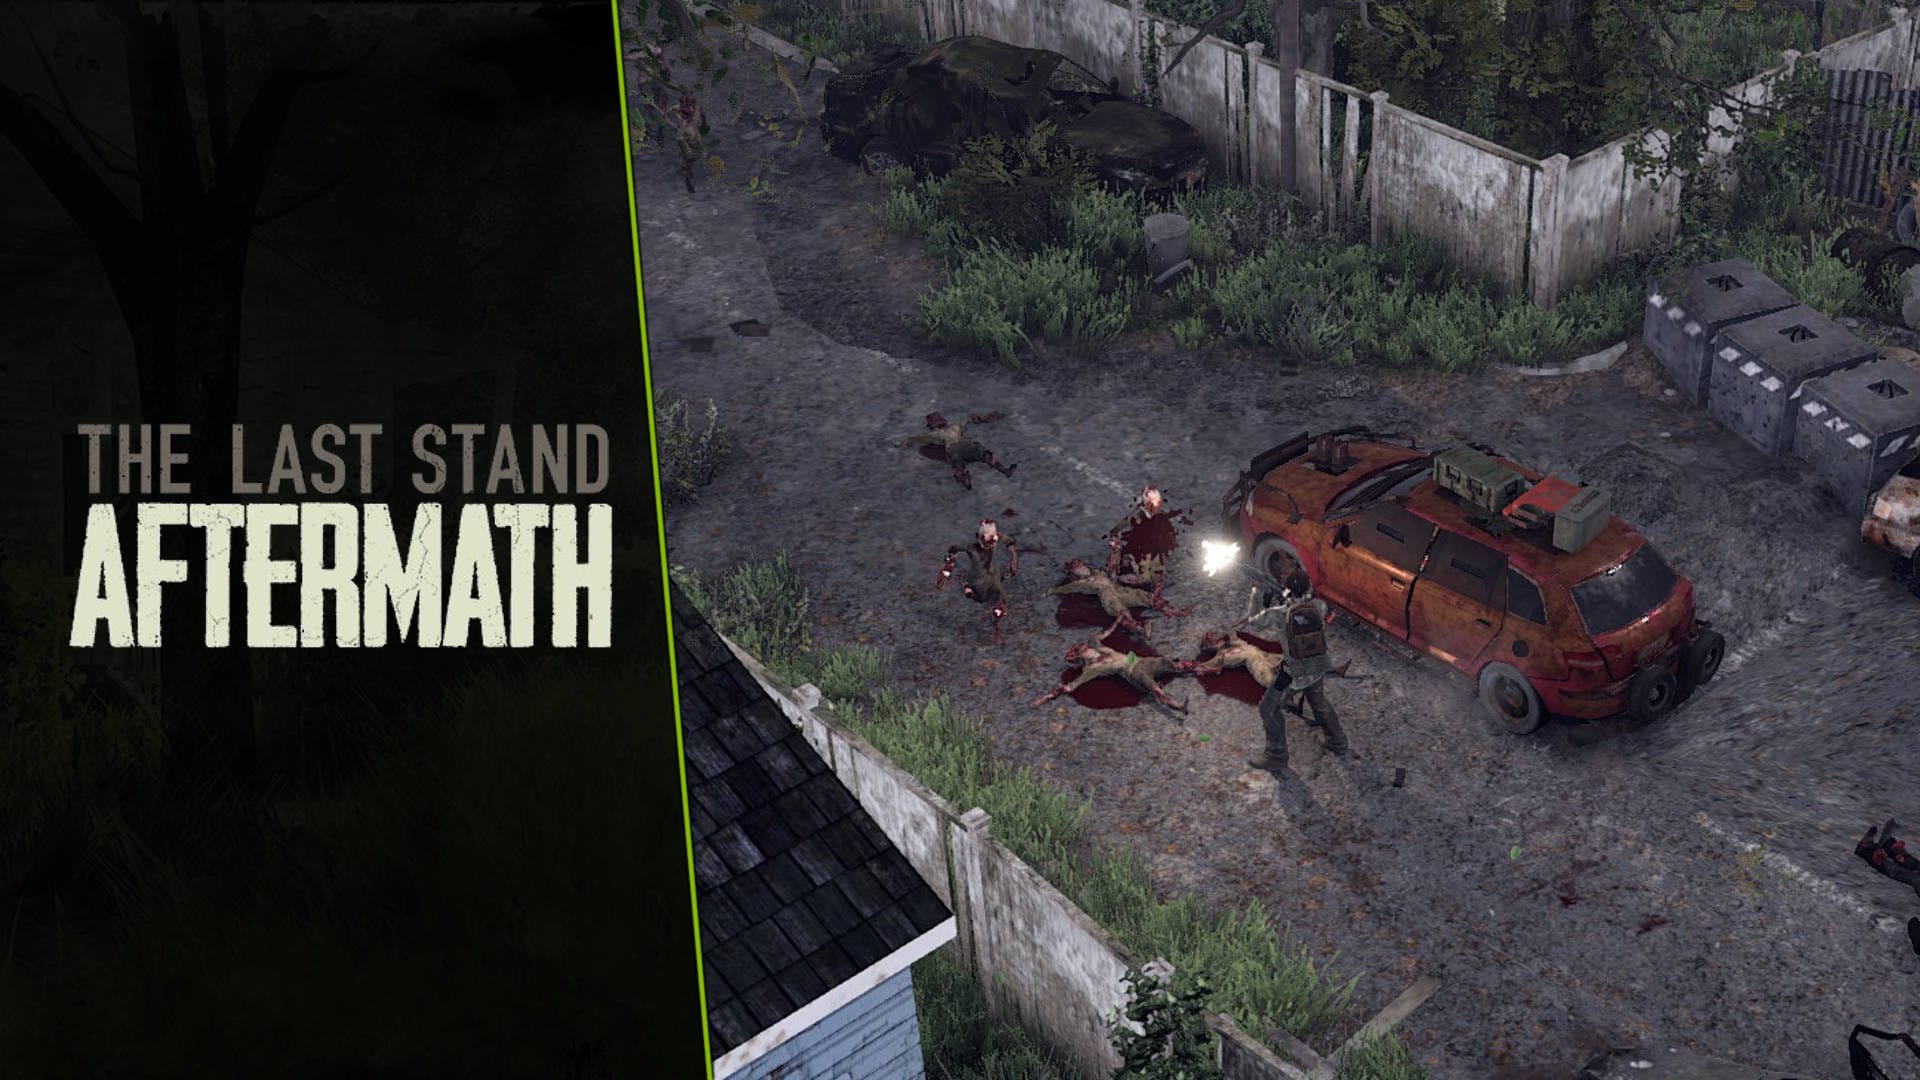
The Last Stand: Aftermath is the sequel to the late 2000s Flash series The Last Stand which saw players barricading a building and defending themselves against zombie hordes. It’s 15 years later, society has borderline collapsed, and there’s no cure in sight.
The last best chance for humanity lies in the Volunteers: infected people with only a few days left to live. You’ll head out into the overrun cities and towns, searching for valuable Supplies, Knowledge, and loot — all the while trying to stay alive.
The Last Stand: Aftermath Guide for Beginners – Understanding Game Mechanics
We’re not going to cover the basics of gameplay (shooting, melee, etc.) in The Last Stand: Aftermath Guide for Beginners as that is covered in the first few moments of the tutorial. There are, however, several game mechanics that are not quite so clear at the beginning — here’s a list of what they are and how they work including Health, Stamina, Supply, Fuel, and Knowledge.
Volunteers
Volunteers are the infected heroes who are willing to travel out into territory filled with zombies in an effect to secure Supplies, Knowledge, and more. A Volunteer’s life is short, but you can help give the people after you a better chance if you play your cards right.
The health bar with antivirals active (left) and inactive (right).
Life, Stamina, Your Infection, and Mutations
As you might expect, you have a life meter to worry about (along with some other things); here’s the basic rundown:
Life Bar – When this reaches zero, you die. Your maximum health is determined by how much your infection has progressed. Stamina Bar – When this reaches zero, you can’t run or perform many actions that require Stamina. Your maximum Stamina also goes down as you perform actions, but you can restore it with items. Antiviral Meter – This shows you how long the Antivirals you have taken will halt the Infection. Once this runs out, the Infection will start progressing again. Infection Progression & Mutations – Without an active Antiviral, the Infection will gradually progress and reduce your maximum Health. Fortunately, each block of Health taken over will grant you a new Mutation (which is typically to your benefit). Read more about how Mutations work in our The Last Stand: Aftermath Mutations Guide.
Experience
As with most RPGs, you’ll gain Experience. This is used to unlock new items that you can buy with Supply.
Focus Mode
Focus Mode (Right Trigger / Left Alt) will direct you to any major points of interest in a level such as your vehicle and Crafting stations.
Stealth
Stealth in The Last Stand: Aftermath works pretty much like how you’d expect: you can crouch down to avoid being seen by enemies. You’ll need to be quiet, too, or the noise you make might attract enemies towards you.
An important note: it is actually possible to break windows or knock physics objects around. I’m not quite sure if this can attract enemy attention, but I wouldn’t be surprised if it did.
Fuel
Fuel is needed to keep your Car going to each new map. At the minimum, you’re going to have to find a Fuel Can in order to progress to the next section of the map. Should you fall short of Fuel, you’ll arrive on a special level (such as the side of the road) with minimal loot and a lot of enemies; do try to avoid leaving while short on Fuel.
An important note to keep in mind: you cannot carry a Fuel Can and a Supply Bag at the same time. You’ll have to make a trip for each of these items you wish to bring back to your Car.
Fuel only lasts for each individual run. You’ll lose any excess Fuel if you die. Fortunately, it’s abundant and you won’t have to worry too much about finding it in future runs.
Supply
Supply is acquired when your run comes to an end. You can also earn Supply by using a Battery on Supply Caches or bringing a Supply Bag back to your car. Keep in mind that you cannot carry a Supply Bag and a Fuel Can at the same time.
Supply persists between runs — you won’t lose it if you die — and it can be used to purchase various items and upgrades at the Armory. (More on that later!)
Knowledge
Knowledge serves two functions: it allows you to buy Upgrades for your current and future Volunteers and it can also be used to purchase goods from the Merchant.
Upgrades are permanent enhancements that can buff Volunteers in various ways; I strongly recommend maxing out Survival Upgrades > Knowledge Retention for the sake of Efficiency. Once you have Knowledge, you can use it at The End (the base where your start) or at Radios in the field (provided you have a Battery to power it) to immediately purchase upgrades.
As for the Merchant, you will randomly find him on certain levels during a run. (The Merchant will be clearly marked on the map.) You can instead spend Knowledge to buy items for your Volunteer right then and there, and his goods often include powerful weapons and ammo.
Knowledge persists between Volunteers — if you die, you won’t lose it.
Your Inevitable Death
Let’s get down to brass tacks: your Volunteer is going to die. Unless you have absolutely phenomenal luck, you are not going to survive your first few runs. (You are definitely not going to survive the tutorial, that’s for sure!)
Death is a part of The Last Stand: Aftermath. All you can hope to do is earn as much Knowledge and Supply as you can to continue the overall mission.
Cellars often contain good loot — and zombies.
The Last Stand: Aftermath Beginner’s Guide – Starting Your Adventure
Your adventure begins proper with a short tutorial mission. You’re introduced to some basic mechanics. Eventually, you’ll have to turn on a generator. This attracts a horde of zombies and you will inevitably die.
The tutorial highlights several key points that you should understand as part of The Last Stand: Aftermath Guide of Beginners. Your character will absolutely die at some point. Just do your best to make as much progress as possible with each run.
You’ll soon find yourself back in “The End” — the hub town from which your Volunteers start your runs. You’ll get a guaranteed “Generalist” Loadout for this first run, but it will be a random selection for all subsequent runs. Speak with the people in town as directed and then hit the road.
Surviving Uptown and Beyond
Your next step in The Last Stand: Aftermath Guide for Beginners is Uptown. This location is the next part of the tutorial that will teach you several key points.
The first thing you’ll learn is that your car needs Fuel. This is a key component for moving to new areas on the map; you won’t be able to leave an area without at least 1 unit of Fuel.
You’ll also learn about cellars. These are self-contained underground areas that often have loot (and zombies) in them. You’ll find an uncharacteristically generous Fuel can in here; grab it and fill up your car. (Remember, you can only carry either a Fuel Can or a Supply Bag — not both!)
Once that stuff is done, take some time to loot. You’ll also discover a H.E.R.C. Station, and this is where you’ll learn about Batteries. Batteries are used to activate electronic devices, including the all-important Antiviral Dispenser. This device, once powered, will give you a single dose of Antiviral. You can find them in buildings or placed out in the open; always keep an eye out for them as getting more Antivirals is critical to your long-term survival.
Eventually, you’ll run out of stuff to loot in Uptown and move on. The map is randomized on every run, so there’s really no telling what you’ll have in front of you. Pick a location, do your best to survive, and try to amass as much Supply and Knowledge as you can. Once you die, you’ll return to The End and get to start a new run.
Returning to ‘The End’
The End serves as the hub town. Aside from letting you pick from three Loadouts, it also allows you to finally spend all of that Supply and Knowledge you’ve saved up.
As stated earlier in The Last Stand: Aftermath Guide for Beginners, your first few Knowledge Points should be spent on the “Knowledge Retention” upgrade as early as possible. This will increase your overall Knowledge income and reduce the overall amount of Knowledge items you need to find to unlock all of the Upgrades. Supply, however, is a somewhat more involved process.
Supply Caches can net you several hundred Supply… or some really useful items right now.
Supply and the Armory
Supply is one of the critical resources in the game (and arguably the most important). As far as I can tell, you gain a bit of Supply in each run regardless of how well you perform. You’ll gain much more, however, through Supply Bags and Supply Caches.
As previously explained, Supply Bags can be found in the field much like Fuel Cans. You’ll have to carry it on your back and put it in your car to actually earn the Supply, and you can only carry either a Supply Bag or a Fuel Can at any one time.
Supply Caches, however, are much more interesting. There are two types of Supply Caches. The first are little boxes that simply need to be powered by a Battery. The second is much larger boxes that need to be powered by a Generator. These will naturally attract quite a few zombies, but they can have a ton of great loot inside. You’ll have the choice of getting some items you can use right now or sending the lot back to The End.
However you get Supply, you’ll be able to spend it by talking to Trinity in town. More options will be available to you as you level up. It’s best to focus on the Armory Items first and foremost as these will provide you a consistent, long-term benefit.
List of Armory Upgrades You Can Buy with Supply
Item Type Icon Description Armory Items Permanently adds an item to the Armory roster. These items will be replenished at the start of every new run. Caches Adds a fixed number of items in the Armory. You can take them as desired before leaving on a run. Any items taken from a cache cannot be redeposited into the Armory. Drops Enables drops of the item type in the game world. Instant Items Instantly adds the listed item into your Volunteer’s inventory. These items cannot be redeposited into the Armory. Gear Insurance Automatically transfers three random items from your current Volunteer to your next Volunteer. Knowledge Converts Supply into Knowledge. Loadout Adds a new Loadout to the pool of potential Volunteers. Recipe Unlocks a new Crafting Recipe.
Continuing Your Adventure
And so we reach the end of The Last Stand: Aftermath Guide for Beginners. By now, you should have a pretty good understanding of the game and its mechanics.
Going forward, you should focus your early runs on gaining as much Supply and Knowledge as possible, upgrading your Volunteers with a focus on getting equipment and surviving as long as possible. Upgraded Volunteers will be able to survive longer, kill more zombies, and explore the farther reaches of the map.
Beyond that, though, is up to you. Each new zone has tougher and tougher enemies to overcome. Equip yourself well, play carefully, and you’ll overcome the greatest challenges the game can throw at you in no time flat.
Guide The Last Stand Aftermath – Biendebuter.net
Un virus a transformé la quasi-totalité de l’humanité en créatures guère sympathiques. Dans ce rogue-lite de Con Artist Games, vous incarnerez tour à tour un des volontaires qui ont trouvé refuge à la Colonie, un des rares endroits où ceux qui vous entourent ne cherchent pas à vous bouffer. Vos volontaires iront explorer tout un tas de lieux à la recherche d’informations sur l’origine de l’infection et comment la combattre. Tout cela, en évitant de servir de plateau repas pour ceux qui ont eu moins de chance que vous.
Bilan médical : c’est compliqué
J’ai parlé de chance ? Ahahahah… Enfin, oui et non. Si vous êtes volontaire, c’est parce que vous avez été infecté mais que le virus ne vous transforme pas comme les autres. Chez vous, l’infection progresse lentement dans votre corps mais elle finira quand même par vous avoir. Une fois les portes de la Colonie franchies, il n’y plus de retour en arrière possible et à votre mort, tout ce que vous avez sur vous est perdu. Une nouvelle exploration démarre alors depuis la Colonie et vous prenez le contrôle d’un nouveau volontaire.
À chaque nouvelle exploration, vous devez choisir un volontaire parmi 3. Lequel prendre ? Chaque volontaire correspond à un profil avec un équipement de base différent. Pour vos premières sorties, l’armurerie de la Colonie sera bien vide. Il vaut mieux donc choisir un volontaire qui possède déjà une arme de poing et s’il a un objet de soin aussi, c’est encore mieux. Le reste, vous le trouverez sur le terrain.
Flingue, bandage, batte : un bon début !
La Colonie
Les seuls éléments qui vous survivent et qui profiteront à la Colonie sont les niveaux d’expérience, les points de provisions et les points d’informations.
Les niveaux d’expérience ajoutent automatiquement de nouveaux choix pour débloquer de nouvelles provisions auprès de Trinity. Elles se scindent en plusieurs catégories, voici quelques conseils pour certaines d’entre elles :
les nouveaux profils de volontaires : jetez toujours un oeil car certains partent avec un bon équipement de base, ce qui vous permet de mieux débuter une nouvelle exploration.
jetez toujours un oeil car certains partent avec un bon équipement de base, ce qui vous permet de mieux débuter une nouvelle exploration. les objets réapprovisionnés : ils sont systématiquement disponibles à l’armurerie, même si vous les avez pris pour l’exploration précédente. C’est pratique lorsque vous n’avez le choix qu’entre 3 volontaires aux profils pas terribles, ça permet de rattraper un peu leur équipement de base.
ils sont systématiquement disponibles à l’armurerie, même si vous les avez pris pour l’exploration précédente. C’est pratique lorsque vous n’avez le choix qu’entre 3 volontaires aux profils pas terribles, ça permet de rattraper un peu leur équipement de base. les nouveaux drops : le texte explicatif de ces objets rouges est, selon moi, un peu piégeux. Il donne l’impression que seul un exemplaire de cet objet va apparaitre quelque part et qu’il faut arriver à lui mettre la main dessus. En fait, c’est beaucoup mieux que ça. Vous allez débloquer la possibilité de trouver désormais cet objet lors de toutes vos fouilles, ce qui est tout de suite beaucoup plus intéressant.
le texte explicatif de ces objets rouges est, selon moi, un peu piégeux. Il donne l’impression que seul un exemplaire de cet objet va apparaitre quelque part et qu’il faut arriver à lui mettre la main dessus. En fait, c’est beaucoup mieux que ça. Vous allez débloquer la possibilité de trouver désormais cet objet lors de toutes vos fouilles, ce qui est tout de suite beaucoup plus intéressant. assurance : c’est nul. Au moins le texte est très clair cette fois. Récupérer 3 objets au hasard à la mort de votre volontaire pour le prochain ? Youpi, quand vous mourrez avec un sac à dos plein à craquer, n’espérez pas sauver votre arme toute pimpée, vous récupérerez probablement 2 bandages et une bouteille d’eau…
c’est nul. Au moins le texte est très clair cette fois. Récupérer 3 objets au hasard à la mort de votre volontaire pour le prochain ? Youpi, quand vous mourrez avec un sac à dos plein à craquer, n’espérez pas sauver votre arme toute pimpée, vous récupérerez probablement 2 bandages et une bouteille d’eau… informations : je déconseille là aussi d’investir des points de provisions pour gagner des points d’informations. Le coût n’en vaut pas la peine et si vous suivez le conseil qui vient juste après, vous en récupérerez rapidement une bonne quantité sur le terrain.
N’oubliez pas de faire vos emplettes chez Trinity avant de partir
Les points d’informations permettent d’améliorer les capacités de vos volontaires (celui que vous contrôlez dans l’immédiat et les prochains). Concentrez-vous au début sur les améliorations de survie qui permettent de récolter davantage de points d’informations, de munitions et d’objets de soin, ça vous facilitera énormément la suite. A contrario, ne dépensez pas tout de suite des points dans les améliorations d’ingénierie, elles vous débloquent des choses dont vous ne vous servirez pas lors des premières explorations.
Les 3 compétences les plus utiles en début de partie
L’infection
Maintenant que vous avez quitté la Colonie, il s’agit de ne pas perdre votre temps.
La progression du virus diminue votre santé maximum. Chaque fois que l’infection gagne un cran, vous pouvez choisir parmi 3 mutations au hasard. J’ai une préférence pour celles boostant l’XP ou les dégâts infligés, mais la plupart apporte des bonus sympathiques quelque soit votre style de jeu. Il n’y a qu’une seule mutation que je ne trouve franchement pas terrible : celle qui vous soigne jusqu’à votre santé max. Ca ne fait pas repartir l’infection de zéro et si vous avez envie de vous soigner, vous avez en général ce qu’il faut dans votre inventaire.
Il n’existe qu’un seul moyen de stopper l’avancée du virus et son effet est temporaire : l’antiviral. La Colonie vous fournit gracieusement une dose au moment de votre départ. Gardez-la précieusement pour les cas d’urgence, quand il faut stopper une infection qui progresse à toute vitesse. Mais si au cours de votre exploration, vous mettez la main sur une autre dose, ne passez pas à côté de cette aubaine : piquez-vous avec celle que vous avez déjà et ramassez l’autre, ça sera toujours du temps de gagné.
Félicitations, votre espérance de vie vient de diminuer !
À fond la forme
Votre endurance n’est pas infinie et si elle tombe à zéro (ça arrive plus souvent qu’on le croit), vous allez avoir un petit problème. Vous pourrez toujours vous déplacer et frapper les infectés, mais vous ne pourrez plus faire de roulade pour éviter leurs attaques. Si vous êtes encerclé à ce moment là, vous risquez de prendre cher.
Le jeu vous donne aussi un indicateur de charge max (40 par défaut) dans l’écran d’inventaire. Le dépasser de 1 ou de 50 a le même effet : il sera indiqué que vous êtes en surcharge. Ne vous inquiétez pas trop, la surcharge ne vous ralentit pas, ni ne vous cloue sur place. Vous perdrez juste plus rapidement de l’endurance.
Le genre de situation qui peut dégénérer si on a un coup de pompe
L’inventaire
Pour survivre au milieu des infectés, voici quelques conseils sur les objets les plus importants qui composent votre inventaire :
les armes de corps à corps : à privilégier quand vos munitions sont limitées ou que vos armes à feu font trop de bruit. Elles s’usent et finissent toutes par casser, alors ramassez toutes celles que vous pouvez trouver, quel que soit leur état. En dernier recours, il vaut mieux utiliser vos poings et vos pieds que de gâcher vos balles.
à privilégier quand vos munitions sont limitées ou que vos armes à feu font trop de bruit. Elles s’usent et finissent toutes par casser, alors ramassez toutes celles que vous pouvez trouver, quel que soit leur état. En dernier recours, il vaut mieux utiliser vos poings et vos pieds que de gâcher vos balles. les armes à distance : elles ne s’usent pas, mais peuvent faire beaucoup de bruit et les munitions ne poussent pas sur les arbres. Si vous pouvez installer un silencieux (même sommaire) sur une arme à feu, faites-le. A l’inverse des couteaux, poêles à frire et autres planches de bois, collectionner les armes de même calibre ne sert à rien, sauf à encombrer votre inventaire. Attention : quand vous sortez une arme de votre sac pour l’équiper, celle-ci est systématiquement vide. Pensez donc toujours à les recharger après avoir refermé votre inventaire.
elles ne s’usent pas, mais peuvent faire beaucoup de bruit et les munitions ne poussent pas sur les arbres. Si vous pouvez installer un silencieux (même sommaire) sur une arme à feu, faites-le. A l’inverse des couteaux, poêles à frire et autres planches de bois, collectionner les armes de même calibre ne sert à rien, sauf à encombrer votre inventaire. Attention : quand vous sortez une arme de votre sac pour l’équiper, celle-ci est systématiquement vide. Pensez donc toujours à les recharger après avoir refermé votre inventaire. les batteries : essayez toujours d’en avoir au moins une sur vous. C’est un objet extrêmement important pour la transmission des points d’information, le marquage des caisses convertibles en points d’équipment et l’ouverture des caissons d’antiviral.
Les armes peuvent être trouvées en deux états : normal ou endommagé. Les armes endommagées font moins de dégâts, mais sont réparables assez facilement. Attention : réparer une arme signifie remonter ses stats au niveau de sa version normale, mais sans toucher à son compteur de durabilité.
Le craft
Au tout début, vous ne connaissez aucune recette, donc craftez dès que possible pour en apprendre un maximum. Une fois que vous avez vos recettes de base, crafter uniquement ce dont vous avez besoin. Certains composants ne pèsent rien, mais l’objet crafté, lui, oui. N’alourdissez pas inutilement votre sac à dos, vous trouverez régulièrement des établis et des feux.
Bon à savoir : les feux ont tendance à attirer les infectés et le jeu ne se met pas en pause quand vous craftez.
Les infectés
Apprenez le plus vite possible à reconnaitre les infectés qui sont, au début, les plus problématiques : ceux qui courrent vers vous pour vous frapper, et ceux qui courrent vers vous pour s’exploser le bide à votre contact. Les premiers auront vite fait de vous encercler et la roulade ne vous accordera qu’un court sursis. Les seconds vont provoquer une montée en flèche de votre infection si vous êtes dans l’aire d’effet. Si ça vous arrive, piquez-vous tout de suite avec votre antiviral pour stopper la progression du virus.
Débarrassez-vous d’eux avant qu’ils fassent une brèche dans une barricade
Non, non, aaaaah !
Vous ferez des erreurs, tôt ou tard, et certaines se paient cash. Petit condensé de certaines situations vécues :
Tomber à court d’essence : ne partez pas en voiture si vous n’avez pas assez d’essence pour rejoindre la prochaine destination. Vérifiez bien que vous n’êtes pas passé à côté d’un bidon d’essence. En cas de panne sèche, le jeu vous fait passer d’abord par un niveau intermédiaire pour en trouver. A part être peuplé d’infectés, ce niveau vous fera surtout perdre du temps, des armes et des munitions.
ne partez pas en voiture si vous n’avez pas assez d’essence pour rejoindre la prochaine destination. Vérifiez bien que vous n’êtes pas passé à côté d’un bidon d’essence. En cas de panne sèche, le jeu vous fait passer d’abord par un niveau intermédiaire pour en trouver. A part être peuplé d’infectés, ce niveau vous fera surtout perdre du temps, des armes et des munitions. Sortir de sa voiture sans vérifier ses armes à feu : il y a parfois un comité d’accueil dans les environs immédiats. Évitez le gros coup de stress d’entendre vos armes faire *clic* *clic* au moment où il vous tombe dessus.
: il y a parfois un comité d’accueil dans les environs immédiats. Évitez le gros coup de stress d’entendre vos armes faire *clic* *clic* au moment où il vous tombe dessus. Déclencher imprudemment une horde : faites d’abord le ménage dans un rayon assez large. Sinon vous allez vous prendre la horde et les infectés déjà présents sur les lieux. Certains infectés étant déjà très pénibles à gérer individuellement, il vaut mieux éviter de les voir arriver alors que vous êtes déjà en train de tirer dans le tas.
faites d’abord le ménage dans un rayon assez large. Sinon vous allez vous prendre la horde et les infectés déjà présents sur les lieux. Certains infectés étant déjà très pénibles à gérer individuellement, il vaut mieux éviter de les voir arriver alors que vous êtes déjà en train de tirer dans le tas. Être trop gourmand / massacrer tout ce qui bouge : le but est d’explorer les lieux, pas de vider son inventaire ou prendre des risques insensés. Avant d’aller briser des crânes dans un endroit qui grouille de monde, réfléchissez à la méthode ou si le jeu en vaut vraiment la chandelle. Si vous avez assez d’essence et que vous estimez que votre inventaire est déjà très fourni, pourquoi prendre des risques inutiles ?
le but est d’explorer les lieux, pas de vider son inventaire ou prendre des risques insensés. Avant d’aller briser des crânes dans un endroit qui grouille de monde, réfléchissez à la méthode ou si le jeu en vaut vraiment la chandelle. Si vous avez assez d’essence et que vous estimez que votre inventaire est déjà très fourni, pourquoi prendre des risques inutiles ? Se croire en sécurité : vous ne l’êtes nulle part, même dans un abri (leçon n°9 du Guide de survie en territoire zombie : no place is safe, only safer). C’est un gars qui a vu son volontaire partir en torche humaine en voulant se soigner qui vous le dit.
Aurais-je oublié de mentionner que de tirer près d’une citerne est aussi une mauvaise idée ?
Un pas de plus vers la Fin
Ici s’achève ce guide. J’ai volontairement occulté certains mécanismes que le tuto couvre de façon claire. Et puis un rogue-lite, c’est aussi le plaisir de la découverte et des morts inattendues. Il ne vous reste plus qu’à ramasser votre baluchon et à vous équiper, les clés de la voiture sont sur le contact. Bonne chance !
So you have finished reading the the last stand aftermath soluce topic article, if you find this article useful, please share it. Thank you very much. See more: The Last Stand: Aftermath wiki, the last stand: aftermath guide, The Last Stand: Aftermath mod, The Last Stand: Aftermath ending, The Last Stand: Aftermath co-op, the last stand: aftermath tools, The Last Stand: Aftermath LinkNeverDie, The Last Stand: Aftermath Download